


Introduction
Fiberglass repairs offer a cost-effective way to restore motorcycle fairings, preserving both their structural integrity and visual appeal. For business owners in the motorcycle repair or customization industry, mastering how to fiberglass motorcycle fairings can elevate service quality and customer satisfaction. This guide walks you through every critical phase—from assessing and preparing damaged surfaces, applying resin and fiberglass materials, to curing, finishing, and ensuring proper fitment during reinstallation. Additionally, essential safety considerations are outlined to protect your team throughout the repair process. By following these detailed chapters, you’ll gain practical expertise to incorporate high-quality fiberglass repairs into your workshop’s offerings.
Tables of Contents
Chapter 1: Essential Surface Cleaning and Preparation for Fiberglassing Motorcycle Fairings
- Mastering Cleaning Techniques to Ensure Flawless Fiberglass Repairs on Motorcycle Fairings
- Effective Sanding Techniques to Optimize Motorcycle Fairing Repairs
- Essential Cleaning and Contaminant Removal to Ensure Strong Fiberglass Adhesion on Motorcycle Fairings
- Thorough Damage Assessment and Surface Repair for Optimal Fiberglass Application
- Protective Practices for Safe and Effective Surface Preparation in Fiberglassing Motorcycle Fairings
Chapter 2: Mastering Resin Application and Fiberglass Integration for Motorcycle Fairings
- Essential Surface Preparation for Optimal Resin and Fiberglass Bonding on Motorcycle Fairings
- Essential Techniques for Seamless Fiberglass Cloth Application with Resin
- Ensuring Optimal Resin Saturation and Curing for Durable Motorcycle Fairing Repairs
- Seamless Sanding and Finishing Techniques to Perfect Resin and Fiberglass Application on Motorcycle Fairings
- Essential Safety Practices and Material Choices for Resin and Fiberglass Application
Chapter 3: Curing and Finishing Techniques for How to Fiberglass Motorcycle Fairings
- Mastering the Curing Process: Achieving Lasting Strength and Precision in Fiberglass Fairing Repairs
- Perfecting Surface Preparation and Sanding: The Foundation for Flawless Fiberglass Fairing Finishes
- Seamless Filling and Priming: Perfecting Fiberglass Fairing Surfaces for Lasting Finish
- Mastering the Art of Painting and Clear Coating for Durable, Glossy Motorcycle Fairings
- Essential Safety Practices and Maintenance Tips for Durable Fiberglass Motorcycle Fairings
Chapter 4: Ensuring Safety First: Protective Measures for Fiberglassing Motorcycle Fairings
- Essential Protective Gear and Safety Practices for Fiberglassing Motorcycle Fairings
- Mastering Chemical Safety: Essential Handling and Storage Practices for Fiberglass Repairs
- Mastering Ventilation and Respiratory Protection When Fiberglassing Fairings
- Essential Protective Gear and Techniques for Safe Fiberglass Application
- Managing Fiberglass Waste and Minimizing Environmental Impact Safely
Chapter 5: Ensuring Fitment and Reinstallation After How to Fiberglass Motorcycle Fairings
- Mastering Test Fitting Techniques to Guarantee Precise Fit and Easy Reinstallation of Fiberglass Motorcycle Fairings
- Mastering Trimming and Sanding Techniques for Perfect Motorcycle Fairing Fitment
- Mastering Mounting Hardware Selection and Adjustment for Precise Fairing Fitment
- Mastering Surface Preparation and Clamping for Perfect Fitment in Fiberglass Fairing Repairs
- Mastering Final Checks and Adjustments for Seamless Fitment and Reinstallation
Chapter 1: Essential Surface Cleaning and Preparation for Fiberglassing Motorcycle Fairings

1. Mastering Cleaning Techniques to Ensure Flawless Fiberglass Repairs on Motorcycle Fairings
Thorough cleaning is fundamental when preparing motorcycle fairings for fiberglass repair. Removing all dust, grease, and oils ensures the resin bonds effectively to the surface. Use isopropyl alcohol or a mild motorcycle shampoo—avoid harsh household cleaners that can damage finishes. After sanding, carefully vacuum or blow away all fiberglass dust to prevent contamination during layup. Light sanding to dull the surface with medium-grit sandpaper roughens it enough to promote resin adhesion without compromising structural integrity. Follow sanding by wiping the area again with isopropyl alcohol to eliminate fine dust particles, creating an ideal substrate for fiberglass application. Safety measures are vital: always wear a respirator mask and gloves to avoid skin and lung irritation from fiberglass fibers and resin fumes. Proper cleaning and surface preparation directly impact the strength and longevity of your fairing repairs, ensuring the reshaped section matches the original finish. For more detailed guidance on optimizing your surface preparation, explore expert tips on motorcycle fairings preparation.
2. Effective Sanding Techniques to Optimize Motorcycle Fairing Repairs
Sanding is an essential step in preparing motorcycle fairings for fiberglass repairs, serving to remove damaged material and promote strong resin adhesion. Begin with coarse grit sandpaper (80–100 grit) to eliminate cracked or weakened areas and dull the glossy finish, ensuring new fiberglass layers bond reliably. Using a sanding block helps maintain even pressure and prevents accidental gouges. Carefully feather the edges to create smooth transitions between old and repaired sections, preserving the fairing’s contours. Avoid over-sanding thin areas that could weaken the structure. After sanding, thoroughly remove dust particles using vacuuming or wiping, while wearing appropriate safety gear like an N95 mask, gloves, and eye protection to mitigate inhaling hazardous fiberglass dust. This meticulous sanding process facilitates the resin’s mechanical grip, enabling durable repairs that blend seamlessly with the existing surface. For practical demonstrations on sanding during motorcycle fiberglass repairs, check detailed tutorials such as the “How Do You Repair Fiberglass On A Motorcycle?” video.
3. Essential Cleaning and Contaminant Removal to Ensure Strong Fiberglass Adhesion on Motorcycle Fairings
Proper surface preparation is crucial to guarantee a lasting fiberglass repair on motorcycle fairings. After sanding the affected area to create a slightly rough texture, thoroughly removing dust, oils, and other contaminants is vital. Use a clean cloth soaked in isopropyl alcohol or a specialized degreaser to wipe the surface, eliminating residues that could block resin adhesion. Following this, removing any fine dust particles left from sanding with compressed air or a tack cloth ensures no microscopic barrier remains. It’s important to avoid water at this stage, as moisture can interfere with the curing of the fiberglass resin. Wearing protective gear, such as N95-rated masks and gloves, safeguards your health when handling dust and cleaning agents. This meticulous cleaning primes the fairing for successful fiberglass application, enabling strong mechanical bonding. For additional tips on surface preparation and selecting the right materials, visit a comprehensive guide on motorcycle fairings. Detailed preparation techniques are also detailed at https://turn1.co.
4. Thorough Damage Assessment and Surface Repair for Optimal Fiberglass Application
A meticulous inspection of the motorcycle fairing is essential to identify cracks, chips, or structural weaknesses that affect repair strategy. Light sanding removes gloss and contaminants while roughening the area, enhancing resin adhesion. Cleaning with isopropyl alcohol or similar solvents ensures oil and dust do not interfere with repair materials. Minor imperfections call for lightweight fairing compounds to fill and smooth the surface. Deeper damage requires applying layers of fiberglass cloth with epoxy resin to restore structural integrity, often necessitating multiple overlays for strength and shape. Clamping or securing parts through curing—usually about 24 hours—prevents shifting, which is crucial for durability. Avoid adhesives that lack structural bonding capabilities. Once cured, sanding achieves a seamless transition, and applying gelcoat or paint protects the repair, sealing it from moisture and wear. Proper preparation and repair guarantee long-lasting, high-quality results. For more on sanding and epoxy use, refer to expert advice at this source.
5. Protective Practices for Safe and Effective Surface Preparation in Fiberglassing Motorcycle Fairings
Prioritizing safety when assessing and preparing motorcycle fairings for fiberglass repair is crucial to prevent injury and ensure optimal results. Wearing protective gear—including gloves, goggles, and a respirator—guards against resin fumes, fiberglass particles, and dust generated during sanding. Working in a well-ventilated environment further minimizes inhalation of harmful chemicals. Thoroughly cleaning the surface removes contaminants that interfere with resin adhesion and reduces skin exposure to hazardous materials. Light sanding enhances fiber bonding but should be performed carefully to avoid sharp debris or accidental cuts. Removing loose fiberglass pieces with appropriate tools prevents accidents and improves repair quality. It’s equally important to keep ignition sources away, as polyester resins are flammable. Finally, disposing of waste properly and keeping first aid supplies accessible address potential mishaps promptly. This attentive safety approach protects both the craftsperson and the integrity of the repair process, reinforcing the foundation for successful fiberglass work. For a practical demonstration of repair steps, see the How Do You Repair Fiberglass On A Motorcycle? video tutorial.
Chapter 2: Mastering Resin Application and Fiberglass Integration for Motorcycle Fairings

1. Essential Surface Preparation for Optimal Resin and Fiberglass Bonding on Motorcycle Fairings
Surface preparation is the critical foundation when applying resin and fiberglass to motorcycle fairings, ensuring a durable bond and flawless repair. Begin by thoroughly cleaning the damaged area to eliminate dirt, grease, and oils that can interfere with resin adhesion. Use specialized cleaners or degreasers suitable for plastics or composites to achieve a contaminant-free surface. Next, lightly sand the fairing with fine-grit sandpaper; this removes any glossy finish or oxidation and creates a textured base for better mechanical grip of the resin and fiberglass layers. Before applying resin, cut the fiberglass mat slightly larger than the repair area to guarantee full coverage with an ideal overlap. When mixing resin and hardener, strictly follow manufacturer ratios to avoid curing issues. Apply an initial resin coat, position the fiberglass mat, and saturate it thoroughly with additional resin. This careful preparation and application promote a strong, seamless integration that withstands stresses. For further insights on repair techniques, consult expert guidance such as the Maston Fiberglass Repair Kit guide. For more on choosing fairings that complement your repair projects, explore affordable motorcycle fairings at Summit Fairings.
2. Essential Techniques for Seamless Fiberglass Cloth Application with Resin
Applying fiberglass cloth with resin to motorcycle fairings demands precise preparation and technique to ensure a strong, durable repair. Start by thoroughly cleaning and sanding the repair area to promote excellent resin adhesion. Mix the resin and hardener carefully, adhering to recommended ratios for consistent curing. Begin the layup by brushing a thin, even coat of resin on the prepared surface, which primes it for bonding. Cut the fiberglass cloth slightly larger than the damaged section for full coverage, then position it carefully to avoid wrinkles or air bubbles, as these can weaken the repair. Press the cloth firmly into place before saturating it completely with more resin, brushing meticulously to remove trapped air. Multiple layers can be applied if additional strength is needed, each requiring thorough resin saturation. After curing, sanding smooth prepares the surface for filler and paint, restoring the fairing’s original look and integrity. Always wear protective gear and work in a ventilated area to handle resin and fiberglass safely. For visual guidance on this step-by-step process, see this detailed fiberglass repair kit instructions. For further insights and related topics, explore comprehensive resources on motorcycle fairings.
3. Ensuring Optimal Resin Saturation and Curing for Durable Motorcycle Fairing Repairs
Achieving proper resin saturation is essential when applying fiberglass to motorcycle fairings. The fiberglass cloth must be fully impregnated with resin to avoid dry spots or trapped air bubbles, which weaken the repair. Using a brush or roller, apply resin evenly, pressing the cloth gently to eliminate air pockets and ensure strong adhesion. Applying resin in thin, even layers prevents excess pooling that can cause imperfections or longer curing times.
Curing the resin thoroughly is just as critical. Maintaining appropriate temperature and humidity levels during curing ensures the resin hardens to its full strength and durability. Resin types vary—epoxy and polyester require different conditions and cure times. Using accelerators can speed curing but must be managed to avoid warping or weak spots. Adequate ventilation is vital to reduce harmful fumes.
Following these steps results in a resilient, smooth surface ready for finishing and reinstallation, preserving your fairings’ functional and aesthetic qualities. For practical demonstrations and detailed tips on resin saturation and curing during composite layup, refer to this tutorial: https://www.youtube.com/watch?v=-YTQKhrL7OA
Explore more about high-quality fairing maintenance and repair techniques in our detailed motorcycle fairings blog.
4. Seamless Sanding and Finishing Techniques to Perfect Resin and Fiberglass Application on Motorcycle Fairings
Achieving a resilient and visually flawless repair on motorcycle fairings starts after the fiberglass and resin have fully cured. The sanding process is critical to remove excess resin and level the surface, beginning with coarse grit sandpaper to address uneven areas efficiently. Progressively using finer grits smooths the repaired patch, blending it into the original fairing for an invisible transition. Minor surface flaws and pinholes are commonly addressed by applying a thin layer of body filler or glazing putty, which should be carefully sanded to a uniform finish once hardened. To ensure the paint adheres well and the finish lasts, applying a primer specially formulated for composite surfaces is essential. This primer promotes durability and enhances paint adhesion, setting the stage for a professional finish. For those seeking to extend longevity and add scratch resistance, a ceramic coating can be applied after painting. Proper surface preparation, including cleaning and light initial sanding before resin application, combined with secure clamping during curing, further optimizes the repair’s strength and contour. Always consider respirator use to protect against harmful fiberglass dust produced during sanding. For a practical demonstration, check the video titled “How Do You Repair Fiberglass On A Motorcycle?” and explore detailed repair insights from explore the best motorcycle fairings at Summit Fairings.
5. Essential Safety Practices and Material Choices for Resin and Fiberglass Application
Ensuring safety and careful material selection is paramount when applying resin and fiberglass to motorcycle fairings. Protective gear such as an N95 or P100 respirator, safety goggles, gloves, and protective clothing shield against irritating dust and toxic fumes released by polyester or epoxy resins. Working in a well-ventilated area further reduces health risks. Selecting epoxy resin is advisable for fairing repairs due to its superior adhesion, strength, heat resistance, and lower toxicity compared to polyester resin. Before laying fiberglass cloth, gently sanding and thoroughly cleaning the surface enhances bonding. Fiberglass cloth or mat pieces should extend beyond the damaged area for effective reinforcement. During curing, securing the parts firmly helps achieve a durable bond, with epoxy typically requiring about 24 hours to cure fully. These measures provide a safe environment and contribute to long-lasting, structurally sound repairs. For additional guidance, view practical tips on the application process in tutorials like How Do You Repair Fiberglass On A Motorcycle?. For further information on motorcycle fairings, explore the best motorcycle fairings at Summit Fairings.
Chapter 3: Curing and Finishing Techniques for How to Fiberglass Motorcycle Fairings

1. Mastering the Curing Process: Achieving Lasting Strength and Precision in Fiberglass Fairing Repairs
Curing is the critical chemical phase that solidifies fiberglass fairings, transforming resin and hardener into a rigid, durable composite. Mixing these components accurately—often around 100 parts resin to 4 parts hardener by weight—is essential to trigger a complete reaction. Once applied, the resin-saturated fiberglass must be pressed firmly to remove air bubbles, ensuring uniform strength. Maintaining the fairing shape during this stage through clamping prevents warping and preserves precise fitment. Curing times vary, typically spanning from 30 minutes for an initial set to 24 hours for full hardness, influenced by resin type, temperature, and humidity. Post-curing, the surface becomes ready for smoothing, filling, and painting with compatible primers to enhance durability and aesthetics. Throughout, safety is paramount; gloves, masks, and adequate ventilation protect against hazardous fumes and skin exposure. For further detailed guidance on resin mixing, application, and curing techniques, consult comprehensive fiberglass repair kit resources like the Maston Fiberglass Repair Kit guide. To explore quality fairings suited for refinishing projects, consider reviewing affordable motorcycle fairings at Summit Fairings.
2. Perfecting Surface Preparation and Sanding: The Foundation for Flawless Fiberglass Fairing Finishes
Perfecting Surface Preparation and Sanding: The Foundation for Flawless Fiberglass Fairing Finishes
Achieving a smooth base through meticulous surface preparation and sanding is vital in sealing the success of fiberglass repairs on motorcycle fairings. Before resin application, lightly sanding the surface removes gloss and contaminants, creating the essential tooth needed for strong adhesion. Using fine to medium grit sandpaper avoids deep scratches while ensuring the resin bonds effectively. After this, cleaning with isopropyl alcohol eliminates any residual dust or oils that could compromise the finish.
Once the fiberglass cures, sanding takes on a crucial role in leveling imperfections such as resin runs or uneven patches. Starting with coarser grits and progressing to finer ones smooths the surface, preparing it for the final steps. Clearing sanding debris between passes prevents contamination and preserves surface integrity. The finishing stages may include applying gelcoat or primer, followed by wet sanding and polishing—these refine the fairing to a glossy, professional appearance.
This careful attention to preparation and sanding lays the groundwork for durable, visually stunning motorcycle fairings that retain their form and finish through use and time. For practical insights on achieving these results, the tutorial “How Do You Repair Fiberglass On A Motorcycle?” offers valuable visual guidance.
3. Seamless Filling and Priming: Perfecting Fiberglass Fairing Surfaces for Lasting Finish
Achieving a flawless surface on fiberglass motorcycle fairings relies heavily on expert filling and priming during the curing and finishing stages. Once the fiberglass resin has cured, the surface often shows pinholes or minor textural flaws that can undermine paint adhesion and final aesthetics. These imperfections are effectively remedied with lightweight, epoxy-based fillers designed for strong adhesion and easy sanding. Applying filler smooths out uneven areas, ensuring a consistent base that conceals defects and enhances durability.
Priming follows as a vital step, sealing the porous filler and fiberglass while providing a uniform surface for paint bonding. High-quality primers formulated for composite materials prevent peeling and reveal any remaining imperfections, guiding final touch-ups. Adequate curing time for both filler and primer—usually 24 hours—ensures optimal strength and stability without risking warping. Throughout this process, careful sanding with fine-grit paper refines surfaces to a professional-grade smoothness.
These concerted filling and priming efforts establish a resilient foundation that protects against UV damage and wear, ultimately elevating the appearance and longevity of your motorcycle fairings. For deeper insights on finishing strategies, explore more at our guide to affordable motorcycle fairings.
(Source: Proper curing and clamping advice for epoxy parts to avoid warping [1])
4. Mastering the Art of Painting and Clear Coating for Durable, Glossy Motorcycle Fairings
Achieving a durable, high-gloss finish on fiberglass motorcycle fairings requires meticulous painting and clear coating after curing. The process begins with careful surface preparation—cleaning, sanding, and priming—to ensure optimal paint adhesion and a smooth foundation. Multiple paint layers build vibrant, rich color depth, often following professional multi-step systems that create bold, clean finishes. This is followed by applying several clear coat layers, which add essential UV protection, gloss, and scratch resistance. These coatings often include curing agents that enhance hardness and durability, critical for withstanding environmental wear and maintaining shine. Curing the clear coat properly, either by air or heat, guarantees a resilient finish. Final wet sanding and polishing remove imperfections and elevate gloss further. For ongoing preservation, gentle cleaning and UV protection measures help sustain the fairings’ appearance and longevity. Explore detailed finishing guidance in resources like the professional seven-step painting processes designed specifically for fiberglass fairings, which can be found at KingsMotorcycleFairings.com. For more comprehensive motorcycle fairing care techniques, visit our explore the best motorcycle fairings at SummitFairings.
5. Essential Safety Practices and Maintenance Tips for Durable Fiberglass Motorcycle Fairings
Ensuring safety during the curing and finishing of fiberglass motorcycle fairings is paramount to protect health and guarantee high-quality results. Working in well-ventilated spaces minimizes exposure to harmful fumes produced by resins, hardeners, and solvents, while appropriate personal protective equipment—such as chemical-resistant gloves, respirators, and eye protection—guards against skin contact and inhalation risks. Careful chemical handling is critical to prevent spills, fire hazards, and unsafe reactions caused by improper mixing or curing conditions. Maintaining the ideal temperature and humidity improves resin curing, avoiding warping or weak spots in the repaired surface.
Once cured, fairings require ongoing care to maintain longevity. Minimizing direct sunlight exposure prevents UV-induced resin degradation, while gentle cleaning with mild soap and soft materials preserves the finish. Applying protective wax or polish strengthens the surface against oxidation and contaminants, extending aesthetic appeal. Timely attention to minor scratches or cracks prevents water damage and structural failures.
Following these integrated safety and maintenance guidelines ensures both the well-being of workers and the lasting durability of fiberglass motorcycle fairings. For a practical demonstration of these repair and safety techniques, refer to the How Do You Repair Fiberglass On A Motorcycle? video. For more insight on fairing care, explore affordable motorcycle fairings and care tips.
Chapter 4: Ensuring Safety First: Protective Measures for Fiberglassing Motorcycle Fairings
1. Essential Protective Gear and Safety Practices for Fiberglassing Motorcycle Fairings
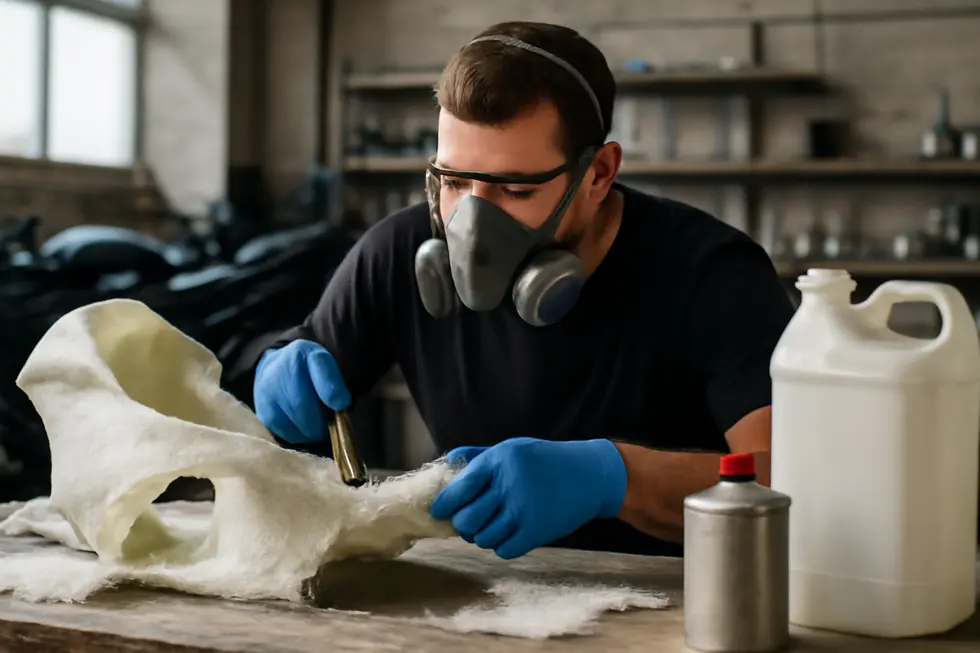
Personal protective equipment (PPE) is fundamental when fiberglassing motorcycle fairings to guard against respiratory irritation, skin exposure, and eye injuries. Respirators or dust masks prevent inhaling harmful fiberglass particles and resin fumes, which can otherwise cause lung discomfort. Wearing nitrile or latex gloves shields skin from contact with resins and hardeners, substances that may trigger allergic reactions or irritation. Safety goggles protect your eyes from airborne dust and chemical splashes, while long sleeves and pants minimize skin exposure to fiberglass strands. Establishing safety protocols is equally important; work in a well-ventilated space or utilize exhaust fans to dissipate fumes effectively. Dispose of resin-soaked materials responsibly due to their flammability, and handle power tools carefully to avoid accidents. These measures are vital to ensure repairs proceed smoothly without compromising personal health. For a hands-on demonstration of safe fiberglassing techniques, the video How Do You Repair Fiberglass On A Motorcycle? offers clear and practical guidance. For further insights, explore expert advice on motorcycle fairings.
2. Mastering Chemical Safety: Essential Handling and Storage Practices for Fiberglass Repairs
When working with fiberglass to repair motorcycle fairings, chemical safety is paramount due to the hazardous nature of resins, hardeners, and solvents. These materials emit volatile organic compounds (VOCs) that pose inhalation risks, making proper ventilation vital. Conduct your work in a well-ventilated space or use respiratory protection to minimize exposure. Wearing personal protective equipment like gloves, goggles, and protective clothing shields skin and eyes from irritation and allergic reactions caused by direct contact. Storing chemicals correctly is equally important—keep them sealed tightly in cool, dry areas away from heat sources or open flames to prevent fire hazards. Use dedicated tools for resin application to avoid cross-contamination, and dispose of waste according to hazardous material guidelines to reduce environmental impact. Having a fire extinguisher nearby further safeguards your workspace against flammable chemical dangers. For detailed guidance, reviewing material safety data sheets (MSDS) for your specific products is recommended. Ensuring chemical safety supports a secure and effective fiberglass repair process on your motorcycle fairings.
For deeper insight on the rep