















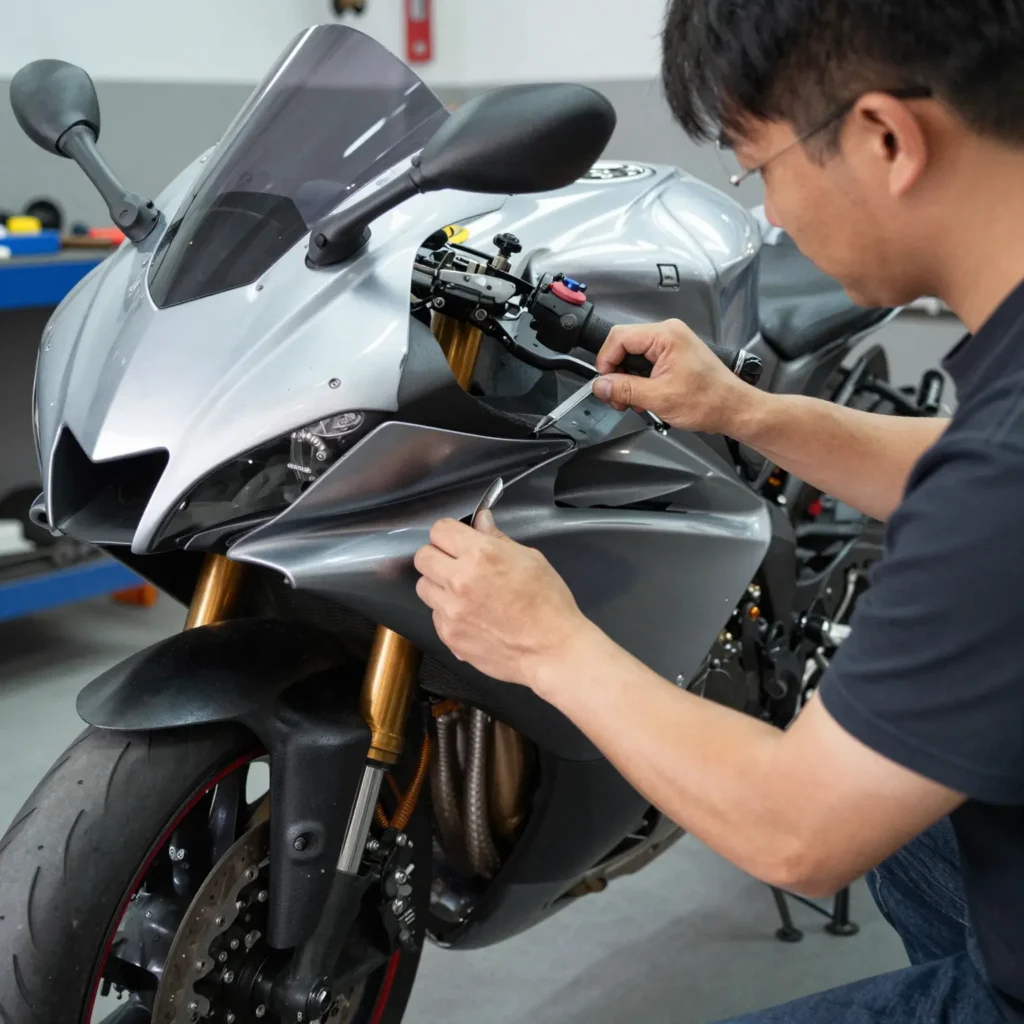
The Importance of Fairing Maintenance and Removal for Your Yamaha R6
When it comes to the Yamaha R6, fairings are not just aesthetic enhancements; they play a crucial role in the overall performance and safety of the bike. For business owners involved in motorcycle repair or customization, understanding the intricacies of fairing maintenance and removal can significantly impact service quality and customer satisfaction. From preventing aerodynamic drag to facilitating engine cooling, well-maintained fairings contribute to the bike’s efficiency and safety on the road. Moreover, with the popularity of mods and repairs in the motorcycle community, there is a growing market for fairing modifications, making it an opportune time for business owners to delve into this aspect of motorcycle maintenance.
Proper fairing removal is essential for executing more extensive repairs or upgrades, as well as for examining underlying components that might need attention. By mastering the techniques of fairing maintenance and removal, bike shops can offer tailored services, enhancing their reputation and attracting a wider range of clients looking for specialized care. Whether you’re advising clients on how to maintain their R6’s fairings or offering repair services, having in-depth knowledge in this area can set your business apart. To expand your knowledge and resources, explore our collection of custom Yamaha fairings that can elevate the visual appeal and performance of your clients’ bikes.
Essential Tools for Front Fairing Removal on Yamaha R6
When removing the front fairing of a Yamaha R6, having the right tools is crucial for a smooth and efficient process. Here’s a list of essential tools that you will need:
Basic Hand Tools
- Screwdrivers: A set of flathead and Phillips screwdrivers to remove screws on the fairing.
- Socket Set: A metric socket set is essential for loosening bolts that secure the fairing to the frame.
- Torque Wrench: This tool ensures that bolts are tightened to the manufacturer’s specifications, preventing damage to components.
Yamaha Specific Tools
- Fairing Removal Tool: This tool is specifically designed for motorcycles like the Yamaha R6, making the removal process easier and preventing any scratches or damage during the process.
- Plastic Pry Tools: Ideal for gently prying off plastic clips and fasteners without damaging them.
Additional Tools
- Adjustable Wrench: Useful for bolts that do not have a standard size.
- Ratchet and Extensions: Helpful for accessing bolts that are hard to reach.
Safety Gear
- Protection Gear: While not a tool, wearing gloves and safety glasses is advisable to keep safe during the removal process.
Equipping yourself with these tools will make the front fairing removal process on your Yamaha R6 much simpler. For those looking for OEM parts or accessories, check out our featured products for the Yamaha R6.
In addition, if you’re considering upgrades or replacements, visit our özelleştirilmiş Yamaha kapağı sayfamızı ziyaret edin to find a range of options that suit your needs.
These tools not only streamline the removal process but also help maintain the integrity of your motorcycle’s fairings.
Steps for Removing the Front Fairing of the Yamaha R6
Removing the front fairing of the Yamaha R6 can be a straightforward process if done carefully. Here’s a step-by-step guide to assist business owners and motorcycle enthusiasts in performing this task effectively. This procedure is essential for accessing the bike’s internals for repairs, maintenance, or upgrading parts.
Gerekli Araçları Topla
Before starting the removal, ensure you have the following tools on hand:
- Phillips screwdriver
- Flathead screwdriver
- Torx screwdriver set
- Ratchet ve anahtar seti
- Pliers
- Protective gloves and eyewear (for safety)
2. Prepare the Motorcycle
- Turn Off the Engine: Ensure the motorcycle is completely powered off and the key is removed.
- Place On Side Stand: Ensure the bike is on a level surface and securely positioned on its side stand.
- Remove the Seat: Start by removing the seat for easier access to the fairing screws. This usually requires unscrewing the bolts located beneath the seat area.
3. Remove Windshield Screws
- Locate Windshield Screws: Using a Phillips screwdriver, remove the screws securing the windshield to the fairing.
- Lift the Windshield: Carefully lift the windshield away from the fairing and set it aside for safekeeping.
4. Disconnect Electrical Connectors
- Locate Electrical Connectors: Identify any electrical connections between the fairing and the motorcycle (e.g., for headlights or indicators).
- Disconnect Carefully: Gently disconnect the connectors by pressing the tabs and pulling them apart, taking care not to damage the connectors.
5. Remove Fairing Bolts
- Locate Fairing Bolts: Look for the bolts that secure the front fairing to the motorcycle frame. These are usually located on the top and sides of the fairing.
- Unscrew the Bolts: Using the appropriate socket or screwdriver, carefully unscrew and remove all the bolts, keeping them in a safe place for reassembly.
6. Remove the Fairing
- Carefully Pull the Fairing Off: Once all screws and bolts are removed, gently pull the fairing away from the motorcycle.
- Check for Obstructions: Ensure there are no remaining connections or clips holding the fairing in place.
7. Inspect and Store
- Inspect the Fairing and Components: Before storing or replacing the fairing, check for any damage and note any areas needing repair.
- Store the Fairing: If you’re not reinstalling the fairing immediately, store it in a safe and clean environment to avoid scratches or damage.
Conclusion
Removing the front fairing from a Yamaha R6 is an essential skill for maintenance and repair. For more detailed instructions or specific questions, refer to the official Yamaha service manuals or Motorcycle forums for community insights. Remember to always prioritize safety and take your time during the process.
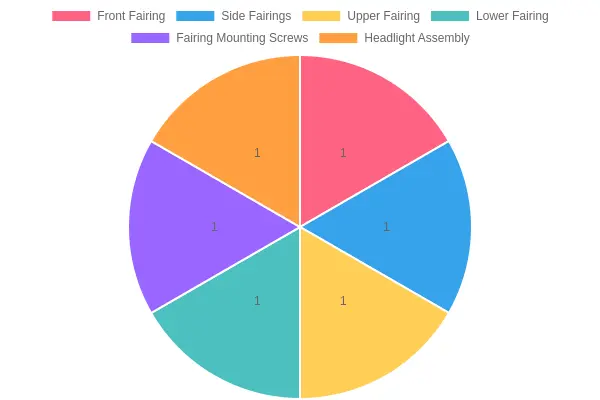
This visual aid highlights the fairing components of the Yamaha R6, providing a clear understanding of the areas that must be removed for maintenance or replacement. It includes labels for:
- Front Fairing: The main front bodywork piece covering the headlight.
- Side Fairings: The left and right bodywork covering the sides of the bike.
- Upper Fairing: Part of the front fairing that encapsulates the windshield.
- Lower Fairing: The undercarriage cover below the engine area.
- Fairing Mounting Screws: Various screws and bolts used to secure the fairings to the frame.
- Far Montajı: The set of lights mounted within the front fairing.
Removing the front fairing of a Yamaha R6 can be a rewarding yet challenging task. While it allows for easy access to various components for maintenance or modification, several common obstacles can arise. Understanding these challenges and how to overcome them can enhance your experience and ensure the integrity of your motorcycle.
1. Special Tools Required
One of the main challenges in fairing removal is the requirement for specific tools. Not all standard toolkits have the necessary items like Torx bits or proprietary fasteners that Yamaha uses.
- İpucu: Invest in a quality motorcycle toolset specifically tailored for your Yamaha R6. Additionally, having a detailed repair manual on hand can help you identify the specific tools needed for the job.
2. Fragile Components
The fairing consists of plastic and delicate components that are prone to cracking or breaking if not handled carefully. Over-enthusiastic force can lead to unexpected damage.
- İpucu: Always work slowly and gently. Use plastic trim removal tools instead of metal ones to pry off fairings, as this minimizes the risk of scratches and breaks.
3. Wiring and Connectivity Issues
The fairing is home to various electrical components and connections, such as headlights and turn signals. These can become entwined or snagged during removal.
- İpucu: Before beginning, take plenty of photos to document connections and their placements. Label wires as you go to make reassembly easier. Use zip ties to secure any loose wires out of the way.
4. Obstructive Fasteners
Often, fairings are secured with screws and clips that can be hard to access, especially if they are located behind another component. The need for thorough searching can result in lost time and frustration.
- İpucu: A magnetic tool holder can be extremely beneficial for keeping track of fasteners while you work. Magnetic bowls or trays can also help ensure nothing is lost during the project.
5. Reassembly Confusion
After the fairing is removed, reassembling everything can become problematic if one doesn’t recall how things were fitted together.
- İpucu: Keep a clear workspace and organize parts systematically. Use labeled bags for different sections of fairing pieces and their corresponding fasteners. Reference your documentation and photographs to ensure all components are returned to their original places.
By anticipating these challenges and employing practical problem-solving techniques, you can make the front fairing removal process smooth and effective. For more customized solutions and specific parts, visit our collection of Yamaha fairings.
Yamaha R6 Fairing Price Comparison Table
The following table illustrates a framework for comparing prices and features of Yamaha R6 fairings from various vendors. It includes hypothetical data that should be replaced with real information from vendors:
| Satıcı Adı | Price | Material | Warranty |
|---|---|---|---|
| Summit Fairings | $XXX | ABS Plastic | $350 – $800 |
| Vendor 2 | $XXX | Fiberglass | 2 years |
| Vendor 3 | $XXX | Polypropylene | Tam dış çatı seti, yüksek dayanıklılık, kolay kurulum |
| Vendor 4 | $XXX | Carbon Fiber | 2 years |
For comprehensive details on your fairing needs, you can visit summitfairings.com.
Yanal Kaplamalara Dair Uzman Görüşleri
Fairings play a crucial role in a motorcycle’s performance and aesthetics. They not only enhance the motorcycle’s visual appeal but also significantly contribute to aerodynamics, reducing drag and improving stability at high speeds. An industry expert might quote:
“The addition of fairings to a motorcycle transforms it from a mere vehicle to a high-performance machine. They streamline airflow, reduce resistance, and improve handling, making them essential for both speed enthusiasts and everyday riders.”
This perspective highlights the dual importance of fairings in both aesthetics and operational efficiency. For motorcycle business owners, understanding these factors can help in making informed decisions about fairing modifications and customizations.
For more insights on motorcycle fairings, you can check out our collection of custom fairings that cater to various models.
Maintenance Tips for Yamaha R6 Fairing Longevity
Maintaining the fairings of your Yamaha R6 is essential for preserving not only the motorcycle’s aesthetic appeal but also its performance and longevity. As a business owner valuing quality, integrating regular maintenance routines into your motorcycle care regimen can significantly enhance your bike’s life. Here are some practical maintenance tips tailored for Yamaha R6 fairings:
1. Regular Cleaning
To keep your fairings looking new and avoid potential damage:
- Hafif Sabun ve Su Kullanın: Clean your fairings using a soft cloth and mild soap diluted in water. Avoid harsh cleaning chemicals that can degrade the material.
- Tamamen Yıkayın: After soaping, rinse the fairings well to remove any soap residue that can leave marks.
- Dry with a Soft Cloth: Use a microfiber cloth for drying to prevent water spots and scratches.
2. Protective Coatings
Applying a protective coating can significantly increase the life of your fairings:
- Wax Application: Regularly apply a quality motorcycle wax to your fairings. This can protect against UV rays, road debris, and other elements that might dull the surface.
- Seramik Kaplama: For more durable protection, consider a ceramic coating, which offers long-lasting protection against scratches and UV fading.
3. Proper Storage
How you store your Yamaha R6 significantly impacts the longevity of the fairings:
- Indoor Storage: Whenever possible, store the motorcycle indoors, away from direct sunlight, heat sources, and humidity. This prevents fading and warping.
- Bir Kaplama Kullanın: Invest in a high-quality motorcycle cover that offers insulation while providing breathability to avoid moisture buildup.
4. Regular Inspections
Consistent inspections help catch issues before they become major problems:
- Look for Cracks or Damage: Regularly inspect your fairings for cracks, chips, or discoloration. Repair any damages promptly using high-quality repair kits or seek a professional for significant issues.
- Check Fastenings: Ensure all fasteners are secure and not corroded. Loose fairings can lead to further damage and safety hazards when riding.
5. Seasonal Maintenance
Adapting maintenance practices based on seasons can prolong fairing life:
- Winter Preparation: In colder months, ensure that your motorcycle is not exposed to salt and ice, both of which can corrode and deteriorate fairing material.
- Post-Season Clean: After winter, do a thorough clean and inspect for any damage that might have occurred during storage.
Recommended Products
For effective cleaning and maintenance of your Yamaha R6 fairings, consider checking these links for top-rated motorcycle cleaning products:
Following these maintenance tips can foster a proactive approach to care, ensuring your Yamaha R6 fairings remain in excellent condition for years to come. Integrating quality products and techniques underscores the value that business owners place on their assets, ultimately reflecting positively on your commitment to excellence in motorcycle maintenance.
Conclusion
In conclusion, the removal and installation of motorcycle fairings, particularly for models like the Yamaha R6, not only provide a sleek and stylish look but also enhance the bike’s overall performance. Proper fairing upgrades lead to improved aerodynamics, increased stability, and better rider protection from external elements. Furthermore, these upgrades can offer unique aesthetics that reflect the rider’s personality and preferences.
Essentially, utilizing high-quality fairings can significantly elevate your motorcycle experience. They do not just serve a functional purpose; they also contribute to the safety and enjoyment of riding. It is vital to approach both the removal and installation processes with care to ensure optimal results. By following proper techniques and choosing quality parts, riders can reap the full benefits of their fairing upgrades.
If you’re looking to upgrade your motorcycle fairings or need high-quality replacements, look no further than Summit Fairings. Our extensive collection promises the perfect fit and style for your ride. Don’t hesitate; transform your motorcycle today!
Fairing Installation Time Comparison
Understanding the average installation times for motorcycle fairings is essential for business owners in the automotive sector. Below, we showcase a comparison between the Yamaha R6 and standard motorcycle models.
Average Installation Times
- Yamaha R6: 1.5 hours
- Standard Models: Suzuki SV650'ı özelleştirmeye gelince, iş sahipleri için çeşitli kasa seçenekleri mevcuttur. Aşağıda, mevcut olan farklı kasa türlerini, tahmini fiyatlarını ve montaj sürelerini karşılaştıran kapsamlı bir tablo yer almaktadır.
The efficiency gained by using quality products from Summit Fairings can lead to significantly reduced installation times.
Installation Time Comparison Chart
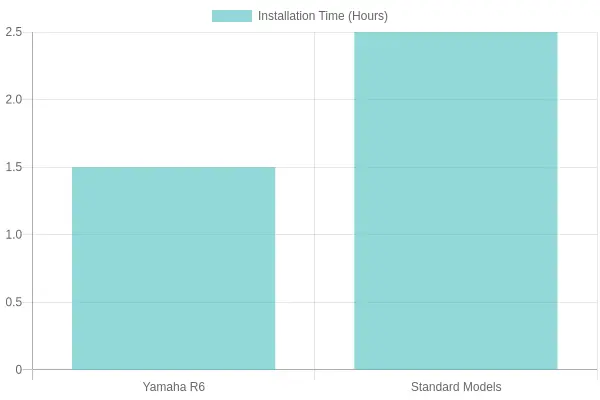
This chart clearly illustrates the installation time required for the Yamaha R6 as compared to other standard motorcycle models, emphasizing the advantages of choosing high-quality fairing options available at Summit Fairings.