












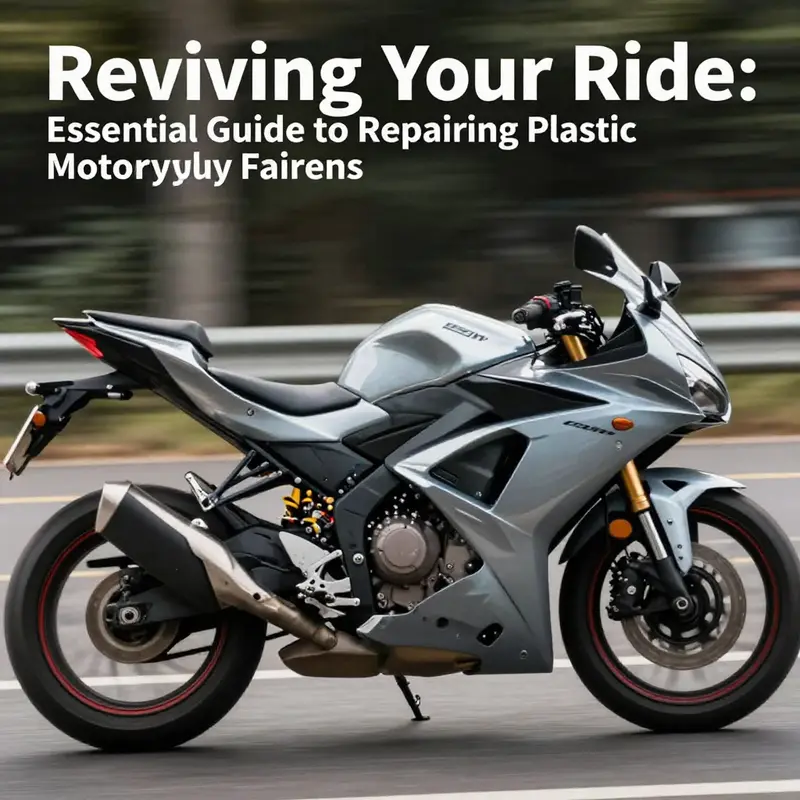
الأجزاء الأمامية للموتورسيكل البلاستيكية ضرورية من حيث الجماليات والديناميكا الهوائية لدراجة نارية. كصاحب عمل في صناعة الدراجات النارية، فهم كيفية إصلاح هذه الأجزاء بشكل فعال يمكن أن يحسن بشكل كبير رضا العملاء وولائهم. ستكتشف منهجية شاملة لتحديد الأضرار، واختيار المواد المناسبة، وإجراء إصلاح عالي الجودة طوال هذا الدليل. كل فصل يتناول مكونات حيوية في عملية الإصلاح - من التقييم الأولي والتحضير إلى تقنيات متقدمة وتفاصيل النهاية. احصل على هذه المعرفة لتحسين عروضك الخدمة وزيادة سمعة علامتك التجارية في السوق التنافسي للدراجات النارية.
قراءة السطح: تشخيص الأضرار وتثبيت الأساس لإصلاح الأجزاء الأمامية للموتورسيكل البلاستيكية
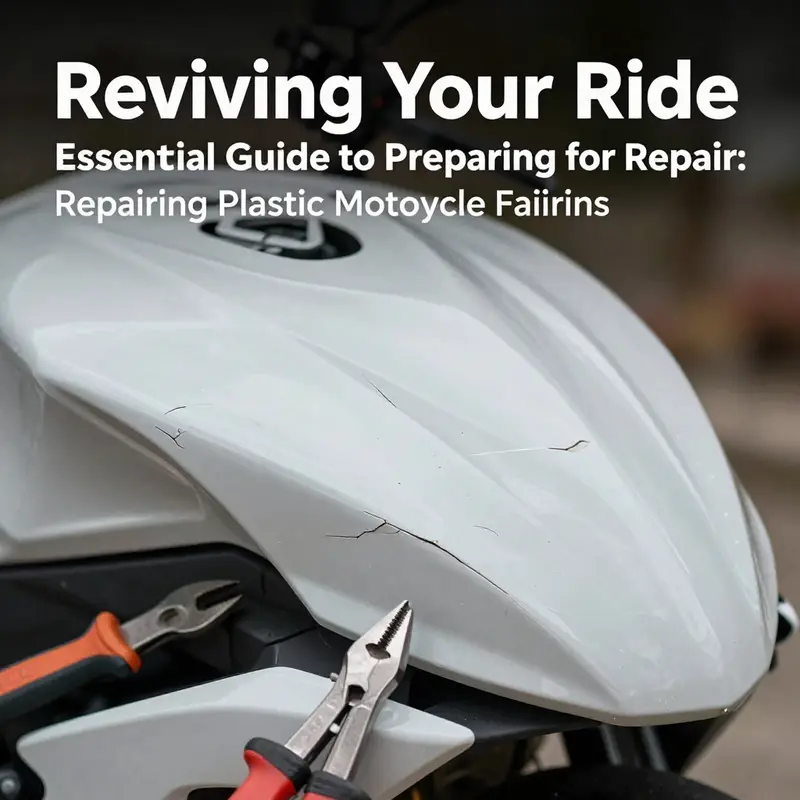 Assessing the damage on plastic motorcycle fairings is more than a quick glance at a scratch. It is a careful survey that reads how a part has endured impact, temperature, and time, and it sets the course for every repair decision that follows. The moment you stand back to take in the whole panel, you should be looking for more than the obvious chips or cracks. The edges around mounting points are high-stress zones where a small flaw can propagate into a larger failure that not only looks unsightly but can disrupt aerodynamics and handling. If a plastic piece is loose, misaligned, or shows uneven seams, those are red flags that previous repairs or improper installation may have left behind. Such conditions matter because they influence how the repair will hold, how well it will bond to the surrounding surface, and how the final finish will wear over time. The analysis also calls for a practical check of the material itself. ABS and other plastics behave differently under stress, and cold storage can reveal hidden weaknesses. If the bike has lived in subzero conditions, brittleness or deep internal cracking can appear where the eye cannot see, especially around areas that flex with speed and wind. Recognizing these signs early helps prevent a glossy but brittle patchwork that will crack again at the first rough road or sudden temperature swing. This is why a thorough assessment blends visual inspection with tactile checks and a sense of how the part has been used and stored. The goal is not only cosmetic restoration but a repair that respects the fairing’s structural role in protection and aerodynamics, as well as the long-term resilience of the finish you plan to apply. When the surface looks reasonably solid yet shows a few cracks or chips, the repair strategy narrows to bonding, filling, and smoothing the affected areas so the new layer can be laid down with confidence. If the damage is more extensive, particularly around edges or mounting bosses, the plan shifts toward reinforcement from the inside. In such cases, you are balancing the need to restore strength with the desire to keep weight and flexibility in check. It is a reminder that plastic is a different animal from metal; the repair workflow must respect its chemistry and how it adheres to itself and to primers and paints. A calm, methodical approach begins with a clean canvas and progresses through layers that build not just aesthetics but adherence and protection against the elements. The first diagnostic step is to map out the scope of the damage. Light surface scratches that have not breached the primer or base coat can often be corrected with refinement work. Deeper scratches, gouges, or small cracks demand a more involved process: bonding, filling, and controlled curing before any sanding or painting. If you notice discoloration or a brittle feel, treat it as a warning sign that the plastic has been stressed or degraded and may require reinforcement rather than a simple surface fix. In the broader sense, the assessment becomes a portfolio of decisions about whether the repair will be a cosmetic refresh or a functional restoration that preserves fit, finish, and the effect of the fairing on the motorcycle’s aerodynamics. The guiding principle is consistency between the repair materials and the plastic itself. Using a plastic-friendly adhesive, a compatible filler, a plastic primer, and plastic-specific topcoat creates a chain of compatibility that helps the repair endure. The assessment also invites a practical question about access and labor. Front fairings or windscreen areas present greater challenges because their shape and position demand precision and uniform coverage. For these zones, choosing to proceed with a professional shop that can offer a climate-controlled spray booth, careful color matching, and exacting surface finish may be the wisest path. In contrast, smaller touch-ups or interior panels can often be tackled in a well-equipped garage, provided the preparation, bonding, and curing steps are followed with discipline and patience. For riders who want to maintain a coherent look across a fairing set, this early stage is also an opportunity to consider whether a color change or a complete repaint aligns with the project goals and time frame. If the original paint is to be preserved, you must also decide how far to sand. Lightly abrading the surface with progressively finer grits prepares the substrate for bonding agents and primer. If the choice is a full repaint, you might end up removing the old paint entirely, which is a larger undertaking but can yield a more uniform final appearance and better adhesion for the new topcoat. The practical upshot of the assessment is a plan that matches the damage profile with appropriate preparation steps, a clear path for reinforcement if needed, and a realistic expectation of the time, materials, and skill involved. This is the moment to internalize that the repair is as much about the method as the material. The method must respect the plastic’s behavior under heat, moisture, and UV exposure. With this mindset, you proceed to preparation, knowing that the surface you start with redefines what you can achieve with adhesive strength, filler smoothness, and color fidelity. As you consider replacement parts or replacement panels, you can turn to a curated selection of options that makes it easier to keep a consistent appearance across the bike. For direct access to a curated selection of replacement panels, see the Honda fairings collection. This resource can help you compare shapes, mounting patterns, and finish options, ensuring your repair plan remains grounded in practical feasibility while still pursuing a clean, factory-like look. In addition to the assessment and preparation, it is useful to keep a single, guiding thread: plastics demand compatible chemistry from the first to the last step. The compatibility of adhesive, filler, primer, paint, and clear coat is what ultimately determines the repair’s success. When you commit to that sequence, you avoid the common pitfall of a finish that peels, crazes, or dulls because the materials were not designed to work together. The preparation stage then becomes a careful choreography. Start with a clean surface. Wash away grease, oils, and road grime with a mild detergent and water, then rinse thoroughly. The goal is to minimize any residual contaminants that could interfere with bonding or paint adhesion. After the wash, allow the surface to dry completely before moving to the sanding phase. The sanding begins with a coarse step to create a mechanical key for bonding agents. Use an 80 to 120 grit sandpaper to lightly abrade the damaged area and surrounding margins. The objective is not to remove material but to expose a fresh substrate and to create micro-mechanical roughness that improves the grip of adhesives and fillers. Once this initial roughing is complete, switch to a finer grade, typically 200 to 400 grit. This second pass refines the surface, reduces deep scratches, and establishes a smoother profile that will accept filler and primer evenly. After sanding, wipe the surface with isopropyl alcohol to remove dust and residual oils. The alcohol acts as a final clean before adhesives or fillers are applied and helps ensure the bond remains intimate and uniform across the repair area. At this point, if there is any obvious hole, crack, or missing material that compromises structural integrity, you should consider interior reinforcement. For larger holes or structural damage, rebuild from the inside using a supportive material such as cotton wadding or foam. This provides a backing for an epoxy-based resin or a fiberglass patch that bonds to the inner surface and offers a stable anchor for the outer repair. In higher performance or show-quality contexts, more advanced reinforcement may be desired, including carbon fiber options. While carbon fiber can yield a repair stronger than the original part, it requires precise execution and additional curing steps, so it is typically pursued when the repair impacts performance or aesthetics at a high level. Once the structural base is secure, you can turn to the bonding and filling stage. Cracks can often be bridged with a compatible plastic adhesive that cures with a rigid bond. After the crack has been bonded, or if the area was a hollow void, apply a body filler to level the surface. The filler should be chosen for its ability to bond with plastic and its resistance to shrinking as it cures. Apply with a spatula or plastic knife, then allow the filler to cure fully per the manufacturer’s instructions. Do not rush this step or skip cure time, or you risk shrinkage cracks that mirror the very problems you are trying to fix. Once cured, sand the area again using progressively finer grits, starting with 180 to 220 and moving through 320 to 400. The goal is a perfectly flat, feathered transition where the repaired zone blends into the surrounding plastic with no ridges or visible steps. After sanding, inspect the repair under good lighting. If the surface shows slight imperfections, a second smoothing pass with a fine filler or spot glazing can be used, followed by another light sanding. This careful refinement is essential to achieving a uniform base for primer. The primer used here is often labeled as a plastic primer or red primer, designed specifically for adherence to polymer substrates. The primer acts as a bond bridge between the repaired surface and the subsequent paint layers, helping to prevent peeling and to promote even color application. Apply the primer in multiple thin coats rather than a single heavy layer. Allow each coat to dry thoroughly before the next, and sand lightly between coats to maintain a smooth surface, typically with 400 grit or finer paper. When the primer has cured and feels dry to the touch, the surface is ready for topcoat painting. For the actual color application, you can use an airbrush or a spray gun, maintaining a consistent distance around 25 centimeters from the surface. A zigzag or sweeping motion helps distribute the paint evenly and reduces the risk of runs and sags. Several light coats are preferable to one heavy layer, with a typical sequence of three to four coats for full opacity and color depth. Between coats, allow the paint to become tack-free, not fully dry, to encourage adhesion of subsequent layers. After the final color coat has dried, it is time for the protective top layer. A clear topcoat seals the color, adds depth, and increases resistance to UV exposure and abrasion. The clear coat should be compatible with the base paint and the plastic substrate, and it should be chosen with an eye toward automotive or aircraft-grade durability when possible. This top layer often requires more than one pass, with light, even coats and ample drying time between applications. Finally, consider the finishing details that contribute to a professional appearance. If the goal is a seamless, factory-like finish, careful color matching is essential. Any slight hue or gloss mismatch will be noticeable on a broad, curved surface. In such cases, an expert eye for color matching and a controlled finishing environment can make a notable difference in the final look. If immediate results are not possible or if the repair area is highly visible, you may decide to rely on a local shop capable of delivering a precise color match and an even, high-gloss finish in a climate-controlled space. By now, the narrative of the repair has shifted from diagnosis to execution, but the chain of steps remains coherent: assessment shapes the plan, cleaning-based preparation prepares the substrate, reinforcement provides strength, bonding and filling restore the surface profile, priming ensures adhesion, painting supplies color and depth, and clear coating locks in the result. The entire workflow emphasizes compatibility at every stage. It is not enough to fix the surface; you must ensure the materials interact harmoniously and endure the realities of riding conditions, including sun exposure, heat cycles, moisture, and vibration. It is why many riders who value longevity opt for process discipline and, when in doubt, seek professional help for high-visibility repairs or complex reshaping tasks. For readers seeking a deeper dive into methodology and product recommendations specific to plastic motorcycle bodywork, the Motorcycle Mechanics Institute offers a comprehensive guide to repairing and restoring plastic fairings, which can provide practical context and case studies to accompany the steps outlined here. If you want to explore a curated inventory of replacement panels to match your bike more precisely, you can visit the Honda fairings collection for reference and compatibility checks. This can help you plan color and shape decisions that align with your original aesthetic while you pursue a repair strategy that feels both durable and visually coherent. For further guidance and detailed tutorials, see the external resource linked here, which expands on practical techniques and material choices for plastic fairing repairs. External resource: https://www.motorcycle.com/motorcycle-repair/repairing-plastic-motorcycle-fairings/
null
 null
null
لمعان، حماية، ونهاية سلسة: إتقان الطلاء والحماية على الأجزاء المعدّلة من دروع الدراجات النارية
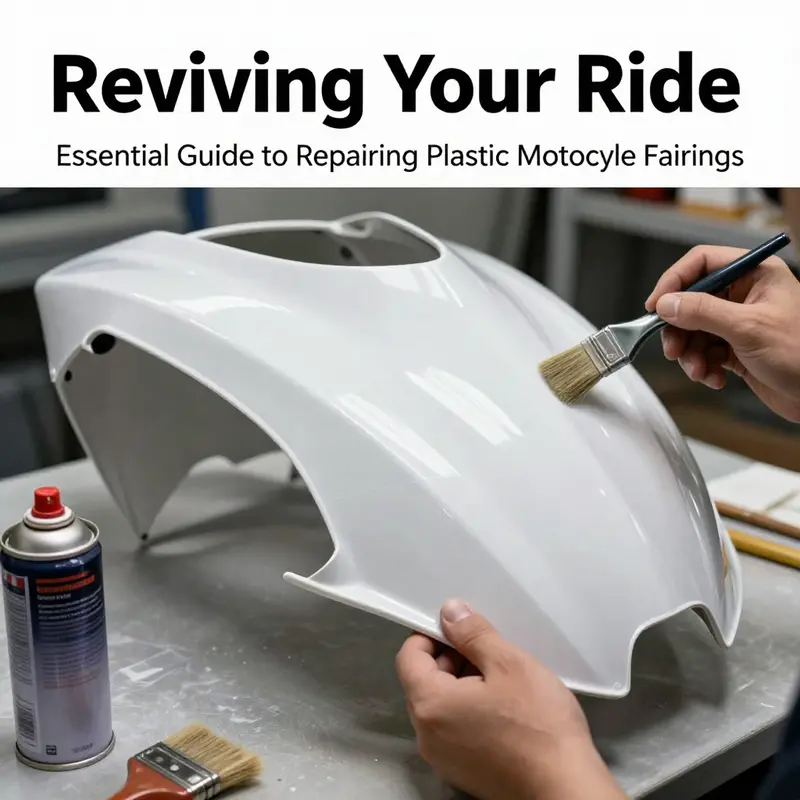 المرحلة الأخيرة من إصلاح دروع الدراجات النارية هي حيث تصبح العمل مُضيءًا بلمعان يشبه المصنع أو يختفي في نهائية غير مُرضية إذا تم التعامل معه بسرعة أو بشكل خاطئ. بعد معالجة الشقوق والفتحات والخدوش العميقة، فإن السطح الذي تراه هو قماش مستعد للكشف عن نوعين من القيمة: اللون والحماية. اللون يمنح درع الدراجة شخصيته، بينما الحماية تحافظ على هذه الشخصية ضد الشمس والأمطار والغبار. الخطوات التالية ليست مجرد جمالية؛ بل تحدد مدى طول عمر الإصلاح وكيفية تأقلمه مع المناخ الصعب لظروف الركوب. الرحلة من لوحة مُصلحة إلى سطح مقاوم ومتوازن ولامع تتطلب احترام خصائص المواد البلاستيكية وتقنية منضبطة تبقي السطح خاليًا من التلوث وطبقات غير متساوية وأخطاء يمكن أن تعيق التصاق الطلاء ونوعية النهاية. في هذا الفصل، نستعرض اللمسات النهائية - كيف تختار الطلاء المناسب، وكيف تطبّقه بسيطرة، وكيف تبني حماية مقاومة، وكيف تضيف تعديلات رقيقة تحوّل درع مُصلح إلى شيء يبدو قويًا كما يشعر به عندما تقوده. سندمج إرشادات عملية من الأساليب المختبرة، مع الالتزام بمبدأ أساسي: تصرف البلاستيك بشكل مختلف عن المعدن، والطلاءات التي نضعها عليه يجب أن تأخذ في الاعتبار هذه الاختلافات دون التضحية بالمتانة أو الجماليات.
قرار اختيار الطلاء يبدأ باعتراف بأن دروع الدراجات النارية تحتاج إلى طلاءات مصممة خصيصًا للسطوح البلاستيكية. الطلاءات التقليدية المستخدمة في السيارات، رغم قدرتها في العديد من السياقات، قد تواجه صعوبات في التصاقها مع البلاستيك بسبب اختلاف معدلات التمدد والانكماش، وطاقة السطح، وجود مواد تساعد في فصل القوالب والمرونة. لتجنب التشقق أو الانفصال أو التحلل الداخلي، يجب أن يقترن نظام اللون بطبقة أساسية متوافقة مع البلاستيك والملء تحته. الطريق نحو نتيجة نهائية متينة ومتخصصة يبدأ بهذه الأساس: طبقة أساسية مخصصة للبلاستيك يمكنها إنشاء مفتاح موثوق على السطح العاري أو المُصلح، ثم طبقات اللون المصنعة للبلاستيك، وأخيرًا طبقة طلاء شفافة تحمي وتُغلّف مع الحفاظ على اللمعان. في الممارسة العملية، يعني هذا التسلسل اختيار طبقة أساسية مخصصة للبلاستيك تعمل مع أنظمة الأكريليك أو الإيبوكسي أو الأورتيان التي تتوافق مع الطبقة العليا، ثم تطبيق اللون الأساسي بعناية وصبر. الغرض من كل طبقة يبقى ثابتًا عبر المشاريع: تعزيز التصاق الطبقات، بناء اللون، وحماية من عوامل البيئة. النتيجة يجب أن تكون مجالًا لونًا موحدًا مع سطح ناعم ومستوي بصري ولا دليل على الإصلاح تحته.
أثناء تخطيط مرحلة اللون، يصبح البيئة المحيطة شريكًا صامتًا في النجاح. عمل الطلاء والنهائيات على البلاستيك يستفيد من بيئة مُتحكم بها حيث تكون مستويات الغبار منخفضة، والرطوبة معتدلة، ودرجة الحرارة مستقرة. حتى انحرافات طفيفة في درجة الحرارة والرطوبة يمكن أن تسبب جفافًا غير متساوٍ للطلاء، مما يؤدي إلى نسيج مشابه لجلد البرتقال أو تدفق أو فجوات تكشف عن فشل الفن في تسطيحه. مكان نظيف خالي من الغبار - سواء داخل ورشة عمل ذات تهوية مناسبة أو تحت خيمة في الطقس الهادئ - يحسن بشكل كبير فرص نتيجة ممتازة. استخدام بندقية رش مخصصة أو نظام رش عالي الجودة يساعد في الحفاظ على نمط رش متساوٍ، وهو أمر ضروري لتحقيق طبقات متساوية ونظيفة تطلبها نهاية بلاستيكية نظيفة. المسافة بين فوهة الرش والسطح مهمة أكثر على البلاستيك من المعدن، حيث يمكن أن تُخفي طبقات أ thicker عيوب طفيفة. على البلاستيك، مسافة مُحكمة تبلغ 25 إلى 30 سم تؤدي عادةً إلى أفضل النتائج، خاصة عند الجمع بين طبقات رقيقة ومتساوية وحركة مقصودة تقلل من التدفق والانسكاب.
القرار بشأن الطلاء يبدأ باعتراف بأن المظلات البلاستيكية تحتاج إلى طلاءات مصممة خصيصًا للأسس البلاستيكية. الطلاءات التقليدية المستخدمة في السيارات، رغم قدرتها في العديد من السياقات، قد تواجه صعوبات في التصاقها على البلاستيك بسبب اختلاف معدلات التمدد والانكماش، وطاقة السطح، وجود مواد تساعد على فصل الأشكال ومواد مرنة. لتجنب التشقق أو التصاق طبقة لاحقة أو انفصال داخلي صغير، يجب أن يقترن نظام اللون بطبقة أساسية ترتبط فعليًا بالبلاستيك وبالمادة المُملأ تحته. الطريق نحو طلاء متين وذو مظهر احترافي يبدأ بهذه القاعدة: طبقة أساسية مخصصة للبلاستيك يمكنها إنشاء مفتاح موثوق على السطح العاري أو المصلح، ثم طبقات لون مصممة للبلاستيك، وأخيرًا طبقة شفافة تحمي وتحمي مع الحفاظ على اللمعان. في الممارسة، يعني هذا التسلسل اختيار طبقة أساسية للبلاستيك مصممة لنظام اليوريثان أو الإيبوكسي أو الأكريليك التي تتوافق مع الطبقة العليا، ثم تطبيق اللون الأساسي بعناية وصبر. تبقى غاية كل طبقة ثابتة عبر المشاريع: تعزيز التصاقها، بناء اللون، وحماية ضد عوامل البيئة. النتيجة يجب أن تكون مجال لون موحد مع سطح ناعم ومستوي بصري ولا دليل على الإصلاح تحته.
عند التخطيط لمرحلة اللون، يصبح البيئة المحيطة شريكًا صامتًا في النجاح. عمل الطلاء والانتهاء على البلاستيك يستفيد من بيئة مسيطر عليها حيث تكون مستويات الغبار منخفضة، والرطوبة معتدلة، ودرجة الحرارة مستقرة. حتى الانحرافات الصغيرة في درجة الحرارة والرطوبة يمكن أن تسبب جفافًا غير منتظم للطلاء، مما يؤدي إلى نسيج مشابه للبرتقال، أو تدفق أو فقاعات تكشف عن فشل المهارة. مكان نظيف وخلو من الغبار - سواء كان داخل ورشة عمل مع تهوية مناسبة أو تحت مظلة في الطقس المعتدل - يحسن بشكل كبير فرص نتيجة ممتازة. استخدام بندقية رش مخصصة أو نظام رش عالي الجودة يساعد في الحفاظ على نمط رش متساوٍ، وهو أمر ضروري لتحقيق طبقات متساوية تطلبها طلاءات البلاستيك النظيفة. المسافة بين فوهة الرش والسطح تهم أكثر على البلاستيك من المعدن، حيث يمكن لطبقات thicker أن تخفي عيوب صغيرة. على البلاستيك، مسافة 25 إلى 30 سم مسيطر عليها تؤدي غالبًا إلى نتائج موحدة، خاصة عند الجمع بين طبقات رقيقة ومنتظمة وحركة مقصودة تقلل من التدفق والانسكاب.
اختيار اللون والخلط أكثر من خيارات جمالية. إذا كنت تقوم بطلاء منطقة مُضرّة لتتطابق مع باقي المظلة، فإن الهدف هو تحقيق انتقال سلس حيث تكون المنطقة المصلحة غير قابلة للتعرف عليها من الأجزاء المحيطة. يتطلب هذا مطابقة لون دقيقة، طبقة أساسية موحدة عند الحاجة، ووعي بأن نسيج سطح البلاستيك يمكن أن يؤثر على عمق اللون المدرك. في العديد من الحالات، قد يتطلب تصليح جزء من المظلة الاهتمام الزائد بحافة التموج أو تطبيق رذاذ لون خفيف على الإصلاح لمساعدة الألوان على الدمج. الهدف ليس مطابقة اللون المثالية رقميًا فقط، بل مطابقة بصرية تبدو مستمرة تحت الضوء العادي أثناء القيادة. عندما يكون الإصلاح جزءًا من استعادة شاملة أو إذا كنت تستهدف إعادة طلاء كاملة، فقد تنتهي بتنظيف السطح حتى يصبح بلاستيكًا نقيًا وإعادة كتابة قصة اللون بأكملها - كل لوحة تُعامل كجزء من لون متناسق ومصمم بعناية. في أي حالة، يجب أن تكون الطبقة الأساسية التي تلي اللون مخصصة للبلاستيك وقدرة على إنشاء رابط دائم بين السطح المصلح والطبقة العليا.
تقنية تطبيق طبقات اللون هي حيث تتحول الانضباط إلى جمال. ابدأ بتحضير سطح جيد بعد الطبقة الأساسية، وتأكد من عدم وجود غبار أو زيت أو بقع أصابع على السطح. منظف آمن للبلاستيك يساعد في إزالة الزيوت والمنتجات التي يمكن أن تعيق التصاقها. بعد التنظيف، يجب تنظيف السطح بقطعة قماش خالية من الغبار وتركه يجف تمامًا قبل تطبيق اللون. عند الرسم، طبقات رقيقة متكررة هي القاعدة. نمط مائل أو متقاطع يساعد في تجنب التدفق ويضمن توزيعًا متساويًا للصبغة على منحنى المظلة. عدد الطبقات المطلوبة عادةً للوصول إلى اللون الكامل هو ثلاث إلى أربع، ولكن يجب تعديله بناءً على قوة اللون وصلاحية الإصلاح تحته. يجب أن يكون لكل طبقة نافذة قصيرة من الوقت لتجف قبل تطبيق الطبقة التالية. هذه النافذة عادة ما تكون 20 إلى 30 دقيقة في ظروف داخلية عادية، لكنها قد تختلف حسب الرطوبة ودرجة الحرارة. منهجية صبور ومنضبطة ستمنع العيوب الشائعة التي تؤثر على الانتهاءات المنزلية، مثل التجمع أو التدفق أو الترطيب غير المنتظم الذي يجعل اللون يبدو مظلمًا أو مبقعًا.
تسلسل الانتهاء - ال primer، واللون، والواقي الشفاف - يBenefit أيضًا من بعض التحسينات التي يمكن أن ترفع النتيجة دون تحويل مهمة DIY إلى عيادة احترافية. أولاً، التغطية ليست مجرد خطوة لمنع تسرب اللون؛ بل هي أداة لحفظ حدود الحواف وخلق حدود واضحة بين المناطق المصلحة والطلاء الحالي. التغطية الدقيقة حول المنطقة المعالجة تضمن أن الحواف لا تذوب أو تصبح ضبابية، مما قد يكشف عن الإصلاح تحت أشعة قوية. ثانيًا، نعومة السطح مهمة. إذا كان السطح البلاستيكي له سطح خشن قليلاً، فإن تلميعه بقسوة رقيقة قبل الـ primer يمكن أن يساعد الـ primer على الالتصاق ويخلق أساسًا ناعمًا. بعد الرسم، يمكن إجراء مسح خفيف بقطعة قماش ملتصقة لإزالة أي غبار عشوائي، مما يضمن أن الطلاء يبدو مثاليًا عند تصوير الغطاء أو مشاهدته عن قرب. ثالثًا، أثناء تطبيق اللون، يمكن عادة معالجة أي اختلاف في اللون أو فرق طفيف في اللون عن طريق تعديل اللون قليلاً في الطبقة التالية أو استخدام مرحلة تفتيح خفيفة فوق منطقة الحدود. الواقع العملي هو أن التعديلات الصغيرة والمقيدة يمكن أن تنتج تباينًا بصريًا يبدو سلسًا تحت معظم ظروف الإضاءة، دون التأثير على هوية لون الصفحة بأكملها.
إذا كانت إصلاحاتك تتطلب أكثر من مجرد لون وطبقة واقي شفافة - إذا كانت الخدوش سطحية ولكن الطبقة الأساسية ما زالت مرئية، أو إذا كنت تريد استعادة قطعة مُتضررة بشكل كبير إلى حالة مماثلة للعرض - ففكر في خطوات إضافية تضيف عمقًا وطول عمر. تلميع بالماء بين الطبقات هو تقنية يستخدمها بعض الركاب لتقليل العيوب، لكن يجب القيام بها بعناية بخطوات تدرجية للقسوة وماء كمصدر للزيت لتجنب التصاقات أو علامات دوائر. بعد جفاف الطبقة الواقي الشفافة النهائية، يمكن تلميعها بقسوة دقيقة جداً ومع مستوى ضغط محدد لتحقيق سطح زجاجي عندما يتم ت suivant بالفرن باستخدام مركب مخصص للبلاستيك. مرحلة الفرنسة هي لمسة نهائية تحسن عمق ووضوح الطلاء، خاصة في الألوان الداكنة حيث تكون العيوب مثل الخدوش الدقيقة أكثر وضوحًا. يمكن لفرن متقن أن يعيد إحياء أقصى لمعان، مما يساعد الطلاء على انعكاس الضوء بشكل متساوٍ ويمنح اللوحة مظهرًا شبه جديد. إذا كنت تفضل مظهرًا أكثر هدوءًا، يمكنك أيضًا اختيار طبقة واقي شفافة ذات لمعان مطفي أو لامع، لكن يجب أن تفهم أن هذه الأنواع من الطلاء ستتطلب صيانة مختلفة وقد تبرز خصائص سطح مختلفة مقارنة بطلاء لامع.
لن يكون الفصل كاملًا دون الاعتراف بالواقع العملي الذي لا تستحق جميع الإصلاحات إعادة تجديد كاملة للطلاء. بالنسبة للإصلاحات الصغيرة حيث الهدف هو الاستعادة وليس إعادة تجديد اللون بالكامل، قد تختار منهجًا موجهًا: تلميع السطح قليلاً، وتطبيق بوليش بلاستيكي متوافق لإعادة لمعانه الأصلي، وحماية بطبقة واقي رقيقة وقصيرة الأمد تعيد تطبيقها حسب الحاجة. من ناحية أخرى، بالنسبة لإعادة رسم كاملة أو مشروع استعادة حيث تحتاج كل قصة للغطاء إلى إعادة كتابة، يصبح العملية رقصة مخططة: إزالة، تمهيد، لون، واقي، وتجفيف - كل خطوة متناغمة بعناية لضمان أن الطلاء النهائي موحد عبر جميع الأجزاء ولا يحتوي على مؤشرات مرئية للإصلاح. عند التردد، قم بممارسة على لوحة تجريبية أو قطعة اختبار لضبط تقنية الرش، كثافة اللون، وسلوك التجفيف قبل الالتزام بالغطاء الفعلي.
بالإضافة إلى التقنية، تهمّة العقلية التي تجلبها إلى رسم وحماية الغطاء البلاستيكي المعالج بنفس القدر من الأهمية كما يهم تسلسل الخطوات نفسها. الصبر، النظافة، والتنظيم تحول مهمة DIY محتملة إلى عملية قابلة للتنبؤ وتكرار. خطط مسبقًا لخلط اللون، اختبر أنماط الرش، ووثق عدد الطبقات ووقت التجفيف. محطة عمل نظيفة بإضاءة جيدة تساعدك على اكتشاف المشاكل مثل الغبار أو الانحراف في اللون أو تفتيح الحواف مبكرًا في العملية، مما يوفر لك إعادة العمل المكلفة. المظهر النهائي يجب أن يكون توازنًا بين الجمال والقوة الهيكلية - ألوان تتطابق، عمق يذهل، وطبقة حماية يمكن أن تتحمل الأمطار، الشمس، والخدش العرضي لرحلة دراجة نارية.
للمتابعين الذين يبحثون عن سياق إضافي وإجراءات مدعومة، يوفر دليل موثوق حول إصلاحات البلاستيك ورسمه تقنيات مفصلة واعتبارات منتجات تتوافق مع النهج الموصوف هنا. يقدم هذا المورد تقنيات مدعومة من الخبراء ونصائح منتجات لإصلاح ورسم مواد البلاستيك لدراجات نارية، بما في ذلك التركيز على الـ primers والواقيات الشفافة الخاصة بالبلاستيك بالإضافة إلى الخطوات العملية لتحقيق نتائج متينة وعالية الجودة. Honda fairings collection يمكن أن يكون مرجعًا مفيدًا لفهم كيف تؤثر أشكال وأشكال مختلفة على منهجية الرسم، مطابقة اللون، واحتياجات إنهاء مجموعة متنوعة من تصميمات الغطاء.
خارج التقنية، الإطار الذهني الذي تجلبه إلى رسم وحماية دروع الدراجات النارية البلاستيكية المعاد إصلاحها يهم بنفس القدر من التسلسل نفسه. الصبر، النظافة، والتنظيم تحول مهمة DIY التي قد تكون فوضوية إلى عملية قابلة للتنبؤ بها وتكرارها. اخطط مسبقًا لخلط اللون، اختبار أنماط الرش، وتوثيق عدد الطبقات ووقت الشفاء. محطة عمل مرتبة مع إضاءة جيدة تساعدك في اكتشاف المشكلات مثل حبيبات الغبار، انحراف اللون، أو تفتيح الحواف مبكرًا في العملية، مما يوفر لك إعادة العمل المكلفة. المظهر النهائي يجب أن يكون مزيجًا متوازنًا بين الجاذبية البصرية والصلابة الهيكلية - ألوان تتطابق، عمق يُذهل، وطبقة واقية يمكنها تحمّل الأمطار، الشمس، والاحتكاك العشوائي لرحلة على الطريق.
بالنسبة للقراء الذين يبحثون عن سياق إضافي وإجراءات مدعومة، يوفر دليل موثوق حول إصلاحات البلاستيك ورسمه تقنيات مفصلة واعتبارات المنتجات التي تتوافق مع المناهج المذكورة هنا. توفر هذه الموارد تقنيات مدعومة من الخبراء ونصائح لاختيار المنتجات لإصلاح ورسم دروع الدراجات النارية البلاستيكية، بما في ذلك التركيز على البنسات الخاصة بالبلاستيك والطلاءات العليا بالإضافة إلى الخطوات العملية لتحقيق نتائج قوية وعالية الجودة. يمكن أن يكون مرجعًا مفيدًا لفهم كيف تؤثر الأشكال المختلفة والتكوينات على منهجية الرسم، وتوافق الألوان، واحتياجات إنهاء مجموعة متنوعة من تصميمات الدروع..
Final thoughts
في النهاية، اللمسات الأخيرة ليست مجرد بعد الاعتبار ولكن هي ذروة التحضير الدقيق، الاختيارات المادية المدروسة، والتقنية المنضبطة. عمر الإصلاح، ووضوح اللون، وعمق اللمعان يعتمد جميعها على كيفية توازنك بين الالتصاق، سلامة اللون، ومتانة الحماية. إذا وجدت أن مراحل اللون والواقي متساويتين، وإذا احترمت سلوك البلاستيك باستخدام البنسات والطلاءات العليا المناسبة، فإن دروعك المعاد إصلاحها لن تبدو جديدة من المصنع فحسب، بل ستتحمل الطقس وال磨损 من الحياة على الطريق. النتيجة هي عرض متكامل وواثق لجزء الجسم في دراجتك النارية - إنهاء مقصود يعكس الاهتمام، الانتباه للتفاصيل، والتزام واضح بحفظ قيمة وجمال دراجتك.