















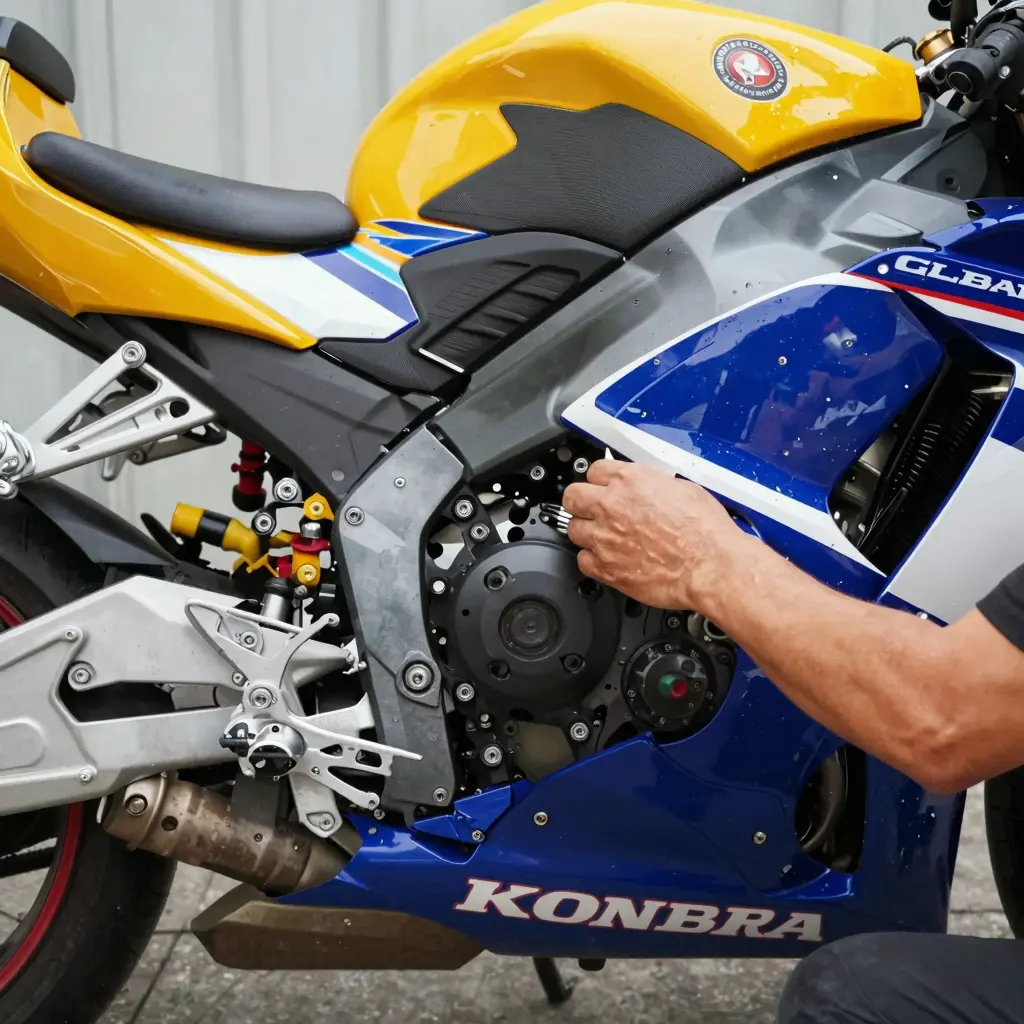
Wenn es um das Besitzen eines 2005 Honda CBR1000RR geht, ist die Aufrechterhaltung seines ästhetischen Erscheinungsbildes und der Leistung von entscheidender Bedeutung für Motorradliebhaber und Geschäftsinhaber gleichermaßen. Das Anbringen von Verkleidungen erhöht nicht nur das Aussehen des Motorrads, sondern spielt auch eine entscheidende Rolle bei dem Schutz seiner Komponenten vor Umweltverschleiß und -schäden. Verkleidungen fungieren als wichtiger Schutz gegen Schmutz, Wind und Feuchtigkeit, wodurch sie ein unverzichtbarer Bestandteil der Motorradwartung werden. Darüber hinaus kann die Wahl von maßgefertigten Verkleidungen Ihr Fahrerlebnis verbessern, indem sie persönliche Akzente bieten, die Ihre Individualität widerspiegeln. Mit einer Vielzahl von Designs und Farben verfügbar, können diese individuellen Optionen den Wert und das Aussehen Ihres Motorrads erheblich steigern. Für jene, die hochwertige Verkleidungen suchen, die Funktionalität und Stil verbinden, Summit Fairings stellt sich als zuverlässige Quelle heraus, die eine umfangreiche Auswahl bietet, die für die Honda CBR-Reihe geeignet ist. Ob Sie ein altes Klassiker restaurieren oder ein bereits beeindruckendes Fahrzeug modernisieren, die Investition in neue Verkleidungen wird zu einer klugen Wahl, die Langlebigkeit und ästhetische Zufriedenheit gewährleistet.
Wie man neue Verkleidungen am 2005 Honda CBR1000RR montiert
Das Montieren neuer Verkleidungen an Ihrem 2005 Honda CBR1000RR kann sowohl das ästhetische Erscheinungsbild als auch die Leistung Ihres Motorrads verbessern. Obwohl es auf den ersten Blick wie eine einschüchternde Aufgabe erscheint, werden durch diese einfachen Schritte ein reibungsloser Installationsprozess gewährleistet. Dieser Leitfaden richtet sich an Geschäftsinhaber, die möglicherweise nicht über umfangreiche mechanische Erfahrung verfügen, daher sind klare Anweisungen und nützliche Tipps im gesamten Prozess enthalten.
Tools and Materials Needed
Bevor Sie beginnen, sammeln Sie die notwendigen Werkzeuge und Materialien:
- New Fairings: Stellen Sie sicher, dass sie für den 2005 Honda CBR1000RR geeignet sind. Verkleidungen hier durchsuchen.
- Socket Set: Ein mit metrischen Größen, vorzugsweise von 8 mm bis 12 mm.
- Screwdrivers: Sowohl flache Schraubendreher als auch Kreuzschraubendreher.
- Torque Wrench: Um sicherzustellen, dass Schrauben gemäß den Vorgaben des Herstellers angezogen werden.
- Kunststoffklemmen und Verschlüsse: Oft erforderlich, um die Verkleidungen zu befestigen.
- Safety Gear: Handschuhe und Sicherheitssonnenbrille, um sich während der Installation zu schützen.
Step-by-Step Installation Guide
Schritt 1: Vorbereitung des Motorrads
- Stellen Sie sicher, dass das Motorrad kalt ist: Lassen Sie das Motorrad abkühlen, falls es kürzlich benutzt wurde.
- Stellen Sie das Motorrad auf eine stabile Oberfläche: Verwenden Sie bei vorhandenem Angebot einen Motorradständer.
Tip: Machen Sie Fotos der vorhandenen Verkleidungen, bevor Sie sie entfernen. Dies dient als Referenz beim Einbau der neuen.
Schritt 2: Entfernen der alten Verkleidungen
- Finden und entfernen Sie die Schrauben und Verschlüsse: Beginnen Sie mit den Seitenverkleidungen und prüfen Sie, ob Schrauben unter dem Sitz oder anderen Komponenten versteckt sind.
- Vorsichtig die Verkleidungen abhebeln: Verwenden Sie ein Kunststoff-Trim-Werkzeug, um Schäden zu minimieren.
Tip: Arbeiten Sie langsam und halten Sie ein Behältnis für Schrauben und Verschlüsse bereit. Dadurch vermeiden Sie, Teile zu verlieren.
Schritt 3: Reinigen des Motorradrahmens
- Den Rahmen abwischen: Verwenden Sie ein Mikrofasertuch, um Staub und Schmutz zu entfernen. Falls nötig, kann ein mildes Entfetter verwendet werden, jedoch stellen Sie sicher, dass kein Rückstand zurückbleibt.
Tip: Eine saubere Oberfläche ist entscheidend dafür, dass die neuen Verkleidungen richtig haften.
Schritt 4: Probefitting der neuen Verkleidungen
- Die neuen Verkleidungen mit vorhandenen Haltepunkten ausrichten: Vor dem Festziehen alles, legen Sie die neuen Verkleidungen in Position.
- Stellen Sie sicher, dass alle Löcher korrekt ausgerichtet sind: Passen Sie gegebenenfalls an.
Tip: Falls einige Löcher nicht übereinstimmen, überprüfen Sie nochmals, ob die richtigen Verkleidungsteile für das Modelljahr verwendet werden.
Schritt 5: Verkleidungen befestigen
- Beginnen Sie mit den unteren Befestigungspunkten: Dies hilft dabei, die Verkleidung während der Installation zu stabilisieren.
- Verwenden Sie einen Drehmoment-Schraubendreher: Folgen Sie den Vorgaben des Herstellers für die Drehmomentangaben.
Tip: Ziehen Sie die Schrauben allmählich in diagonalen Muster (wie bei einem Reifen) an, um eine gleichmäßige Spannung zu gewährleisten.
Schritt 6: Endkontrollen und Anpassungen
- Prüfen Sie nochmals alle Schrauben: Stellen Sie sicher, dass alles fest und sicher ist.
- Überprüfen Sie die Passform jeder Verkleidung: Es sollten keine Lücken zwischen den Verkleidungen und dem Motorradkörper sein.
Tip: Sehen Sie sich nochmals Ihre Referenzbilder an, um die Passform zu vergleichen und notwendige Anpassungen vorzunehmen.
Conclusion
Sobald die neuen Verkleidungen installiert und auf eine korrekte Passform überprüft wurden, können Sie zurücktreten und Ihr Werk bewundern! Dieser Prozess verbessert nicht nur das Aussehen Ihres CBR1000RR, sondern kann auch Aerodynamik und Leistung steigern.
Für weitere Informationen zur Auswahl der richtigen Verkleidungen, besuchen Sie diese Ressource zu maßgefertigten Verkleidungen. Last but not least, always consider having a professional inspect your installation-we hope these steps make it easy for you!
Essential Tools for Installing Fairings on a 2005 Honda CBR1000RR
To successfully install new fairings on your 2005 Honda CBR1000RR, gather the following essential tools:
- Socket Set: A comprehensive socket set will help you remove and install various bolts.
- Torque Wrench: Ensure bolts are tightened to the manufacturer’s specifications.
- Die Installation eines Fairing Bolt Kits auf Ihrem Suzuki GSXR 600 ist eine wichtige Wartungsaufgabe, die die Erscheinung Ihres Fahrrads erheblich verbessern kann, während sie dessen strukturelle Integrität sicherstellt. In diesem Leitfaden gehen wir Schritt für Schritt durch den detaillierten Installationsprozess, benötigte Werkzeuge, Tipps und häufige Fallen, die Sie vermeiden sollten.: A variety of screwdrivers (Phillips and flat) will be needed for different screws.
- Pliers: Useful for gripping and manipulating various components.
- Trim Removal Tools: Plastic trim removal tools can help avoid scratching your bike’s surface while removing existing fairings.
- Heat Gun or Hairdryer: Helpful for warming up adhesive on old fairings or for fitting new fairings if necessary.
- Safety Glasses and Gloves: Protect your eyes and hands during installation.
Before starting the installation process, ensure you have gathered all the necessary tools and check out our selection of custom Honda fairings to get the look you desire for your bike!
Selecting the Right Fairings for the Honda CBR1000RR
When it comes to customizing or replacing the fairings on your Honda CBR1000RR, selecting the right fairings is crucial for both performance and aesthetics. Here are some key factors to consider while making your choice:
Material
The material of the fairings greatly influences their durability and weight. The most common materials include:
- ABS Plastic: This is popular for its strength and resistance to impact. ABS plastic fairings tend to be affordable and provide decent protection for your bike, making them a practical choice for everyday riders.
- Fiberglass: If you’re looking for something lightweight and customizable, fiberglass might be the way to go. It’s often used in racing settings, but can be more fragile than ABS. Be cautious about the installation, as fiberglass can be more challenging to fit perfectly.
- Carbon Fiber: For those who want a premium look and performance, carbon fiber offers excellent strength-to-weight ratios and brings an exclusive feel. However, it is generally more expensive than other materials.
Style and Fit
The style of fairings can enhance the visual appeal of your bike. Consider the following:
- OEM vs Aftermarket: Original Equipment Manufacturer (OEM) fairings ensure a perfect fit while aftermarket options might offer unique designs but can vary in fit. Brands like Summit Fairings provide a range of aftermarket options specifically designed for the CBR1000RR.
- Racing Fairings: If you intend to use your bike for racing, opt for aggressive designs that can enhance aerodynamics and aesthetics. Brands like NT Fairings are well-known for their kits designed for high performance, offering both style and functionality.
Buying from Reputable Sources
It’s essential to purchase fairings from trusted suppliers to ensure quality and fitting. Look out for sources like Sport Fairings, known for its durability and style. Alternatively, Fairing Master provides a vast array of options and is renowned for quality. Choosing reputable suppliers guarantees you receive fairings that not only fit well but also enhance the bike’s performance and lifespan.
Selecting the right fairings will significantly impact the overall look and feel of your Honda CBR1000RR. Keep in mind these factors before making a choice, and remember that quality should never be compromised for price.
Common Issues During Fairing Installation on the 2005 Honda CBR1000RR
Installing new fairings on a Honda CBR1000RR can be a rewarding undertaking that enhances the bike’s aesthetic and aerodynamics. However, it also comes with several potential challenges that can make the process frustrating if you’re not prepared. Below is a summary of common issues encountered during installation, along with corresponding solutions to help prevent mistakes.
Common Problems and Their Solutions
| Problem | Potential Solution |
|---|---|
| Misalignment of fairings | Adjust brackets and mounting points for proper fit. |
| Over-tightening screws | Use a torque wrench to ensure proper screw tension. |
| Missing or damaged clips | Replace clips with OEM parts to ensure secure fitting. |
| Scratches during installation | Use protective cloths or padding to prevent damage. |
| Inadequate tools for installation | Use a complete set of tools, including correct sizes. |
| Wrong fairing kit for the model | Verify fairing kit compatibility before purchase. |
| Difficulty in fitting due to bent parts | Straighten or replace bent components as needed. |
| Electrical issues after installation | Check connections and wiring thoroughly after fitting. |
Preparation Advice
Before starting the installation, familiarize yourself with the specific fairing components of your 2005 CBR1000RR. Ensure you have all the necessary tools, including the right screwdrivers, pliers, and a torque wrench. Review the installation manual thoroughly to understand the sequence of steps.
For those looking to replace their fairings with custom options, check out our custom fairings collection.
Conclusion
By anticipating these challenges and preparing solutions ahead of time, the fairing installation process can be conducted much more smoothly. Always remember to take your time, as rushing can lead to errors that could have otherwise been avoided. Happy riding and customizing your CBR1000RR!
Comparison Table of Fairings for the 2005 Honda CBR1000RR
| Fairing Type | Key Features | Pros | Cons | Price Range |
|---|---|---|---|---|
| OEM-Ersatzteile | Made of high-quality ABS, fits perfectly, 21 pieces included. | Durable, perfect fit | Higher cost than aftermarket options | $500 – $700 |
| Injection Molded Fairings | UV-protected ABS, pre-drilled for easy installation. | OEM-style appearance, solid quality | Limited design options | $400 – $650 |
| Custom Graphics | Unique designs, aesthetic enhancements, various colors available. | Personalized look, enhances aesthetics | May require professional installation | $300 – $800 |
| All-Black Racing Style | Sleek black finish, designed for a sporty aesthetic. | Aggressive look, popular among racers | Might not be street-legal in all areas | $350 – $600 |
Für weitere Informationen zu OEM fairings and Hochleistungsset, check out these links!
This table provides a quick reference for business owners looking to make informed decisions on fairing options for the Honda CBR1000RR. Each type caters to different needs, from aesthetic enhancements to OEM replacements. Choosing the right fairing can significantly impact not only the motorcycle’s appearance but also its performance in terms of aerodynamics and durability.
Maintenance Tips for Fairings
Maintaining fairings is crucial for ensuring longevity and performance of your motorcycle. Here are some essential tips for cleaning, protecting from damage, and inspecting for wear after installing new fairings on your 2005 Honda CBR1000RR.
1. Cleaning
Regular cleaning is key to preserving the appearance and longevity of your fairings. Follow these guidelines:
- Use Mild Soap: Clean the fairings with a mixture of mild soap and warm water. This helps to remove dirt and grime without damaging the finish of the fairings.
- Avoid Harsh Chemicals: Steer clear of abrasive cleaners or solvents that can cause scratches and degrade the material. You can find motorcycle-specific cleaners that are safe for the fairings.
- Weiche Tücher oder Schwämme: When cleaning, always use soft materials to avoid scratching the surface. Consider microfiber cloths that are gentle yet effective.
2. Protecting from Damage
- Das Wachsen Ihrer Kappen nicht nur die Glanz, sondern auch eine Schutzschicht gegen UV-Strahlen und Straßenabfälle. Investieren Sie in hochwertige Motorradpolituren, wie diejenigen, die in: Applying a quality wax can provide a protective layer against UV rays and pollutants. This reduces fading and protects against minor impacts.
- Avoid Parking in Direct Sunlight: When possible, park your motorcycle in shaded areas or use a cover to protect it from harsh sunlight that can cause fading and heat damage.
- Stand Up Grates: Install grates or use motorcycle covers when storing your bike. This prevents incidental damage from objects falling on the fairings and guards against dust accumulation.
3. Regular Inspections
- Check for Cracks or Chips: Regularly inspect the fairings for any signs of damage, such as cracks or chips. Early detection allows for prompt repairs, preventing further deterioration.
- Listen for Unusual Noises: During your rides, pay attention to unusual vibrations or noises; these may indicate that the fairings are loose or improperly secured.
- Seasonal Check-Up: Make it a practice to inspect the fairings at least once per season, especially before and after long rides or during extreme weather conditions.
For more information including various styles and options for fairings, check out our custom Honda fairings collection or explore featured products.
By following these maintenance tips, you’ll not only keep your fairings looking great but also contribute to the overall longevity and performance of your motorcycle.
“I couldn’t be happier with the quality and color of my new fairings from Summit Fairings. The customer service was outstanding, and I absolutely love how my bike looks now!”
- A satisfied customer on 1200Artists
This quote exemplifies the satisfaction that users find with products from Summit Fairings, reinforcing the credibility of our offerings as you embark on your project to install new fairings on your 2005 Honda CBR1000RR.
In summary, replacing the fairings on your 2005 Honda CBR1000RR can significantly enhance its aesthetics and aerodynamics, ultimately improving performance. Throughout this guide, we’ve covered essential steps, from gathering tools to removing old fairings and installing new ones. We emphasized the need for patience and precision to achieve a seamless fit. Moreover, investing in high-quality, custom-fitted fairings ensures durability and style that can transform your motorcycle into a true standout on the road.
Now that you’re well-equipped with the knowledge needed for a successful installation, it’s time to elevate your ride. Don’t settle for less! Head over to Summit Fairings today to explore our wide selection of custom-fitted fairings specifically for the CBR1000RR. Our offerings combine quality craftsmanship with urgent delivery, ensuring your bike not only looks great but is also ready for the road in no time. Make your upgrade today and experience the ultimate blend of form and function!