















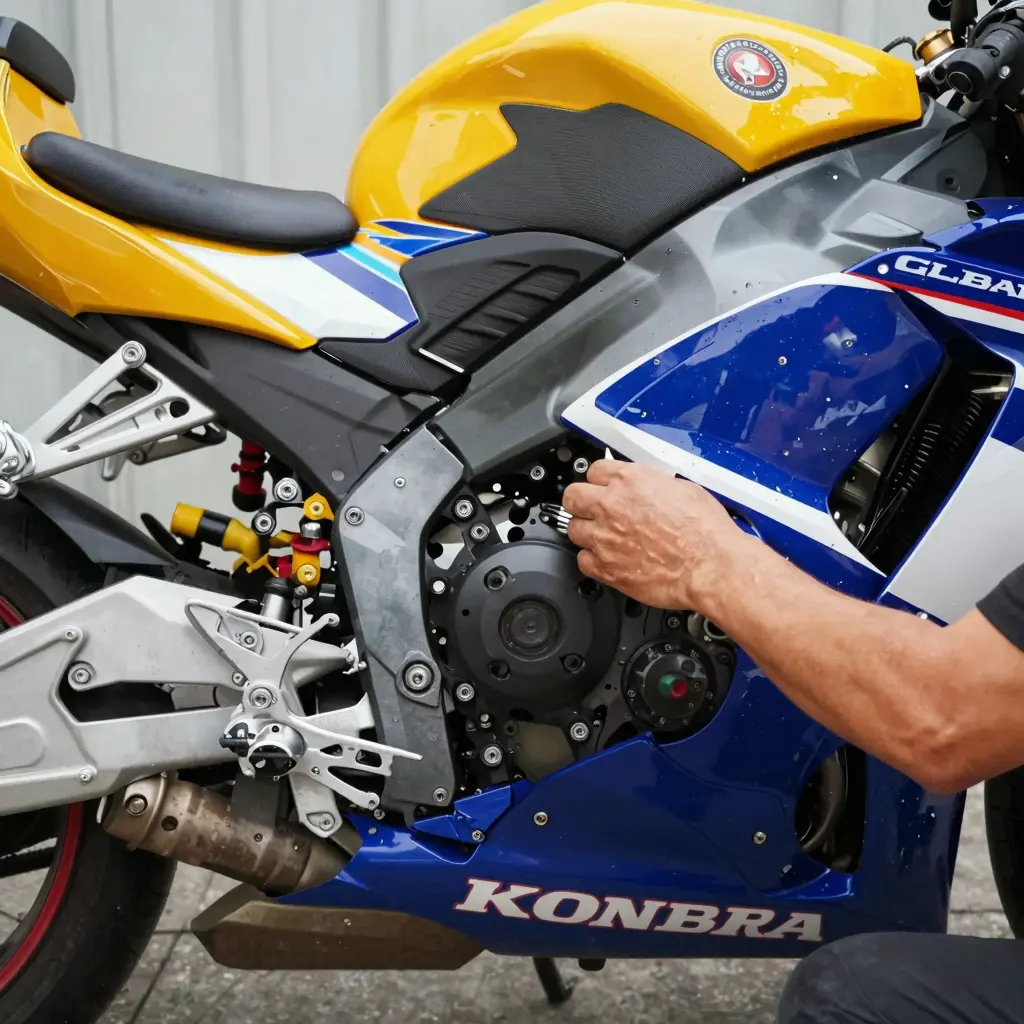
Lorsqu'il s'agit de posséder un Honda CBR1000RR de 2005, maintenir son apparence esthétique et sa performance est primordial pour les amateurs de motos et les propriétaires d'entreprises. Installer des garde-boues améliore non seulement l'apparence de la moto, mais joue également un rôle critique dans la protection de ses composants contre l'usure et les intempéries. Les garde-boues servent de barrière essentielle contre les débris, le vent et l'humidité, ce qui en fait un élément indispensable de l'entretien des motos. De plus, opter pour des garde-boues sur mesure peut améliorer le style de votre moto, offrant des touches personnalisées qui reflètent votre individualité. Avec une gamme de designs et de couleurs disponibles, ces options personnalisées peuvent considérablement augmenter la valeur et l'apparence de votre moto. Pour ceux qui recherchent des garde-boues de qualité qui allient fonction et élégance, Summit Fairings se distingue comme une source fiable, proposant une sélection étendue adaptée à la gamme Honda CBR. Que vous restauriez un classique ancien ou que vous modernisiez déjà une moto impressionnante, investir dans de nouveaux garde-boues devient un choix intelligent qui assure une longévité et une satisfaction esthétique.
Comment installer de nouveaux garde-boues sur le Honda CBR1000RR de 2005
L'installation de nouveaux garde-boues sur votre Honda CBR1000RR de 2005 peut améliorer à la fois l'apparence esthétique et les performances de votre moto. Bien que cela puisse sembler une tâche intimidante, suivre ces étapes simples assurera un processus d'installation fluide. Ce guide s'adresse aux propriétaires d'entreprises qui n'ont pas nécessairement une grande expérience mécanique, donc des instructions claires et des conseils utiles sont fournis tout au long du processus.
Outils et matériaux nécessaires
Avant de commencer, rassemblez les outils et matériaux nécessaires :
- Installer de nouveaux carénages sur un Yamaha R6 peut être un projet DIY gratifiant pour les amateurs de motos et les propriétaires d'entreprises souhaitant améliorer leurs véhicules. Suivez ces instructions étape par étape pour assurer une installation réussie :: Assurez-vous qu'ils sont conçus pour le Honda CBR1000RR de 2005. Parcourir les garde-boues disponibles ici.
- Socket Set: Un avec des tailles métriques, idéalement entre 8 mm et 12 mm.
- Screwdrivers: À la fois à tête plate et à cruciforme.
- Torque Wrench: Pour vous assurer que les vis sont serrées selon les spécifications du fabricant.
- Crochets en plastique et fixations: Souvent nécessaires pour sécuriser les garde-boues.
- Safety Gear: Gants et lunettes de protection pour vous protéger pendant l'installation.
Step-by-Step Installation Guide
Étape 1 : Préparer la moto
- Assurez-vous que le cycliste est froid: Laissez la moto refroidir si elle a été récemment utilisée.
- Placez la moto sur une surface stable: Utilisez un support pour moto si disponible.
Tip: Prenez des photos des garde-boues existants avant de les retirer. Cela servira de référence lors de l'installation des nouveaux.
Étape 2 : Retirer les anciens garde-boues
- Localisez et retirez les vis et les fixations: Commencez par les garde-boues latéraux, vérifiez s'il y a des vis cachées sous le siège ou d'autres composants.
- Décollez doucement les garde-boues: Utilisez un outil en plastique pour éviter les dommages.
Tip: Travaillez lentement et utilisez un contenant pour les vis et les fixations. Cela empêchera de perdre des pièces.
Étape 3 : Nettoyer le châssis de la moto
- Essuyez le châssis: Utilisez un chiffon microfibre pour enlever la poussière et les débris. Si nécessaire, un nettoyant léger peut être utilisé, mais assurez-vous qu'aucun résidu ne reste.
Tip: Une surface propre est cruciale pour que les nouveaux garde-boues adhèrent correctement.
Étape 4 : Essai des nouveaux garde-boues
- Alignez les nouveaux garde-boues avec les supports existants: Avant de fixer quoi que ce soit, placez les nouveaux garde-boues en position.
- Vérifiez que tous les trous sont alignés correctement: Ajustez si nécessaire.
Tip: Si certains trous ne s'alignent pas, vérifiez à nouveau que les bonnes pièces de garde-boues sont utilisées pour l'année du modèle.
Étape 5 : Fixer les garde-boues en place
- Commencez par les points de fixation inférieurs: Cela aide à stabiliser le garde-boues pendant l'installation.
- Utilisez une clé à couple: Suivez les directives du fabricant pour les spécifications de couple.
Tip: Serrez les vis progressivement en diagonale (comme vous le feriez avec un pneu) pour assurer un serrage équilibré.
Étape 6 : Vérifications finales et ajustements
- Vérifiez à nouveau toutes les vis: Assurez-vous que tout est bien serré et sécurisé.
- Inspectez l'ajustement de chaque panneau de garde-boues: Il ne doit pas y avoir de gaps entre les garde-boues et le corps de la moto.
Tip: Regardez à nouveau vos photos de référence pour comparer l'ajustement et apporter les ajustements nécessaires.
Conclusion
Une fois les nouveaux garde-boues installés et vérifiés pour un bon ajustement, vous pouvez reculer et admirer votre travail ! Ce processus améliore non seulement l'apparence de votre CBR1000RR, mais peut aussi améliorer l'aérodynamique et les performances.
Pour plus d'informations sur le choix des bons garde-boues, consultez cette ressource sur les garde-boues personnalisés. Last but not least, always consider having a professional inspect your installation-we hope these steps make it easy for you!
Essential Tools for Installing Fairings on a 2005 Honda CBR1000RR
To successfully install new fairings on your 2005 Honda CBR1000RR, gather the following essential tools:
- Socket Set: A comprehensive socket set will help you remove and install various bolts.
- Torque Wrench: Ensure bolts are tightened to the manufacturer’s specifications.
- Un guide étape par étape pour installer les protections arrière pour motos: A variety of screwdrivers (Phillips and flat) will be needed for different screws.
- Pliers: Useful for gripping and manipulating various components.
- Trim Removal Tools: Plastic trim removal tools can help avoid scratching your bike’s surface while removing existing fairings.
- Heat Gun or Hairdryer: Helpful for warming up adhesive on old fairings or for fitting new fairings if necessary.
- Safety Glasses and Gloves: Protect your eyes and hands during installation.
Before starting the installation process, ensure you have gathered all the necessary tools and check out our selection of custom Honda fairings to get the look you desire for your bike!
Selecting the Right Fairings for the Honda CBR1000RR
When it comes to customizing or replacing the fairings on your Honda CBR1000RR, selecting the right fairings is crucial for both performance and aesthetics. Here are some key factors to consider while making your choice:
Material
The material of the fairings greatly influences their durability and weight. The most common materials include:
- ABS Plastic: This is popular for its strength and resistance to impact. ABS plastic fairings tend to be affordable and provide decent protection for your bike, making them a practical choice for everyday riders.
- Fiberglass: If you’re looking for something lightweight and customizable, fiberglass might be the way to go. It’s often used in racing settings, but can be more fragile than ABS. Be cautious about the installation, as fiberglass can be more challenging to fit perfectly.
- Carbon Fiber: For those who want a premium look and performance, carbon fiber offers excellent strength-to-weight ratios and brings an exclusive feel. However, it is generally more expensive than other materials.
Style and Fit
The style of fairings can enhance the visual appeal of your bike. Consider the following:
- OEM vs Aftermarket: Original Equipment Manufacturer (OEM) fairings ensure a perfect fit while aftermarket options might offer unique designs but can vary in fit. Brands like Summit Fairings provide a range of aftermarket options specifically designed for the CBR1000RR.
- Racing Fairings: If you intend to use your bike for racing, opt for aggressive designs that can enhance aerodynamics and aesthetics. Brands like NT Fairings are well-known for their kits designed for high performance, offering both style and functionality.
Buying from Reputable Sources
It’s essential to purchase fairings from trusted suppliers to ensure quality and fitting. Look out for sources like Sport Fairings, known for its durability and style. Alternatively, Maître Fairing provides a vast array of options and is renowned for quality. Choosing reputable suppliers guarantees you receive fairings that not only fit well but also enhance the bike’s performance and lifespan.
Selecting the right fairings will significantly impact the overall look and feel of your Honda CBR1000RR. Keep in mind these factors before making a choice, and remember that quality should never be compromised for price.
Common Issues During Fairing Installation on the 2005 Honda CBR1000RR
Installing new fairings on a Honda CBR1000RR can be a rewarding undertaking that enhances the bike’s aesthetic and aerodynamics. However, it also comes with several potential challenges that can make the process frustrating if you’re not prepared. Below is a summary of common issues encountered during installation, along with corresponding solutions to help prevent mistakes.
Common Problems and Their Solutions
| Problem | Potential Solution |
|---|---|
| Misalignment of fairings | Adjust brackets and mounting points for proper fit. |
| Over-tightening screws | Use a torque wrench to ensure proper screw tension. |
| Missing or damaged clips | Replace clips with OEM parts to ensure secure fitting. |
| Scratches during installation | Use protective cloths or padding to prevent damage. |
| Inadequate tools for installation | Use a complete set of tools, including correct sizes. |
| Wrong fairing kit for the model | Verify fairing kit compatibility before purchase. |
| Difficulty in fitting due to bent parts | Straighten or replace bent components as needed. |
| Electrical issues after installation | Check connections and wiring thoroughly after fitting. |
Preparation Advice
Before starting the installation, familiarize yourself with the specific fairing components of your 2005 CBR1000RR. Ensure you have all the necessary tools, including the right screwdrivers, pliers, and a torque wrench. Review the installation manual thoroughly to understand the sequence of steps.
For those looking to replace their fairings with custom options, check out our custom fairings collection.
Conclusion
By anticipating these challenges and preparing solutions ahead of time, the fairing installation process can be conducted much more smoothly. Always remember to take your time, as rushing can lead to errors that could have otherwise been avoided. Happy riding and customizing your CBR1000RR!
Comparison Table of Fairings for the 2005 Honda CBR1000RR
| Fairing Type | Key Features | Pros | Cons | Price Range |
|---|---|---|---|---|
| Pièce de rechange OEM | Made of high-quality ABS, fits perfectly, 21 pieces included. | Durable, perfect fit | Higher cost than aftermarket options | $500 – $700 |
| Injection Molded Fairings | UV-protected ABS, pre-drilled for easy installation. | OEM-style appearance, solid quality | Limited design options | $400 – $650 |
| Custom Graphics | Unique designs, aesthetic enhancements, various colors available. | Personalized look, enhances aesthetics | May require professional installation | $300 – $800 |
| All-Black Racing Style | Sleek black finish, designed for a sporty aesthetic. | Aggressive look, popular among racers | Might not be street-legal in all areas | $350 – $600 |
Pour plus d'informations sur OEM fairings and Kit de performance élevée, check out these links!
This table provides a quick reference for business owners looking to make informed decisions on fairing options for the Honda CBR1000RR. Each type caters to different needs, from aesthetic enhancements to OEM replacements. Choosing the right fairing can significantly impact not only the motorcycle’s appearance but also its performance in terms of aerodynamics and durability.
Maintenance Tips for Fairings
Maintaining fairings is crucial for ensuring longevity and performance of your motorcycle. Here are some essential tips for cleaning, protecting from damage, and inspecting for wear after installing new fairings on your 2005 Honda CBR1000RR.
1. Cleaning
Regular cleaning is key to preserving the appearance and longevity of your fairings. Follow these guidelines:
- Utiliser un savon doux: Clean the fairings with a mixture of mild soap and warm water. This helps to remove dirt and grime without damaging the finish of the fairings.
- Avoid Harsh Chemicals: Steer clear of abrasive cleaners or solvents that can cause scratches and degrade the material. You can find motorcycle-specific cleaners that are safe for the fairings.
- Soft Cloths or Sponges: When cleaning, always use soft materials to avoid scratching the surface. Consider microfiber cloths that are gentle yet effective.
2. Protecting from Damage
- Cirez régulièrement: Applying a quality wax can provide a protective layer against UV rays and pollutants. This reduces fading and protects against minor impacts.
- Éviter de stationner sous le soleil direct: When possible, park your motorcycle in shaded areas or use a cover to protect it from harsh sunlight that can cause fading and heat damage.
- Stand Up Grates: Install grates or use motorcycle covers when storing your bike. This prevents incidental damage from objects falling on the fairings and guards against dust accumulation.
3. Regular Inspections
- Check for Cracks or Chips: Regularly inspect the fairings for any signs of damage, such as cracks or chips. Early detection allows for prompt repairs, preventing further deterioration.
- Listen for Unusual Noises: During your rides, pay attention to unusual vibrations or noises; these may indicate that the fairings are loose or improperly secured.
- Seasonal Check-Up: Make it a practice to inspect the fairings at least once per season, especially before and after long rides or during extreme weather conditions.
For more information including various styles and options for fairings, check out our custom Honda fairings collection or explore featured products.
By following these maintenance tips, you’ll not only keep your fairings looking great but also contribute to the overall longevity and performance of your motorcycle.
“I couldn’t be happier with the quality and color of my new fairings from Summit Fairings. The customer service was outstanding, and I absolutely love how my bike looks now!”
- A satisfied customer on 1200Artists
This quote exemplifies the satisfaction that users find with products from Summit Fairings, reinforcing the credibility of our offerings as you embark on your project to install new fairings on your 2005 Honda CBR1000RR.
In summary, replacing the fairings on your 2005 Honda CBR1000RR can significantly enhance its aesthetics and aerodynamics, ultimately improving performance. Throughout this guide, we’ve covered essential steps, from gathering tools to removing old fairings and installing new ones. We emphasized the need for patience and precision to achieve a seamless fit. Moreover, investing in high-quality, custom-fitted fairings ensures durability and style that can transform your motorcycle into a true standout on the road.
Now that you’re well-equipped with the knowledge needed for a successful installation, it’s time to elevate your ride. Don’t settle for less! Head over to Summit Fairings today to explore our wide selection of custom-fitted fairings specifically for the CBR1000RR. Our offerings combine quality craftsmanship with urgent delivery, ensuring your bike not only looks great but is also ready for the road in no time. Make your upgrade today and experience the ultimate blend of form and function!