















Introduction
오토바이 패러릴을 광택내는 것은 그들의 빛나는 모습과 무결성을 유지하는 데 필수적이며, 특히 최고 수준의 서비스를 제공하려는 사업주들에게 중요합니다. 오토바이 산업이 번영하면서 고객 기대가 높아지면서 패러릴 유지에 대한 깊은 이해가 필요하게 되었습니다. 이 가이드는 준비 단계, 효과적인 광택 과정, 전문가 팁을 탐구하여 오토바이 패러릴이 최상의 상태로 보이도록 하며, 이는 수명을 연장하고 브랜드 이미지를 향상시킵니다.
Tables of Contents
제1장: 오토바이 패러릴 광택의 예술을 마스터하기: 기본 청소 및 점검
- 완벽한 마무리 결과를 위한 오토바이 패러릴의 필수 청소 및 점검
- 오토바이 패러릴 광택을 마스터하기: 주요 준비 및 세부 처리 기술
제2장: 오토바이 패러릴을 재생시키기 위한 필수 광택 기법
- 오토바이 패러릴의 완벽한 광택을 위한 도구 및 기법
- 오토바이 패러릴 광택을 위한 필수 안전 규정 및 체계적인 실천 방법
제3장: 완벽한 마무리 결과를 위한 오토바이 패러릴 광택의 예술을 마스터하기
- 오토바이 패러릴 광택 전에 효과적인 표면 준비를 위한 필수 단계
- 완벽한 오토바이 패러릴을 위한 점진적 사포 작업 마스터하기
제1장: 오토바이 패러릴 광택의 예술을 마스터하기: 기본 청소 및 점검
오토바이 패러릴의 필수 청소 및 점검을 위한 준비: 완벽한 마무리 결과
오토바이 패러릴을 광택할 때, 일반적으로 ABS 플라스틱 및 유리 섬유와 같은 재료로 만들어지는 경우, 고급 품질의 내구성 있는 결과를 얻기 위해 철저한 준비가 핵심입니다. 이 준비 단계는 철저한 청소 과정과 광택 과정에 방해가 되는 손상 요소를 식별하기 위한 철저한 점검을 포함합니다. 당신의 패러릴이 깨끗하고 존재하는 결함이 기록되어 있다면, 외관을 개선하고 오토바이 외부의 수명을 연장하는 복원의 기반을 마련하게 됩니다.
필요한 자재 모으기준비 단계를 시작하기 위해, 모든 필요한 자재를 포함하는 종합적인 도구 키트를 준비하세요. 이는 중단을 줄이고 효율성을 보장합니다. 자동차 디테일링에 적합한 약간의 비누 또는 플라스틱 친화적인 청소제를 계획하세요. 이는 패러릴을 거친 화학물질로부터 보호합니다. 부드러운 스펀지나 마이크로파이버 천은 더 많은 긁힘을 유발하지 않도록 청소에 필수적입니다. 깨끗한 물로 채워진 두 개의 버킷은 세척된 천을 헹구기 위해 사용되며, 이소프로필 알코올은 표면을 효과적으로 지방 제거하기 위해 필수적입니다. 광택 과정 동안 오염을 피하기 위해 보호하려는 영역을 마스킹하기 위해 페인터 테이프와 플라스틱 가방을 준비하세요. LED가 포함된 조명과 확대경은 작은 결함과 손상을 발견하는 데 도움이 됩니다. 이 도구들은 준비가 정확한지 확인하는 데 매우 가치 있습니다. 마지막으로, 손을 보호하기 위해 장갑을 착용하세요.
초기 청소 실행청소 과정의 첫 번째 단계는 먼지, 벌레, 도로 먼지 등을 제거하기 위한 초기 세척입니다. 고압 세척기는 시커스를 손상시키거나 균열에 먼지를 밀어 넣을 수 있으므로 저압 물을 사용하세요. 세척 후, 한 버킷에 약간의 비누를 혼합하세요. 두 버킷 세척 방법은 필수적입니다: 하나는 비눗물, 다른 하나는 오염된 천을 헹구기 위한 것입니다. 이 접근법은 천이 세척될 때 깨끗하다는 것을 보장함으로써 표면의 재오염을 방지합니다.
세척 중에는 직선으로 움직여서 회전 운동 대신 부드럽게 문지르세요. 이는 스와일 마크를 만들지 않도록 합니다. 가장자리, 통풍구, 장착 지점에 특히 주의를 기울이세요. 이 지역은顽固한 먼지가 많고 추가주의가 필요합니다. 만족할 만큼 청소가 끝났다면, 즉시 마이크로파이버 타월로 잘 헹구고 말리세요. 이는 패러릴 표면에 물 반점을 일으킬 수 있는 잠재적인 위험을 피하기 위해 필수적입니다.
깊은 청소 및 지방 제거 작동초기 청소 이후, 광택을 위한 완벽한 표면을 확보하기 위해 깊은 청소 및 지방 제거가 필요합니다. 이 단계에서는 마이크로파이버 천으로 약간 젖은 이소프로필 알코올로 표면을 닦습니다. 이 단계는 광택 제품이 광택 과정에서 효과적으로 부착되지 못하게 할 수 있는 잔여 오일, 왁스 잔여물, 실리콘 또는 남은 광택제를 제거합니다.
타나 벌레 잔해와 같은 특히 강한 오염물질을 처리하기 위해서는 디테일링 스프레이로 윤활된 클레이 바를 사용하는 것이 좋습니다. 클레이 바 기법은 표면을 긁지 않고 매립된 먼지를 제거하는 데 효과적이며, 더 매끄러운 마무리를 가능하게 합니다. 청소 후, 어두운 곳에서 최소 30분 동안 공기 건조시켜 표면에 잔류 수분이 없도록 해야 합니다.
결함에 대한 철저한 점검초기 청소 후, 광택 작업을 위해 완벽한 표면을 준비하기 위해 깊은 청소와 기름 제거가 필요합니다. 이 단계에서는 이소프로필 알코올로 약간 젖은 마이크로파이버 천으로 패닝 표면을 닦습니다. 이 단계는 광택 제품이 광택 과정 중에 효과적으로 부착되지 못하게 할 수 있는 잔여 오일, 왁스 잔여물, 실리콘 또는 남은 광택제를 제거합니다.
타나 벌레 조각과 같은 특히顽固한 오염물질의 경우, 세부 처리 스프레이로 윤활된 클레이 바를 사용하는 것이 좋습니다. 클레이 바 기법은 표면 아래에 박힌 먼지를 제거하면서 표면을 긁지 않고 더 매끄러운 마무리를 가능하게 합니다. 청소 후, 최소 30분 동안 그늘진 장소에서 패닝을 공기 건조시켜야 합니다. 이는 잔류 습기를 방지하기 위함입니다.
결함 검사패닝이 깨끗하고 마른 후, 철저한 검사를 수행해야 합니다. 표면의 긁힘, 균열, 산화, 또는 자외선 손상의 징후(보통 백색의 창백한 표면으로 나타납니다)를 찾기 위해 밝고 기울어진 조명을 사용하십시오. 확대경은 일반적으로 눈에 띄지 않는 세부 사항을 발견하는 데 도움이 됩니다. 표면의 감촉에 주의를 기울이세요; 깨끗한 손가락이나 장갑을 사용하여 패닝을 따라 움직이면 어떤 고점이나 저점이 있는지, 그리고 표면의 균일성을 판단할 수 있습니다.
이 검사 단계에서 더 깊은 구조적 문제도 확인해야 합니다. 손톱보다 넓은 균열은 광택 전에 에폭시 수리가 필요할 수 있음을 기억하세요. 깊은 긁힘이 발견되면, 광택을 위한 매끄럽고 안전한 표면을 보장하기 위해 샌딩이 필요합니다. 또한, 유연성 테스트를 수행할 때, 패닝이 균열이나 거미줄 모양의 손상을 보이지 않도록 가벼운 압력을 가해 확인해야 합니다. 이는 구조적으로 안정적이며 복원을 위해 준비되어 있음을 나타냅니다.인접 영역 마스킹.
어떤 광택 작업을 시작하기 전에, 패닝 인근 영역을 마스킹하는 것이 현명합니다. 이 행동은 광택 과정 중 헤드라이트, 페인트, 디케일이 손상되거나 긁히는 것을 방지하는 데 필수적입니다. 깨끗한 선을 만들기 위해 페인터 테이프를 효과적으로 사용하고, 모든 비패닝 구성 요소를 철저히 덮어야 합니다.
완벽한 마무리의 최선의 방법.
광택 준비 과정을 완료하려면 깨끗한 작업 환경을 유지하는 데 규율이 필요합니다. 먼지와 쓰레기 없이 그늘진 장소, 이상적으로는 차고를 선택하고, 50°F에서 80°F(10°C에서 27°C) 사이의 편안한 온도를 유지하세요. 이 온도 범위는 광택 제품의 빠른 건조와 화합물의 조기 경화를 방지하며, 이 두 가지 모두 결과에 방해가 될 수 있습니다.
특히 산화된 패닝을 다루는 경우, 이후 철저한 검사 과정으로 넘어가기 전에 플라스틱 복원제를 사용하는 것을 고려하세요. 이 사전 치료는 전체적인 시각적 효과를 향상시키고, 이후 광택 작업을 더 효과적으로 만듭니다. 전체 패닝 세트의 철저한 청소, 검사 및 준비에 약 1~2시간을 예산하세요.
요약하자면, 오토바이 패닝을 청소하고 검사하는 적절한 준비 단계는 광택 과정에서 우수한 결과를 얻는 데 필수적입니다. 이 철저한 접근법은 광택 시간에 빛나고 매끄러운 모습을 되찾을 수 있도록 보장하며, 패닝 재료가 손상되지 않고, 이상적으로는 수명을 연장시킬 수 있습니다. 준비 단계에 시간과 신경을 투자하는 것이 최종 마무리의 품질에 대한 보상을 받는다는 것을 기억하세요. 자동차 애호가들이 자동차의 미적 매력을 향상시키려는 경우, 이러한 기본 단계를 이해하는 것은 도로에서 열정을 유지하는 데 중요한 요소입니다.
오토바이 패닝 광택을 마스터하기: 핵심 준비 및 세부 처리 기술.
효과적인 오토바이 패닝 광택은 광택을 위한 적절한 준비 기술에 달려 있으며, 이는 매끄럽고 거울처럼 반짝이는 마무리를 달성하는 데 기반을 제공합니다. 이 과정에서 몇 가지 핵심 단계의 이해와 실행이 중요합니다: 세척, 스카핑, 샌딩, 건조 및 세부 처리. 각 단계는 서로 보완하며, 패닝의 미적 매력뿐만 아니라 수명을 연장하는 종합적인 방법론을 형성합니다.
패닝 세척 scuffing, 어떤 공격적인 기법을 적용하기 전에, 철저한 세척이 필수적입니다. 깨끗한 표면은 복원 노력에 손상을 입히지 않습니다. 먼저 패닝에 풍부한 눈 거품을 적용하세요. 거품은 내장된 오염물을 느슨하게 하는 프리 soaking 역할을 합니다. 부드러운 스폰지를 사용하여 표면을 부드럽게 닦으세요. 플라스틱이나 페인트를 긁지 않도록 주의하세요. 모든 부분을 닦은 후, 많은 물로 패닝을 헹구어 모든 비누와 오염물 잔여물을 완전히 제거하세요. 이 시점에서 패닝은 이후 단계에 방해가 되는 어떤 오염물도 없어야 합니다.
표면 스카핑
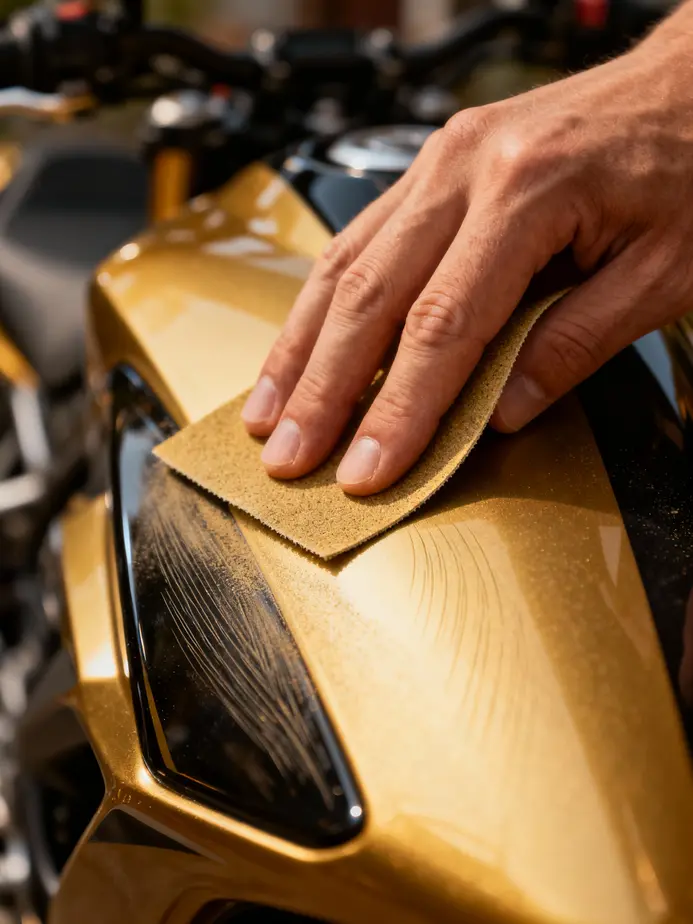
다음으로, 광택을 위한 패닝 표면을 준비하세요. 이 단계는 기존 마감을 무광으로 만들고, 광택 제품이 붙을 수 있는 '이빨' - 약간 더 거친 표면을 생성하는 것을 의미합니다. 400~600 그릿 샌딩페이퍼 또는 미세한 스코치 브라이트 패드를 사용하세요. 원형 운동으로 작업하면 가장 좋은 결과를 얻을 수 있으며, 이는 불균일한 표면을 만드는 위험을 줄입니다. 여기서 목표는 매끄러운 공장 마감을 제거하는 것이지만, 재료를 지나치게 얇게 하지 않도록 해야 합니다. 기억하세요, 패닝은 구조적 강도가 필요합니다. 급격한 샌딩을 피하여, 특히 도로의 진동이 표면에 가한 변경을 악화시킬 수 있으므로, 표면을 약화시키지 않도록 주의하세요. sanding, 특히 습식 연마를 포함합니다. 320에서 400의 더러운 그릿으로 물을 사용하여 이러한 결함을 효과적으로 평평하게 만드는 것을 시작하십시오. 표면이 물로 윤활되어 먼지를 최소화하도록 하십시오. 심한 긁힘을 처리한 후, 600에서 800 사이의 더 가늘은 그릿으로 전환하여 표면을 더욱 정교하게 만드십시오. 이 단계는 최상의 연마 작업에 필수적인 매끄러운 감촉을 제공할 것입니다. 연마 과정 동안 계속해서 작업을 점검하여 과도한 연마로 인한 영구적인 손상을 피하십시오.
완전히 건조시키기
연마 과정에서 물 자국을 방지하기 위해 페인팅을 올바르게 건조시키는 것이 필수적입니다. 균일한 공기를 사용하여 홈이나 구멍에 갇힌 물을 제거하고, 부드러운 마이크로파이버 타월로 마무리하십시오. 표면의 어떤 부분도 습기를 남기지 않도록 부드럽게 두드려 말리십시오. 연마 단계로 넘어가기 전에 확실히 확인하십시오.
연마 과정을 위한 세부 처리 기술
페인팅이 깨끗하고, 긁혀 있으며, 완전히 건조해졌다면, 이제 연마 및 광택 단계로 전환할 수 있습니다. 페인팅 재료(플라스틱 또는 도색 표면)에 적합한 특수 연마 화학제품을 적용하십시오. 이 경우 이중 작동 폴리셔가 가장 유용한 도구가 될 것입니다. 낮은 속도로 설정하여 약 1500~2000 RPM 범위 내에서 유지하고, 폼 또는 울 패드를 사용하여 적용하십시오. 이전 단계에서 발생한 산화, 안개, 그리고 스와일을 효과적으로 제거하기 위해 컷팅 화합물을 먼저 사용하십시오.
작은 겹치는 구역을 이동하며, 과도한 열을 생성하지 않도록 가벼운 압력을 유지하십시오. 과도한 열은 플라스틱을 변형시켜 지금까지의 모든 노력이 무의미하게 만들 수 있습니다. 이 단계를 완료한 후, 밝은 조명 아래에서 디테일링 스프레이로 표면을 닦으며 페인팅을 점검하십시오. 이는 진행 상황을 추적하고 이전 단계에서 남아 있는 잔여물들을 마지막으로 제거하는 데 도움이 됩니다.
표면이 만족스러울 때, 명확성을 위해 더 미세한 광택제를 사용하십시오. 이 미세한 광택제는 색상의 깊이와 광택을 강화하여 플라스틱이 새것처럼 보이게 합니다. 디테일링 과정에는 필요에 따라 여러 번의 적용이 포함될 수 있으며, 특히 초기에 중대한 산화나 긁힘이 있었던 경우에 특히 그렇습니다.
연마 후 보호 기술
당신의 노고를 고정하기 위해 보호성 마감재를 적용하는 것이 필수적입니다. 화학적으로 표면에 결합하는 세라믹 코팅이 권장됩니다. 이 코팅은 페인팅 표면에 강한 수분 배제층을 제공하여 물, 자외선, 그리고 도로 오염물에 대한 저항력을 크게 향상시킵니다. 이 코팅을 적용하는 것은 정밀도가 필요하며, 얇고 균일한 층을 사용하고, 최적 결과를 위해 24~48시간 동안 경화시켜야 합니다.
복원 후 정기적인 유지보수는 복원 후에 이루어져야 하며, 눈 거품 세척과 거친 청소 제품을 피하는 것이 중요합니다. 이는 오토바이 페인팅의 아름다운 표면을 보존하는 데 필수적입니다. 이 보호 층을 주기적으로 재도포하는 것—이상적으로는 반년마다—는 페인팅이 요소를 견디고, 오토바이가 도로를 위해 매끄럽고 준비된 상태로 유지되도록 보장할 것입니다.
결론적으로, 오토바이 페인팅의 연마 및 복원은 처음에는 어려워 보일 수 있지만, 단계별 접근법은 성공을 보장합니다. 준비, 디테일링, 보호의 구조화된 프로세스를 따르면, 어두운, 긁힌 페인팅을 차량의 매력적인 특징으로 바꿀 수 있으며, 외관뿐만 아니라 가치와 내구성도 향상시킬 수 있습니다. 특정 설정을 더욱 정교하게 하거나, 독특한 모델을 위한 사람들은 해당 오토바이 브랜드에 맞는 특수 제품을 찾을 수 있습니다. 서밋 페어링스, where you can explore a wide array of fairing options.
제2장: 오토바이 패러릴을 재생시키기 위한 필수 광택 기법
1. Tools and Techniques for Achieving a Flawless Buff on Motorcycle Fairings
Buffing motorcycle fairings is not just about restoring shine; it’s about refurbishing the motorcycle’s aesthetic and maintaining its health over time. The right tools and techniques are paramount for achieving that flawless finish. At the heart of this process lies a progression of steps that blend care with precision, allowing riders to rejuvenate their fairings to a showroom-like standard.
Key Buffing Techniques and Tools
To embark on the journey of buffing your motorcycle fairings, it’s imperative to start with the right tools. A standard toolkit for this endeavor should include a dual-action polisher, various grades of sandpaper, microfiber polishing pads, and polishing compounds tailored for either plastic or paint.
Initial Scuffing: This preparatory phase is essential for creating a suitable surface for polishing. Using sandpaper graded between 400 to 600 grit or a Scotch-Brite pad, lightly scuff the fairings in a circular motion. This method not only enhances paint adhesion but also retains the structural integrity of the fairings by avoiding aggressive material removal. It’s important to be gentle—this step is designed to create microscopic imperfections, or ‘tooth’, rather than to deplete the gelcoat layer.
Progressive Sanding: Following the initial scuff, the next step is progressive sanding. This encompasses a multi-stage process starting with 320-400 grit sandpaper, which will address deeper scratches, oxidation, or other surface imperfections. Progressing to finer grits of 600 and finally 800 will help you achieve that silky smooth result. Using increasingly finer grits minimizes the risk of creating new scratches while refining the surface finish.
Circular motions remain crucial throughout the sanding stages. This technique not only ensures an even application but also contributes to the overall finishing quality. Remember, excessive sanding can reduce the fairing’s structural strength, particularly under the strains experienced during rides. Therefore, moderation is key.
Wet Sanding Technique: To elevate the process, consider incorporating wet sanding. This technique utilizes water as a lubricant to significantly reduce dust and debris during the sanding stages, which elevates paint adhesion. As you implement this technique, ensure you keep the surface wet to improve the sanding experience and achieve a more refined finish. Not only does this method help maintain cleanliness, but it also allows you to achieve higher precision.
Preparing the Surface for Buffing
Once the sanding process is complete, a comprehensive cleaning of the fairings is essential. Utilize snow foam or a gentle cleaner to thoroughly wash the surface, lifting away any embedded dirt or oils. This task necessitates a gentle scrub with a soft sponge followed by a thorough rinse. Air drying and towel drying are critical steps, as they eliminate any potential contaminants that could undermine the polishing results. Engaging in this preparatory cleaning will lay an ideal foundation for the subsequent buffing stage.
Buffing for a Glossy Finish
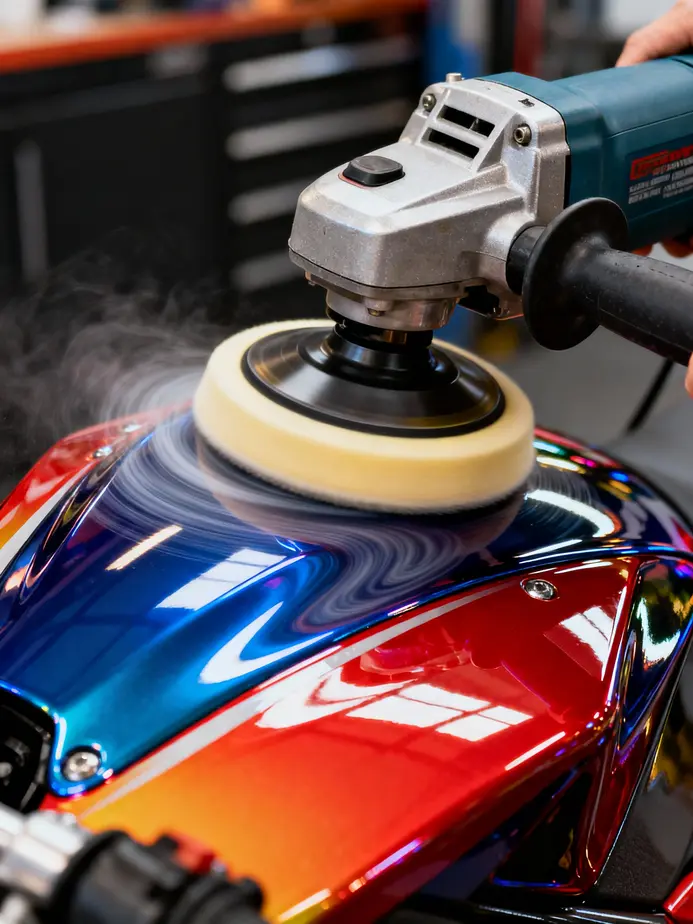
With the fairings cleaned and prepped, the buffing process can commence. Applying a specialized plastic or paint polishing compound is key. Use a dual-action polisher fitted with a microfiber pad; this equipment is designed to effectively remove swirls, oxidation, and haze while maintaining a fine finish. Operate the polisher at low speed and exert light pressure, working in small sections to ensure uniformity. Polishing compounds specifically formulated for motorcycle surfaces yield the best results,
After the initial polish, switch to a finer cutting polish or glaze. This step not only enhances the clarity but also deepens the fairing’s color. The final stage is applying a finishing polish, which should be buffed to a high gloss for that showroom shine. For those with carbon-fiber fairings, it’s imperative to apply a dedicated protectant, allowing at least 24 hours for the cure time. This protects the integrity of the fairings against environmental elements, ensuring they maintain their shine longer.
Advanced Techniques for Persistent Scratches
On the occasion that deeper scratches remain post-buffing, advanced techniques such as wet sanding and buffing may be necessary. Engaging in carefully controlled wet sanding will smooth out problematic areas without compromising the safety of the fairing. Transitioning through the appropriate grits and realizing when to stop sanding is vital to avoid overdoing it. After meticulously sanding, return to the buffing process to restore the shine and clarity.
In addition to these methods, the application of a ceramic coating could significantly enhance your fairings’ longevity and hydrophobic properties. These coatings serve as a barrier against road debris, UV damage, and moisture accumulation, simplifying future maintenance and keeping the motorcycle looking new for years.
Practical Tips for Optimal Results
To maximize the effectiveness of this buffing process, it is advisable to use motorcycle-specific products; these are formulated to prevent any detrimental impact on ABS plastic or painted surfaces. Furthermore, always conduct a test on a small section of the fairing, allowing you to gauge potential reactions before proceeding with the entire fairing.
Moreover, whenever possible, carry out your buffing in a dust-free environment. Dust can easily mar the achieved shiny finish, leading to disappointing results. By ensuring the workspace is clean, the polish will adhere correctly, reflecting light beautifully once the buffing is complete.
As an additional note for those feeling the urge for professional restoration—especially for high-end models such as Ducati fairings—consider integrating buffing into a broader bodywork restoration that may include primer, clear coat application, and comprehensive detailing. This comprehensive approach can elevate the fairing restoration project from basic polishing to full enhancement.
The art of buffing motorcycle fairings is an intricate dance between preparation, technique, and the right tools. Successfully following through the outlined steps will not only rejuvenate the fairings’ appearance but also improve the overall value and longevity of the motorcycle. Whether you’re tackling the job yourself or seeking professional assistance, understanding these key processes is fundamental in achieving that coveted finish that reflects the passion and pride of motorcycle ownership. For Honda enthusiasts, you might want to explore Honda fairing options and techniques at Summit Fairings to ensure your fairings are as stunning as your ride.
2. Essential Safety Protocols and Methodical Practices for Buffing Motorcycle Fairings
Buffing motorcycle fairings is not merely an aesthetic endeavor; it’s a meticulous process that demands a blend of skill and safety awareness. This subchapter will delve into the essential safety protocols and best practices required to buff motorcycle fairings effectively, ensuring that you can restore your bike’s appearance while minimizing risks and maximizing results.
The Importance of Safety in Buffing
Before commencing any buffing operation, acknowledging the significance of safety is paramount. Buffing involves tools and chemicals that could pose risks if not properly managed. A well-ventilated workspace, for example, is crucial to mitigate exposure to harmful fumes emitted from polishing compounds. This means working outdoors or in a garage with sufficient airflow. Ensure that all flammable materials are kept at a distance, as some polishing products can be combustible when exposed to heat.
Wearing appropriate protective gear cannot be understated. Protective gloves shield your skin from chemicals, while safety glasses guard your eyes against debris and compound splatters. A dust mask is also advised to prevent inhalation of fine particles, especially when sanding. Don’t overlook the importance of securing the fairings to a solid surface. Loose or improperly mounted fairings can shift unexpectedly, jeopardizing both the worker’s safety and the quality of the buffing session.
Preparing the Workspace
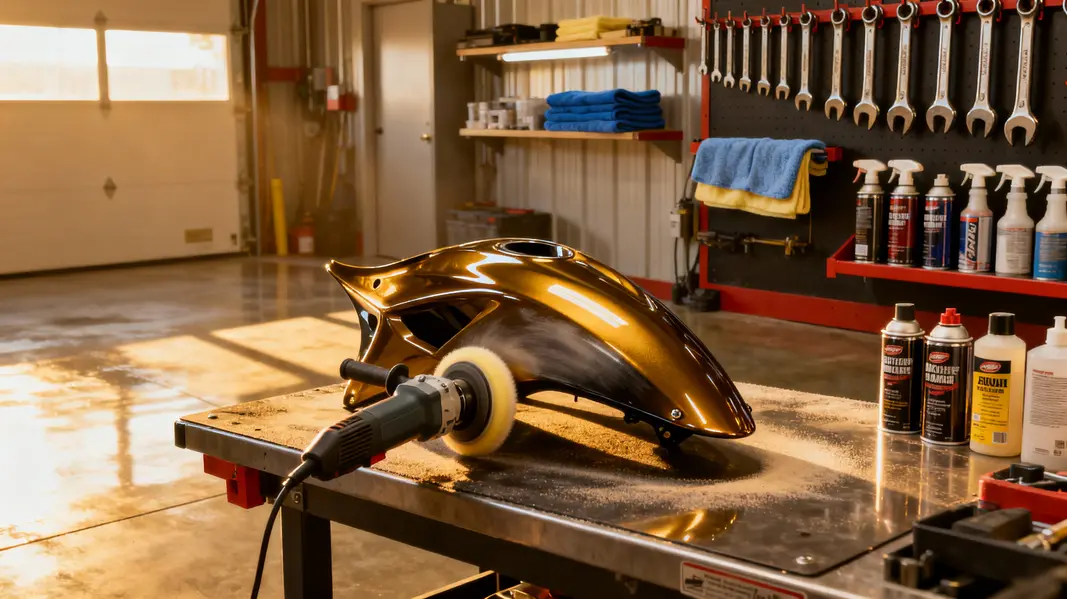
Your workspace plays a crucial role in the buffing process. Begin by ensuring that your environment is clean and organized. Remove any unnecessary items that could clutter your area, and ideally, lay down a drop cloth to catch any debris or polish splatters. A dust-free environment is paramount; the cleaner your workspace, the better your results. Consider utilizing a workbench or table where you can comfortably position the fairings at an optimal height for buffing.
Surface Treatment Considerations
Before diving into polishing, it’s necessary to prepare the surfaces you intend to buff thoroughly. Dirty or greasy surfaces can lead to significant imperfections during the buffing process, which can save you a lot of trouble later on. Following your initial cleaning phase, apply a treatment to degrease and etch the surface. This step will prevent flash rust, especially if there are metal components on the fairings. Rinse carefully to neutralize any cleaning residue, ensuring the surface is ready for sanding.
Technique and Tools for Effective Buffing
Buffing is both an art and a science that requires the right tools and techniques to achieve optimal results. For buffing motorcycle fairings, the ideal tool is often a dual-action polisher paired with the appropriate polishing pads designed specifically for plastics and painted surfaces. Given the nature of motorcycle fairings—often made from ABS or other sensitive materials—you must ensure that your polishing compounds are suitable. Using the wrong products can lead to damaging the surfaces you worked so hard to prepare.
Choosing the Right Compounds
Begin with a cutting compound to address lighter scratches and oxidation. This fundamental step sets the stage for the following finer polish stages, critical for achieving that high-gloss finish. Once the initial pollutants are eliminated, transition to a polishing compound that refines the surface further. Apply these products in small sections, ensuring that you use light pressure to prevent overheating and warping the plastic. This method enhances clarity and brilliance in the paint or coating without risking damage.
When working, remember that over-buffing in one area can lead to uneven surfaces. It’s best to regularly wipe down the area you’ve just buffed, allowing you to visually assess your progress and adjust pressure accordingly. Implementing a circular buffing motion can help evenly distribute the pressure, contributing to a uniform finish while avoiding gouges or distinct swirl marks.
Common Pitfalls to Avoid
While buffing motorcycle fairings is rewarding, many pitfalls can undermine your efforts. One common mistake involves using excessively coarse sandpaper during preparation, which can create thin spots on the fairing, rendering them vulnerable to cracking under stress. Sticking to sandpapers with grit no coarser than 220 is advisable, particularly on glossy surfaces, to avoid ruining the fairing’s integrity.
Another area to be wary of is the allure of accelerated techniques that bypass proper preparation. Rushing through the cleaning or sanding phase can lead to serious flaws in the finish that no amount of polishing will remedy. Ensure every stage—from cleaning to final buff—is meticulously executed. Take your time; the results will be worth the effort.
Post-Buffing Care
After you’ve achieved that desired shine, it’s essential to apply a protective wax or sealant compatible with the materials you’ve worked on. Such treatments guard against future environmental damage, providing an extra layer of protection against UV rays and dirt accumulation. Always test new products on a smaller area before applying them to the entire surface to ensure compatibility and avoid adverse reactions.
Reinstallation and Maintenance
Once your motorcycle fairings are buffed to perfection and adequately treated, it’s time for reinstallation. But before you affix them back onto your motorcycle, take a moment to assess the mounting hardware. Some materials can expand or contract due to temperature changes, leading to loose fittings that could vibrate over time. Using appropriate fasteners and ensuring they are secure is vital to avoid future issues while out on the road.
When storing your fairings, ensure they sit in a stable, dry environment. Major temperature shifts can lead to warping, especially in plastic materials. Securely store them in a place where they won’t be knocked over or exposed to harsh elements.
In conclusion, buffing motorcycle fairings entails a detailed process that balances safety with technique. Whether you are a seasoned motorcycle enthusiast or a first-time buffing aficionado, prioritizing safety protocols and understanding best practices will yield superior results in restoring your motorcycle’s fairings. Each step contributes to a final product that not only looks good but stands the test of time, allowing you to enjoy your ride with confidence. For more insights on motorcycle fairings and related products, consider exploring our selection of motorcycle fairings tailored to different models.
제3장: 완벽한 마무리 결과를 위한 오토바이 패러릴 광택의 예술을 마스터하기
1. Essential Steps for Effective Surface Preparation Before Buffing Motorcycle Fairings
To achieve a flawless finish when buffing motorcycle fairings, proper surface preparation is not just a preliminary task; it sets the stage for the entire process. By investing time and effort into preparing the fairings adequately, you can ensure that the buffing yields optimum results, restoring the vibrant shine of the fairings while preventing potential damage to the material. The following steps detail the recommended practices to prepare your motorcycle’s fairings effectively, allowing you to create the ideal conditions for a successful buffing job.
Commencing with Thorough Cleaning
The journey to pristine motorcycle fairings begins with a comprehensive cleaning. Start by selecting a suitable motorcycle cleaner or snow foam, known for its efficacy in lifting dirt, grease, and road grime without damaging the surface. Apply the cleaning solution with a sponge, using gentle circular motions to lift away contaminants. Ensure that you focus on areas commonly affected by dirt, such as lower sections of the fairings and wheel wells. Once you’ve scrubbed thoroughly, rinse the surface completely with water to avoid leaving any residue behind; leftover cleaning agents can interfere with the adhesion of polishing compounds applied later.
A key point to remember is to avoid harsh chemicals that may etch or damage the surface of your fairings. Sticking to motorcycle-specific products guarantees that you’re using the safest possible options tailored to the materials used in fairing construction.
Scuffing for a Better Bond
After cleaning, the next step involves lightly scuffing the surface. This stage is crucial as it not only deglosses the factory gelcoat or existing paint but also creates a mechanical ‘tooth’ that helps polishing compounds grip effectively during the buffing process. Using 400-600 grit sandpaper or a Scotch-Brite pad, apply gentle, circular motions, focusing on even light abrasion instead of aggressive sanding. It’s imperative to be cautious at this stage to prevent the creation of structural weaknesses in the plastic due to over-sanding. This precaution protects the integrity of your motorcycle fairings, ensuring they remain sturdy against the vibrations experienced during rides.
Progressive Wet Sanding for Improved Smoothness
If you encounter deeper imperfectio