


Introduction
Understanding the intricacies of painting plastic motorcycle fairings is crucial for both DIY enthusiasts and business owners in the motorcycle industry. This process not only enhances the aesthetic appeal of bikes but also contributes to their value and longevity. By the end of this piece, you will gain a thorough understanding of the essential steps involved, from surface preparation to applying a final clear coat. Each chapter delves into a key aspect of the painting process, revealing techniques and tips designed to ensure flawless results, protecting your investment, and potentially boosting your business’s reputation among customers who seek quality craftsmanship in motorcycle maintenance.
Tables of Contents
Chapter 1: Mastering Surface Preparation for Flawless Paint on Motorcycle Fairings
- Refined Techniques for Optimal Surface Preparation in Painting Plastic Motorcycle Fairings
- Navigating the Traps: Common Missteps in Surface Preparation for Motorcycle Fairings
Chapter 2: Ensuring Long-lasting Results: The Art and Science of Priming Plastic Motorcycle Fairings
- A Gateway to Perfect Paint: Unlocking the Benefits of Priming Plastic Motorcycle Fairings
- The Transformative Power of Priming: Enhancing Longevity and Beauty in Plastic Motorcycle Fairing Finishes
Chapter 3: Mastering the Art of Preparing Plastic Motorcycle Fairings for a Flawless Paint Finish
- Essential Steps to Achieve a Pristine Surface: Cleaning and Preparing Motorcycle Fairings for a Professional Paint Job
- The Foundation of Beauty: Priming and Topcoats for Plastic Motorcycle Fairings
Chapter 4: The Transformative Final Touch: Elevating Motorcycle Fairing Finish with 2K Clear Coat
- The Essential Role of 2K Clear Coat in Achieving Lasting Brilliance for Painted Plastic Motorcycle Fairings
- Polishing the Finish: Expert Techniques for Applying Clear Coat on Plastic Motorcycle Fairings
Chapter 1: Mastering Surface Preparation for Flawless Paint on Motorcycle Fairings
1. Refined Techniques for Optimal Surface Preparation in Painting Plastic Motorcycle Fairings
To achieve an impeccable paint finish on plastic motorcycle fairings, mastery of surface preparation techniques is indispensable. The process sets the stage for a durable and professional-quality appearance, and every detail counts.
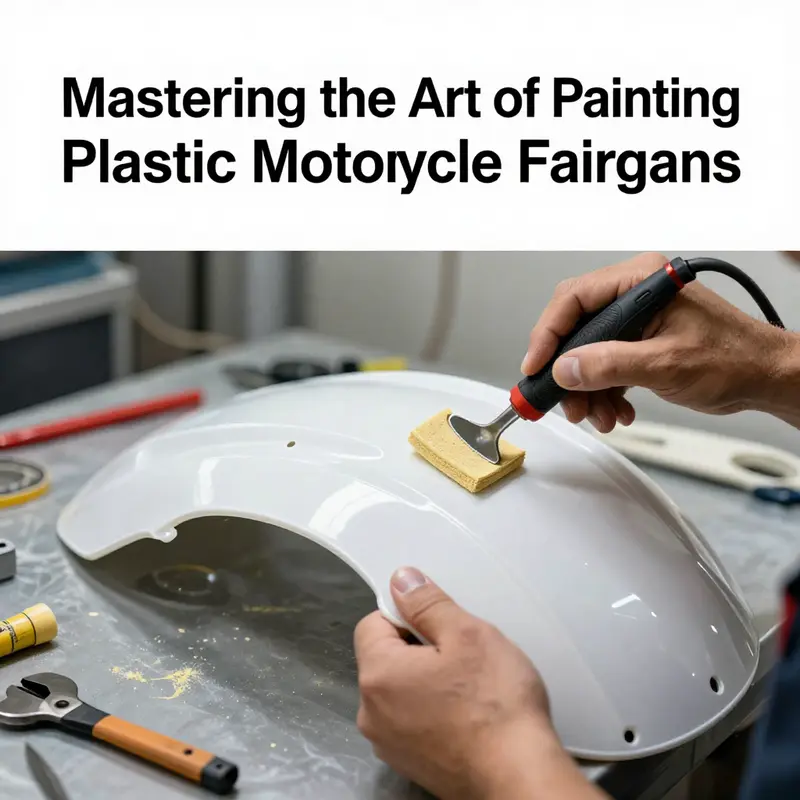
Preparing a motorcycle fairing starts with ensuring that the surface is impeccably clean. This initial step cannot be overemphasized. Thorough cleaning involves using a dedicated plastic cleaner or a powerful degreaser to eliminate oils, dirt, and any wax residues. These contaminants inhibit adhesion, and even minuscule particles could jeopardize the paint’s longevity. A clean surface is not just a preference; it’s a necessity for achieving optimal results. After a rigorous cleaning, the patron should employ a lint-free cloth to ensure no fibers remain.
Once the fairing is clean, the next step requires a specific approach to surface conditioning. Utilizing a plastic bonder is a sophisticated technique to enhance the paint’s adherence. The bonder acts by chemically treating the surface, creating microscopically rough anchor points across the fairing’s surface, which dramatically improves the bonding strength between the paint and the plastic. Applying this product meticulously according to the manufacturer’s instructions is critical, as it provides invaluable support against future peeling or flaking that would mar the appearance over time.
Equally vital is permitting the bonder to cure properly. Rushing this step can lead to diminished effectiveness, which may manifest later as a weakened paint job. Optimal curing time varies by product, but a patience-infused approach typically yields the best outcomes.
Sanding, too, is an art that must be practiced with precision. After the bonder has fully cured, lightly sand the treated areas using fine-grit sandpaper, ranging from 1200 to 2000 grit. This gentle abrasion serves two important functions: it smooths out minor imperfections and expands the surface area for the impending paint layer. Sanding should be performed with care, ensuring that you don’t create deep gouges but rather a subtly scalloped texture that can help facilitate the chemical bond between the plastic and paint.
Moreover, it’s essential to keep in mind the environmental factors during this crucial phase of preparation. Working in a dust-free zone will minimize the likelihood of particles infiltrating the fresh paint layers. If an ideal workspace isn’t available, consider improvising opportunities to capture dust or using a temporary shelter to shield your efforts from airborne muck.
Understanding the components of environmental conditions is paramount. Optimal temperatures should generally hover around 70°F to 80°F (21°C to 27°C), as both cold and excessively humid settings could interfere with how the paint adheres and cures. Avoiding direct sunlight ensures that drying times are consistent and less likely to trigger unsightly runs or blisters.
One common mistake is neglecting to address the edges and softer corners of fairings, which are often the most challenging areas for adhesion. Be vigilant in these spots, applying a bit more focus during both cleaning and sanding. If edges appear rough after sanding, a fine touch may still be warranted before painting even begins. Remember, stains or an uneven surface can create issues that may compromise the smooth finish desired.
The importance of using quality materials cannot be overstated. Investing in a premium plastic-specific primer will make a considerable difference in overall results. With the help of primers that cater specifically to plastic substrates, you can achieve an even distribution of paint coverage. For example, brands that recommend applying a bonding primer can significantly amplify adhesion properties. This layer is not simply an attachment but a bridge connecting the bonder and paint for a seamless application strategy.
Once the preparatory tasks are executed, it’s beneficial to dry the fairings gently with a clean cloth, removing trace dust particles that may have accumulated during sanding. Assessing the surface again at this point allows you to evaluate whether any final touch-ups to imperfections are needed. Any identified flaws can be addressed prior to moving on, ensuring the highest quality paint job.
As you transition from the preparation phase to the application of actual paint, it’s also advisable to keep your workspace organized. By maintaining a tidy environment, you’ll be able to locate tools quickly and avoid unnecessary disruptions during the painting phase. Simple organizational tools like trays and boxes for materials can streamline the entire experience and help create a focused working atmosphere.
To further enrich your painting experience, consider utilizing a high-quality, well-calibrated spray gun or an airbrush for the most uniform application. Should these options not be readily available, utilizing a quality spray can will suffice, provided that the application techniques align with the desired outcomes. Whether employing a spray gun or can, multiple thin coats are essential; this eliminates heavy runs, ensuring even distribution that adds longevity to the final painted layer.
Finally, abide by best practices during and after the painting process, such as opting for a clear coat to provide extra protection against UV rays and scratches. The confluence of these refined techniques – thorough cleaning, the careful application of bonding agents, meticulous sanding, and focus on quality products – directs the direction toward achieving a stunning appearance for your motorcycle fairings. By investing time and attention into the preparation phase, you can safeguard your labor and ensure that the end result is a vibrant reflection of your craftsmanship and creativity, ultimately transforming your motorcycle into a personalized piece of art. When paired with online resources, mastering these techniques opens new avenues for riders daring to showcase their individuality on the open road.
2. Navigating the Traps: Common Missteps in Surface Preparation for Motorcycle Fairings
When embarking on the journey of painting plastic motorcycle fairings, the success of your project often hinges on the surface preparation stage. This foundational step is pivotal, yet it’s also fraught with common missteps that can compromise the final result. Understanding these pitfalls not only equips you with the knowledge to avoid them, but it also sets the stage for achieving a professional grade finish that stands the test of time.
One of the most prevalent issues encountered during surface preparation is inadequate cleaning. It’s tempting to overlook this step, especially when the fairings appear visually clean. However, any remnants of oil, wax, or fingerprints from handling the fairing can act as barriers, preventing proper adhesion of the primer to the plastic surface. Such weak bonding points are notorious for leading to disastrous outcomes, such as peeling or bubbling paint. A thorough cleaning regimen using a reliable degreaser should always precede any sanding or priming work. This careful initial step cannot be overstated, as it is integral to long-lasting results.
Following cleaning, the next critical phase involves sanding. Unfortunately, many DIY painters skip this entirely or choose sandpaper that is too coarse. Sanding serves an essential purpose: it creates a rough texture on the plastic that allows the primer and paint to grip effectively. Using paper coarser than 400-grit without a proper progression can leave deep, unattractive scratches that not only mar the appearance but are virtually impossible to eliminate once other layers are applied. The goal here is to achieve a pristine base that is smooth yet textured enough for optimal adhesion.
Moreover, many oversights occur after the sanding process is complete. It’s essential to remember that the dust and debris generated during sanding must be meticulously removed. Using a tack cloth or compressed air is essential to ensure that no particles are trapped beneath the primer or paint layers. If any residue remains, it can lead to tiny imperfections and weak spots, ultimately jeopardizing the integrity of the finish. It’s a common misconception that sanding is the endpoint of preparation; in reality, it’s just one step in a meticulous process.
Another often-encountered issue is over-sanding. While creating a good surface profile is critical, applying too much pressure or spending too long in one area can create problems. Thinner sections of the fairing are especially vulnerable, and aggressive sanding can lead to cracks or significantly weaken the fairing. Every inch of the fairing deserves equal attention, balancing the need to prepare it adequately while remaining cautious of damaging the underlying material.
The application of primer represents another vital phase where mistakes frequently occur. The primer serves as the foundational barrier that enhances adhesion between the plastic and the subsequent paint layers. A common error in this area is applying too much primer in a single coat. Thick layers may initially seem advantageous, but they can lead to issues such as wrinkling or poor adhesion. Instead, multiple thin coats should be applied with adequate drying time in between, ensuring optimal bonding. Conversely, insufficient coverage can result if primer is applied too lightly, leading to gaps where the paint fails to adhere, risking flaking or peeling over time.
Failing to let the primer fully cure before advancing to the topcoat is another critical mistake. Rushing this phase can cause the paint to lift or wrinkle due to chemical reactions arising from the uncured primer. Following manufacturer recommendations for drying and curing times is essential for achieving the best results. Patience during this process truly pays off in the final appearance and durability of the paint job.
Surrounding environmental conditions can also greatly influence the surface preparation stage, yet these factors are often overlooked. For optimal results, strive to work in a controlled, clean environment where dust and contaminants are at a minimum. High humidity can have particularly seductive implications—moisture may condense on the wet primer leading to bubbles, while excessive heat can dry the primer too quickly, undermining its ability to bond. Conversely, very low temperatures slow down the curing process, increasing the risk of contamination. Maintaining stable temperature and minimal humidity is, therefore, integral to a successful painting endeavor.
In summary, navigating the common traps of surface preparation involves a comprehensive understanding of each step’s importance. From stringent cleaning to careful sanding, and from precise priming to optimal environmental conditions, each element plays a critical role in the overall success of painting motorcycle fairings. Recognizing and addressing these pitfalls not only enhances your skill set but also instills the discipline needed to achieve a impeccable finish. Every effort taken during this phase lays the groundwork for a transformed fairing that not only looks fantastic but also withstands the rigors of the road.
For additional resources and further detailed guidance on specific types of motorcycle fairings, consider exploring prominent collections, such as those focusing on Honda, Yamaha, and Suzuki models, to find the right fit for your project and enhance your understanding of various fairings’ needs in the context of painting.
Chapter 2: Ensuring Long-lasting Results: The Art and Science of Priming Plastic Motorcycle Fairings

1. A Gateway to Perfect Paint: Unlocking the Benefits of Priming Plastic Motorcycle Fairings
In the realm of motorcycle customization, painting plastic fairings is as much an art as it is a science. At the heart of a successful paint job lies the priming process, an essential step that sets the stage for a durable and visually appealing finish. Understanding the importance of priming and its role in paint adhesion can make a world of difference between a mediocre effort and a professionally executed transformation.
Motorcycle fairings, crafted from materials such as ABS and polycarbonate, present unique challenges for paint adhesion. These plastics are often characterized by low surface energy—meaning they resist bonding with conventional paint due to their smoothness and non-porosity. Imagine trying to pour paint on a slick surface; the liquid will bead up rather than adhering. This phenomenon makes priming a non-negotiable step for anyone serious about achieving a pristine finish on their bike.
Primers specifically formulated for plastics serve as the crucial intermediary that addresses these challenges. These primers alter the molecular structure of the fairing’s surface to improve paint adhesion significantly. They achieve this in two primary ways: mechanical anchoring and chemical bonding. The mechanical aspect involves filling in microscopic pores and irregularities on the plastic surface, allowing the paint to grab hold more effectively. Meanwhile, chemical bonding occurs when the active components in the primer interact with the surface of the plastic, creating a tighter bond and enhancing durability.
Choosing a high-quality primer, especially one intended for plastics, is vital for maximizing adhesion. Aspects to look for include adhesion promoters like silanes or specially designed acrylic resins that increase the effectiveness of the bond between the primer and the underlying substrate. It is equally crucial to follow the primer application instructions meticulously. Many plastic primers demand a brief curing period post-application to allow the active compounds to cross-link and fully activate the surface. This step ensures that the primer forms a robust foundation for the subsequent topcoat, reducing the likelihood of delamination as the paint ages.
Before any primer is applied, thorough surface preparation is necessary. Even the finest primer will falter if the fairing is dirty or improperly prepped. Cleaning the fairing with a degreaser removes oils and residues that could inhibit adhesion, while a light sanding with fine-grit sandpaper (ranging from 800 to 1200 grit) creates the texture needed for the primer to adhere effectively. This step, often overlooked by novices, is critical; it increases the surface area that the primer can grip while minimizing contamination that can lead to weak spots in the paint system.
Failing to adequately prepare the surface can lead to a cascade of issues. Paint may peel or flake off prematurely due to inadequate bonding with the underlying plastic. The stresses exerted on the paint from environmental factors such as UV exposure, moisture, and thermal expansion can exacerbate these flaws. Therefore, taking the time to carefully prepare the fairings with proper cleaning and sanding techniques is an investment in the longevity and aesthetic value of the paint job.
Once the fairing is prepped, priming can commence. An even application of primer is essential; using either a spray can or an airbrush, multiple light coats should be applied rather than a single heavy coat. This approach minimizes the risk of drips and runs, allowing for a smooth finish that can be further refined. After applying the primer, allow it to cure appropriately and inspect the surface before moving onto the paint application. This inspection can highlight any imperfections that may need addressing, securing a flawless paint job in the end.
Part of mastering the priming phase involves understanding the eventual impact of clear coats. Once the topcoat has been applied, it is generally advisable to finish off with a clear urethane topcoat. This topcoat provides a protective barrier against environmental damage, UV radiation, and scratches. Moreover, the inclusion of a clear coat amplifies the depth and sheen of the paint, safeguarding the intricate details and colors you’ve chosen to express your personality through your motorcycle.
To achieve the most durable results, maintain a balanced environment during the entire painting process. Ensure that you are working in a well-ventilated space away from dust and direct sunlight—both enemies of the flawless finish. Also, temperature and humidity levels should be monitored; conditions that are too hot or cold can allow improper curing, leading to adhesion problems. Professionals often use specific temperature ranges recommended by manufacturers to avoid these pitfalls.
In summary, taking the time to prime your plastic motorcycle fairings effectively plays a crucial role in the overall success of your painting project. Far from simply a preliminary task, priming serves as the essential bridge that secures a lasting bond between the fairing and your chosen paint, ensuring that your motorcycle not only looks good but stands up to the rigors of the road. As you prepare your fairings, remember that every detail counts, and the finishing touches, including the right primer, will elevate your project from ordinary to extraordinary—reflecting your unique style and dedication to your ride.
For more information on the priming process and its significance in painting plastic motorcycle fairings, you can refer to an in-depth resource that discusses these concepts in detail: Effective Priming of Plastic Motorcycle Fairings. Understanding the science of adhesion will empower you to achieve the motorcycle aesthetics you’ve always dreamed of.
2. The Transformative Power of Priming: Enhancing Longevity and Beauty in Plastic Motorcycle Fairing Finishes
The process of painting plastic motorcycle fairings involves several critical steps, but none is quite as pivotal as the application of primer. A common misstep among DIY enthusiasts is underestimating the role of this preparatory coating, often viewing it as a mere formality. However, the quality of the priming process significantly impacts both the aesthetic appeal and the durability of the paint job over time. In this section, we will explore how various priming techniques influence the long-term performance of painted plastic motorcycle fairings, delving into the science behind adhesion, environmental resistance, and protective features.
Primers serve primarily to create a strong bond between the paint and the plastic surface. The surface of motorcycle fairings is typically non-porous and smooth, which makes it chemically challenging for paint to adhere effectively. By applying a primer specifically designed for plastic, riders can create a textured surface that allows paint to grip firmly. This is essential for preventing issues such as peeling, chipping, or blistering, which can arise from environmental influences like UV radiation, rain, and temperature changes.
One advanced technique involves using etching primers, which go a step further than conventional primer. These products utilize mild chemical etchants to create micro-roughness on the surface of the plastic, thus enhancing the area available for mechanical bonding. The result is a paint job that can endure the rigors of outdoor exposure far better than one prepared with standard or non-compatible primers. Multiple studies confirm that the use of two-part epoxy primers or specialized plastic-specific formulations can lead to significantly improved adhesion strength, particularly in scenarios subject to harsh weather conditions. In practical terms, an adequately primed fairing will not only look impeccable but will also resist degradation, ensuring the vibrant colors remain intact.
In a real-world context, the long-term effects of priming can be vividly observed through empirical data from accelerated aging tests. These tests simulate the impact of years of exposure to sunlight, moisture, and fluctuating temperatures, showing that properly primed surfaces maintain their integrity impressively over time. Various studies conducted, including those published by SAE International, have illustrated that motorcycle fairings treated with specially formulated primers exhibit minimal degradation after extensive exposure, showcasing their lasting power compared to those with inadequately primed surfaces. Poor priming often leads to premature issues such as fading, chalking, and edge lifting, particularly at seams where stress is concentrated, underscoring the importance of a rigorous priming approach.
The visual presentation of painted fairings, of course, is also significantly influenced by the primer used. A high-quality primer not only improves adhesion but also fills minor imperfections in the plastic bodywork. This results in a smoother, more uniform base for the subsequent paint layers, allowing for a higher-quality finish that emulates the pristine look of factory-applied coatings. Additionally, contemporary primer formulations frequently integrate additives such as UV stabilizers and anti-corrosive agents, helping to protect against everyday environmental hazards like road salt or industrial contaminants that could otherwise lead to premature deterioration.
Achieving this ideal finish, however, requires careful attention to the application process. Proper surface preparation—cleaning, sanding, and dust removal—is paramount for maximizing the benefits of the primer. Even the best products can fail if improperly applied. This includes factors like application thickness, appropriate curing time, and ensuring compatibility with both the primer and finish paint. Therefore, familiarity with the manufacturer’s guidelines can inform DIYers of the correct procedures needed to optimize performance. For instance, ensuring the primer is thoroughly dry before layering the paint can prevent issues of adhesion failure down the line.
The durability of painted motorcycle fairings can also be significantly enhanced by the synergy of well-chosen primers and compatible topcoat options. The trend in the industry leans heavily towards pairing robust primers, such as chemically etched varieties, with modern polyurethane topcoats known for their resilience and flexibility. This combination has been shown to yield aesthetically stable finishes that withstand challenges ranging from sunlight exposure to cyclical thermal stress, with tested samples revealing minimal degradation even after extensive simulated outdoor conditions.
In summary, the thoughtful application of primer is far from a perfunctory step; it is the foundation of any successful painting project for motorcycle fairings. The investments made in selecting the correct type of primer are rewarded with lasting visual allure and robust protection against the elements. Enthusiasts who embrace this essential component of the painting process are more likely to enjoy their customized bikes, proudly showcasing paint jobs that retain their original beauty and resist the wear and tear that often accompanies roadway experiences. As such, one cannot overlook the perennial importance of primer in this intricate dance of aesthetics and durability.
For further exploration into different motorcycle fairings and how proper priming and painting techniques can transform their look, consider visiting our collection of motorcycle fairings.
Chapter 3: Mastering the Art of Preparing Plastic Motorcycle Fairings for a Flawless Paint Finish

1. Essential Steps to Achieve a Pristine Surface: Cleaning and Preparing Motorcycle Fairings for a Professional Paint Job
Preparing plastic motorcycle fairings for painting is an intricate process that demands attention to detail and an understanding of the materials involved. This foundational stage sets the stage for a successful paint job, helping ensure longevity and aesthetic appeal. To achieve a smooth, durable finish, follow a systematic process that emphasizes cleanliness, surface texture, and proper priming.
To start, the initial task is to clean the fairing thoroughly. Conducting a thorough cleaning may seem simple, but this step significantly impacts the success of your paint job. Utilizing a mild detergent mixed with water paired with a soft cloth or sponge is the best method to eliminate any dirt, grease, or wax that may linger on the surface. Avoid abrasive detergents or stiff brushes that can scratch or damage the delicate plastic. Once you have scrubbed away contaminants, rinse the fairing well and allow it to dry completely in a dust-free environment. Remember, any residue left on the surface can lead to complications in the subsequent steps.
Once the cleaning is complete, sanding the surface is vital to creating the right texture for paint adhesion. Select fine-grit sandpaper, preferably between 800 and 1200 grit, and begin lightly abrading the fairing’s surface. The goal here is not to remove material but rather to create a micro-texture that enhances adhesion for the primer and paint. Sand evenly across the entire fairing, focusing on even those hard-to-reach edges and corners where paint often fails to adhere. After sanding, carefully wipe down the surface with a tack cloth or a lint-free rag dampened with isopropyl alcohol. This helps eliminate any lingering dust or particles that could interfere with the paint bonding correctly. Skipping this cleansing step can result in imperfections that compromise the quality of the final finish.
With the surface clean and properly sanded, the next step involves applying primer. Selecting a primer specifically formulated for plastics is crucial, as typical automotive primers may not provide adequate adhesion on non-porous surfaces. Look for products designed to work with polypropylene, ABS, and other common plastics used in motorcycle bodywork. The application should be done in thin, even coats, following the manufacturer’s guidelines for drying times between applications. Properly applied primer not only seals the surface but also enhances the paint’s adhesion capabilities. Missing or poorly applied primer can lead to future peeling or blistering, so take these moments to be diligent and strategic.
After applying the primer, it’s crucial to perform a final inspection of the prepared surface. Adequate lighting is necessary to examine every inch for uniform texture and cleanliness. Areas that may have been missed during cleaning or sanding will compromise the adhesion of the paint if overlooked. A thorough final inspection ensures that you can move to the painting process with confidence, ready to create a flawless finish without unexpected issues arising due to surface imperfections.
The integrity of your motorcycle’s fairings depends greatly on how well you execute the cleaning and preparing phase. Each part of the preparation builds upon the previous step, forming a robust foundation for the paint to adhere effectively and consistently. By investing the necessary time into these steps, you ultimately save time and resources on redoing paint jobs that could have been avoided by taking the correctly scheduled approach ahead of time.
Once satisfied with your preparation, you are ready to move into the painting phase, where high-quality automotive paint compatible with your primer plays a key role in achieving that desired finish. Whether opting for a glossy or matte look, ensure that you are using materials intended for professional automotive applications, providing both functionality and elegance.
As a part of this journey into customization, you might feel tempted to rush through preparation due to eagerness to see your results. However, remaining patient and disciplined, especially during these critical stages, is paramount. Quality work done in the preparation phase can dramatically improve adhesion, reduce the likelihood of imperfections, and ultimately enhance the visual appeal of your motorcycle. Protecting the investment you’ve made in your fairings with careful preparation not only enriches the aesthetic value of your motorcycle but also potentially boosts its resale value.
For more extensive insights into the nuance