


Introduction
Repainting motorcycle fairings is a critical service that combines technical expertise and precision to deliver vibrant, long-lasting finishes. For business owners in the motorcycle aftermarket industry, understanding every aspect—from surface preparation and priming to advanced painting techniques and protective coatings—is essential to distinguish your services and meet customer expectations. Additionally, knowing the value of professional service options and alternatives like vinyl wrapping elevates your competitive edge. This guide breaks down the painting process into three key areas: effective surface preparation and priming to ensure paint adhesion; detailed painting and protective coating techniques for durability and shine; and insight into professional repainting services alongside alternative customization methods. Together, these chapters provide a comprehensive framework to optimize your repainting workflow and maximize client satisfaction.
Tables of Contents
Chapter 1: Surface Preparation and Priming in Repainting Motorcycle Fairings
- Mastering Cleaning and Degreasing: The Essential First Step for Durable Motorcycle Fairing Paints
- Mastering Sanding and Imperfection Filling for a Smooth, Durable Fairing Surface
- Mastering Primer Selection and Application to Maximize Paint Adhesion on Motorcycle Fairings
- Elevating Durability Through Superior Surface Cleaning, Sanding, and Primer Application
- The Broader Impacts of Meticulous Surface Preparation and Priming on Motorcycle Fairing Repainting
Chapter 2: Painting Techniques and Protective Coatings in Repainting Motorcycle Fairings
- Mastering Surface Preparation: The Essential Step for Durable and Flawless Motorcycle Fairing Paints
- Mastering Primer and Base Paint Application for a Durable and Vibrant Fairing Finish
- Mastering Layering and Custom Paint Effects for Stunning and Durable Motorcycle Fairings
- Enhancing Durability and Gloss: Mastering Multiple Clear Coat Applications on Motorcycle Fairings
- Mastering the Final Layers: Expert Finishing and Advanced Protective Coatings for Lasting Motorcycle Fairings
Chapter 3: Professional Services and Alternatives in Repainting Motorcycle Fairings
- Inside the 7-Step Industrial Repainting Process: Achieving Durability and Flawless Finish on Motorcycle Fairings
- Mastering Airbrushing at Home: Beginner-Friendly Techniques for DIY Motorcycle Fairing Repaints
- Leveraging Comprehensive Auto Body Shops for Expert Motorcycle Fairing Repainting
- Elevating Motorcycle Fairings with Custom Art Studios: Personalized Craftsmanship Beyond Standard Repainting
- Balancing Quality, Cost, and Time: Choosing Between Professional and DIY Repainting for Motorcycle Fairings
Chapter 1: Surface Preparation and Priming in Repainting Motorcycle Fairings
1. Mastering Cleaning and Degreasing: The Essential First Step for Durable Motorcycle Fairing Paints
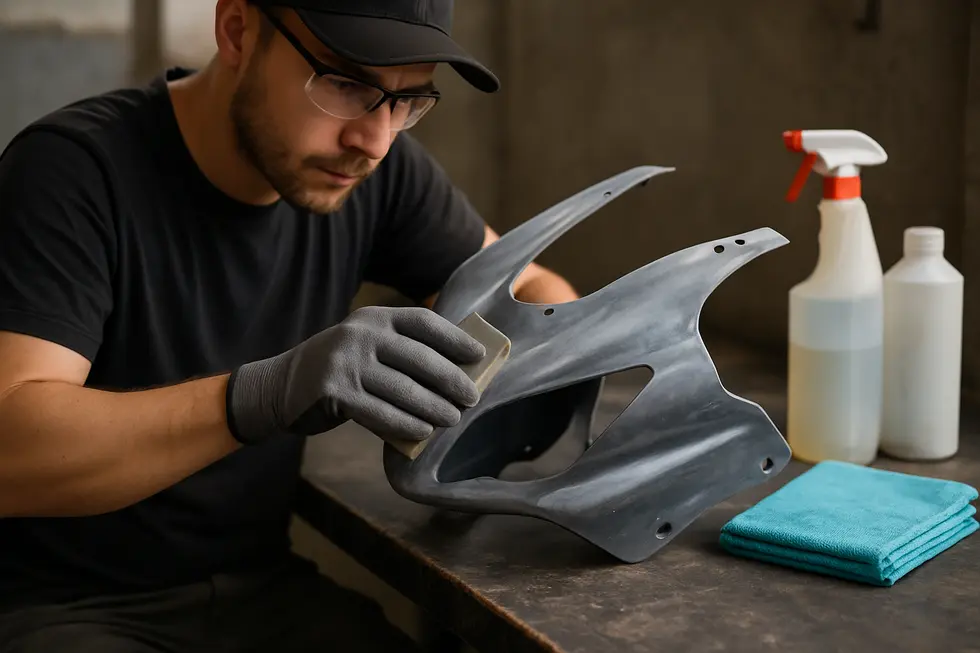
The foundation of a flawless repaint on motorcycle fairings begins with meticulous cleaning and degreasing. These steps remove any contaminants—such as oils, waxes, dirt, and tar—that impair paint adhesion and can cause uneven finishes or peeling later. Isopropyl alcohol is widely used due to its effectiveness in dissolving residues without harming ABS plastic surfaces common in fairings. Applying it thoroughly with a lint-free cloth ensures the removal of invisible films that no ordinary wash might miss.
For more persistent grime, techniques like clay bar treatment gently lift embedded particles without scratching the plastic. This method preserves the fairing’s integrity while preparing a clean, uniform surface. After these cleansing agents have done their part, sanding complements cleaning by slightly roughening the surface. This micro-texture improves primer bonding by increasing surface area, and it also helps eliminate minor imperfections or residual paint remnants. Sanding must be even and gentle to avoid damaging the fairing.
Degreasing is equally critical. Specialized degreasers designed for automotive plastics further ensure no oily films remain, which might otherwise cause primer and paint to fail prematurely. Only after this comprehensive cleaning and degreasing cycle is the fairing surface truly ready for priming.
Selecting the right primer tailored for ABS plastics—often epoxy-based or containing adhesion promoters—is crucial. Such primers seal the cleaned surface and create a chemically compatible layer that paints can grip securely. Skipping or inadequately performing these preparatory steps often results in peeling, cracking, or an orange peel texture. By committing to detailed cleaning and degreasing processes, the repaint gains a durable, visually stunning finish that withstands wear and environmental exposure.
For further insight into high-quality fairings and their preparation, explore this comprehensive guide on motorcycle fairings.
2. Mastering Sanding and Imperfection Filling for a Smooth, Durable Fairing Surface
Sanding and filling imperfections are foundational steps in repainting motorcycle fairings, directly influencing the finish’s durability and visual appeal. After thoroughly cleaning and degreasing the fairings, sanding begins with a moderately fine grit, typically 320 or higher. This step removes residual old paint and smooths rough patches, creating a surface profile that promotes strong primer adhesion. Sanding also helps feather any edges around scratches or previous damage, blending them seamlessly into the plastic’s surface.
Once sanding has stripped uneven areas, persistent dents or scratches are addressed with automotive-grade fillers or putties designed for plastics. These compounds fill imperfections and are sanded down once dry, restoring a consistent, flat surface. Applying a guide coat—using a dry aerosol spray—after initial sanding is essential. The guide coat highlights subtle surface flaws that might escape the naked eye, enabling targeted sanding corrections. This practice ensures that no bump or depression remains unnoticed before priming.
With the surface now evened out, a plastic-compatible primer spray is applied. This primer seals the plastic and creates a uniform base that enhances adhesion and smoothness for subsequent paint layers. The primer itself can be sanded gently to eliminate any minor flaws, ensuring a flawless foundation.
Using these layered preparation steps—careful sanding, precision filling, guide coat inspection, and appropriate priming—ensures the repainting process begins on the strongest possible footing. This meticulous approach prevents issues like paint peeling or texture inconsistencies, which are critical when working with ABS plastic fairings.
For those looking for more guidance on choosing quality fillers and sanding techniques, automotive-focused resources offer valuable insights. Also, exploring expert insights on motorcycle fairings available here can help with maintenance tips that protect your paint job long term.
3. Mastering Primer Selection and Application to Maximize Paint Adhesion on Motorcycle Fairings
Achieving a durable, flawless finish on motorcycle fairings starts with meticulous surface preparation and the right primer choice. Initially, the fairing surfaces must be thoroughly cleaned to remove all traces of grease, dust, and old coatings. Using a dedicated wax and grease remover ensures contaminants that can cause paint defects are effectively eliminated. This step is crucial for preventing adhesion failures and unsightly imperfections.
Once clean, the surface requires gentle abrasion using fine-grit sandpaper, typically between P400 and P600. This light sanding creates a subtle texture that allows the primer to bond more effectively, significantly reducing risks of paint peeling and chipping. Sanding also smooths minor irregularities without damaging the ABS plastic substrate common to many fairings.
The primer selected must be compatible with plastic and any metal components in the fairing assembly. Epoxy-based or Direct-to-Metal (DTM) primers are widely favored because they offer robust adhesion properties and corrosion resistance. These primers form a resilient base layer, bridging the non-porous plastic surface to the paint layers applied afterward.
Application best practices include using a high-volume, low-pressure (HVLP) spray gun to evenly coat the surface with primer. Multiple thin layers with proper drying intervals produce a smooth, uniform foundation. After the primer cures, a light sanding step refines the surface by removing any imperfections or texture inconsistencies.
Completing this foundational process with a quality clearcoat seals the paint layers, boosting UV resistance and preserving gloss. This multi-layer approach delivers not only vibrant, long-lasting color but also protective qualities that stand up to weathering, scratches, and fading.
Careful attention to these primer selection and application steps can greatly enhance repainting results. Utilizing plastic-compatible primers and thorough cleaning and sanding ensures the paint adheres flawlessly, maintaining the fairing’s appearance and durability for the road ahead.
For additional insights on sourcing quality components and materials for repainting, visit the explore summit fairings blog.
More detailed professional techniques can be found by referencing the application of high-quality epoxy primers in motorcycle refinishing guides.
4. Elevating Durability Through Superior Surface Cleaning, Sanding, and Primer Application
Achieving a durable and visually striking finish on motorcycle fairings begins with meticulous surface preparation and expert primer application. The process starts with a thorough cleaning to remove all contaminants like grease, dirt, wax, and residual old paint. Utilizing appropriate degreasers ensures no residue remains that could interfere with primer and paint adhesion. This step is essential, as any leftover impurities can lead to defects such as peeling or uneven texture in the final coat.
Following cleaning, sanding the fairing’s ABS plastic surface with fine-grit sandpaper (typically between 400-600 grit) is crucial. This creates just enough surface texture for the primer to cling to without damaging the plastic substrate. Proper sanding also helps minimize minor scratches and irregularities, facilitating a smooth and even base for the layers that follow.
The application of a plastic-compatible primer tailored for ABS or similar plastics serves as the bonding agent between the non-porous surface and subsequent paint layers. Applying multiple thin coats, rather than a single heavy layer, prevents runs and ensures thorough coverage. The primer also stabilizes the surface, reduces the risk of corrosion or UV-related damage, and smooths out minor imperfections.
After priming, careful layering of base coats and protective clear coats enhances color depth and longevity. When maintained with gentle washing and limited sun exposure, these layers can retain gloss and resist fading. For long-term preservation, professional detailing treatments such as sealants or ceramic coatings can be applied, augmenting shine and durability further.
For those interested in exploring quality options for motorcycle fairings and repainting materials, explore the best motorcycle fairings at Summit Fairings offers valuable insights.
For more detailed guidance on surface preparation and priming techniques, the external resource https://www.autobodytoolmart.com/articles/types-of-primers-best-primer-for-plastic.html provides an in-depth look at selecting and applying primers specifically designed for plastic components.
5. The Broader Impacts of Meticulous Surface Preparation and Priming on Motorcycle Fairing Repainting
The often overlooked but essential phases of surface preparation and priming in repainting motorcycle fairings carry impacts far beyond aesthetics. These foundational steps secure proper paint adhesion and enhance durability, which translates directly into economic benefits for motorcycle owners and repair professionals alike. Thorough cleaning and sanding remove contaminants and smooth out imperfections, creating a stable base that prevents premature paint failure. Applying a primer designed for plastics like ABS or fiberglass fortifies this base, ensuring the paint bonds firmly and resists peeling or chipping.
Economically, such meticulous preparation decreases maintenance frequency, helping owners avoid costly repairs while preserving or even elevating resale value by maintaining the fairings’ visual and structural integrity. For repair shops, delivering consistently high-quality results fosters customer trust and repeat business, reinforcing local economic activity and contributing to a skilled labor market. Beyond economics, the societal benefits are meaningful; well-executed refinishing extends the service life of fairings, reducing environmental waste and promoting sustainable vehicle upkeep. Cleaner, intact fairings also contribute to rider safety by sustaining visible signals and improving structural soundness.
Moreover, the expertise gained and applied within refinishing communities supports craftsmanship traditions and encourages community involvement around motorcycle care and restoration. This blend of technical precision with broader social and economic advantages underscores why investing time and resources in surface preparation and priming is critical for long-term success in repainting projects.
For more insights into technical guidelines on paint adhesion and primer application on plastic fairings, consult resources such as Hoekstra Transportation Inc., which provide detailed specifications ensuring optimal results.
Explore further insights on motorcycle fairing refinishing from Summit Fairings’ dedicated community at Explore the Best Motorcycle Fairings at Summit Fairings.
Chapter 2: Painting Techniques and Protective Coatings in Repainting Motorcycle Fairings
1. Mastering Surface Preparation: The Essential Step for Durable and Flawless Motorcycle Fairing Paints
Achieving a flawless and durable paint finish on motorcycle fairings starts with meticulous surface preparation. This stage is crucial because the plastic material used, typically ABS, is inherently smooth and non-porous, making proper adhesion of paint a challenge if not treated correctly. Initially, the fairings must be thoroughly cleaned to remove all dirt, grease, and residues. Gentle soaps combined with soft cloths ensure contaminants are lifted without scratching the surface. Degreasing follows to eliminate any oily films that standard washing might miss, as even trace oils can cause paint to peel or bubble over time.
Sanding the surface is the next vital step; it gently roughens the fairing’s smooth plastic, providing “tooth” for the primer to grip. Using fine grit sandpaper, imperfections such as minor scratches or old paint flakes are also smoothed out. This creates the ideal canvas for primer application, which bonds directly to the plastic. Choosing a primer formulated for plastic ensures chemical compatibility that enhances adhesion and prevents future paint failure.
Before painting, addressing any cracks, dents, or deeper scratches is necessary. Use fillers carefully and sand until perfectly smooth to avoid these defects showing through the final finish. Each of these steps—cleaning, degreasing, sanding, and defect repair—works together to guarantee the paint layers will sit evenly and remain resilient.
Completing this thorough preparation results in a finish that is not only visually striking but also resistant to chipping and environmental wear. For additional insights into these preparation strategies applicable across various motorcycle parts, refer to this comprehensive guide on painting motorcycle calipers.
For more information on fairing options and maintenance, explore affordable motorcycle fairings.
2. Mastering Primer and Base Paint Application for a Durable and Vibrant Fairing Finish
Repainting motorcycle fairings demands a precise balance of technique and material compatibility, especially when dealing with surfaces like ABS plastic. After thorough sanding and cleaning, applying the right primer is critical; it serves both as a bonding agent for the base paint and a protective shield for the underlying substrate. For plastic fairings, primers formulated specifically for plastics create the essential adhesion needed to prevent peeling or flaking. When metal sections are involved, epoxy primers are preferred due to their superior rust-inhibiting and bonding properties, ensuring longevity in challenging road conditions.
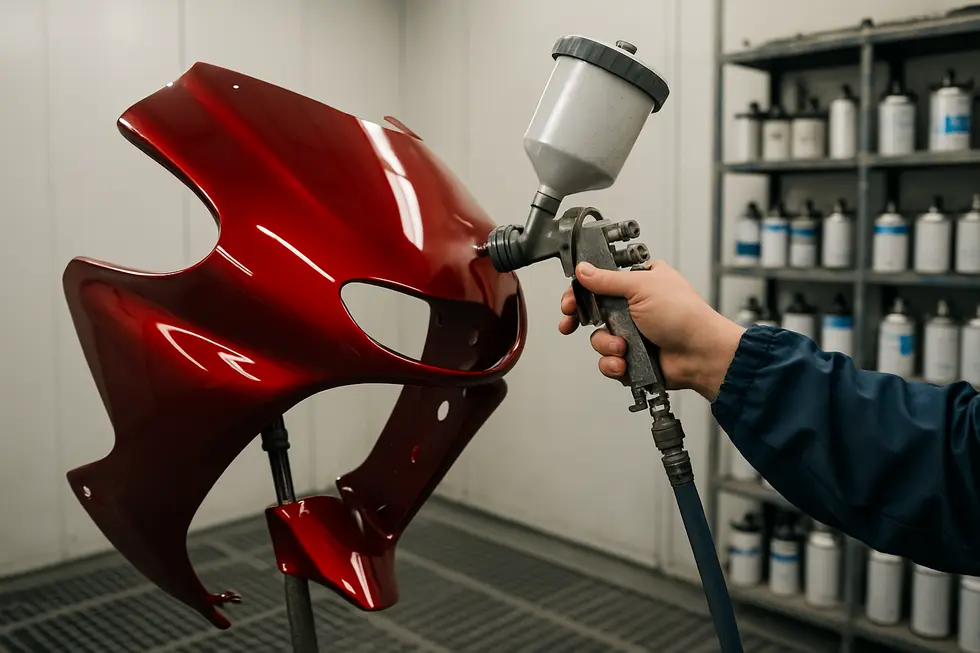
Following primer application, the base paint phase requires multiple medium-wet coats to build a uniform, vibrant color layer. Proper flash time between coats — the brief period allowing solvents to evaporate without drying fully — is important to avoid runs or uneven texture. This layering approach not only enhances color depth but also improves durability under UV exposure and abrasion. When metallic colors are chosen, specialized techniques like lower-pressure “drop coating” help evenly distribute metallic flakes for a smooth, reflective finish.
Industry professionals often follow a structured multi-step painting process, combining meticulous surface prep with primers tailored for plastics or metals and several base coats to achieve rich, show-quality results. Clear coats follow to lock this work in place, adding gloss and guarding against environmental elements. This workflow aligns with the standards of top aftermarket fairing manufacturers whose focus on fitment and finish quality ensures ready-to-install, resilient parts.
For motorcycle enthusiasts aiming to refresh their fairings themselves, mastering primer and base paint application is key. The right products and methods prevent common issues like poor adhesion and premature fading, making the repaint investment worthwhile. To explore further insights into high-quality fairings suited for repainting projects, refer to this comprehensive motorcycle fairings resource.
Additional guidance on primer types and usage can be found in detailed tutorials covering everything from spray techniques to compatibility considerations, such as those presented by Eastwood’s auto painting resources: https://www.eastwood.com/paints/how-to-paint-a-car-at-home-easy-steps.html
3. Mastering Layering and Custom Paint Effects for Stunning and Durable Motorcycle Fairings
Achieving a standout paint finish on motorcycle fairings hinges on skillful layering and applying custom paint effects that go beyond basic color. Layering involves meticulously building up the paint in stages—starting with a solid base coat that establishes uniform color and coverage, followed by mid-coats that introduce visual depth and specialized effects, and finally sealing everything with a clear coat to protect and enhance gloss.
Custom paint effects such as metallic and pearl finishes elevate the fairing’s aesthetic by reflecting light in dynamic ways, revealing subtle hues and shimmering details that change with the viewing angle. For example, a pearl mid-coat layered over a base color can produce a lustrous shimmer, while metallic paints add sparkle and dimension. These effects require precise application techniques—smooth, overlapping spray strokes and controlled drying times—to avoid runs and ensure even coverage.
Alongside layering, surface and environmental conditions play a vital role. Paint should be applied in clean, dust-free surroundings with stable temperatures between 65–75 °F and moderate humidity to avoid imperfections. Each paint layer must dry properly before applying the next to build durable depth without trapping solvents.
The final protective clear coat serves both aesthetic and protective functions. High-quality clear coats guard the paint from ultraviolet (UV) exposure, scratches, and environmental damage that would otherwise cause fading or peeling. Multi-stage paint jobs that incorporate effects usually finish with a glossy clear layer that also simplifies buffing to a polished shine.
For riders seeking precise control and vibrant custom finishes, mastering these layering and effect techniques is essential. Understanding how to blend base colors with specialty mid-coats, apply them evenly, and seal with a clear coat dramatically enhances both the visual impact and longevity of repainted motorcycle fairings. For more insights on achieving professional-grade base coats and custom effects, a useful resource can be found at Luna OEM Basecoat Paint.
Additionally, exploring Summit Fairings’ blog offers inspiration and guidance on premium motorcycle fairings that complement expert painting techniques.
4. Enhancing Durability and Gloss: Mastering Multiple Clear Coat Applications on Motorcycle Fairings
Achieving a resilient and visually striking finish on motorcycle fairings hinges on the precise application of multiple clear coats. After the fairing’s surface is meticulously prepared by cleaning, sanding, and priming, and following the gradual build-up of thin, even base paint layers, the clear coat becomes indispensable for protection and enhancement. Applying at least three thin layers of a high-quality clear coat ensures a robust shield against UV rays, weathering, and everyday wear such as scratching and abrasion.
Each clear coat layer must be applied carefully with adequate drying time in between to avoid imperfections like drips or uneven gloss. This layering technique not only safeguards the underlying paint but also deepens its color intensity and imparts a glass-like shine. Clear coats designed explicitly for ABS plastic and automotive uses further guarantee adhesion and long-term durability, preserving the fairing’s vibrant appearance despite exposure to harsh riding conditions.
Professionals often utilize advanced clear coats, including two-component (2K) systems, which offer superior hardness and clarity. The multi-step process—primer, multiple paint coats, and several clear coats—replicates manufacturing standards, providing a finish that is both show-quality and resilient. Once fully cured, the surface can be gently polished to enhance the reflective gloss, restoring a mirror-like finish unique to expertly refinished fairings.
This detailed approach exemplifies why proper clear coat application is paramount to any repainting project. The combination of UV protection, scratch resistance, and weatherproofing dramatically extends the life and look of motorcycle fairings.
For riders seeking guidance on selecting fairings and refinishing techniques, exploring the wealth of information in the Your Ultimate Source for Affordable Motorcycle Fairings offers valuable insights into quality options and refinishing best practices.
5. Mastering the Final Layers: Expert Finishing and Advanced Protective Coatings for Lasting Motorcycle Fairings
Mastering the Final Layers: Expert Finishing and Advanced Protective Coatings for Lasting Motorcycle Fairings
Achieving a sturdy, vibrant finish on motorcycle fairings extends beyond base coats and primers—it culminates in meticulous finishing and advanced protective coatings. After careful surface preparation and priming, the application of multiple thin base coat layers builds a uniform, intense color that resists runs and drips. For enthusiasts aiming for custom flair, airbrushing and effect paints can introduce distinctive visual elements that elevate aesthetic appeal.
The crowning step is the application of several clear coat layers, typically five to six, which safeguard the color beneath from scratches, UV radiation, and environmental wear. These transparent coats also deepen the paint’s gloss, creating a rich, reflective surface that enhances the fairing’s visual depth. Once cured, the finish can be gently wet-sanded to remove any minor imperfections, then polished or buffed using waxes or advanced ceramic coatings. These finishing touches not only boost shine but also significantly enhance scratch resistance and hydrophobic properties, making the surface easier to maintain.
Ceramic coatings, in particular, represent a cutting-edge advancement in protective technology. When applied after polishing, they form a durable shield that repels dirt, water, and road debris, extending the lifespan of the paint and maintaining a showroom-quality gloss over extended periods. This multi-layered approach—from base coat through advanced clear coats and sealing compounds—ensures motorcycle fairings withstand the rigors of riding conditions while presenting a flawless finish.
For those exploring professional refinishing options or DIY repainting, understanding these finishing and protective layering techniques is essential. Each step contributes to paint longevity, surface toughness, and an undeniable visual impact, turning repainted fairings into premium, long-lasting components. For additional insights into related fairing options and installation, visit this comprehensive resource on explore the best motorcycle fairings at Summit Fairings.
More specialized information on epoxy primers, base coats, and advanced clear coats can be found in detailed painting resources such as https://summitfairings.com/blog/.
Chapter 3: Professional Services and Alternatives in Repainting Motorcycle Fairings
1. Inside the 7-Step Industrial Repainting Process: Achieving Durability and Flawless Finish on Motorcycle Fairings
Professional repainting of motorcycle fairings relies on a meticulous, multi-step industrial process designed to deliver exceptional durability and a premium finish. This approach moves far beyond simple paint applications, employing precise surface preparation, specialized primers, and layered coatings to ensure the paint bonds securely to the often challenging ABS plastic surfaces. Initially, the fairings undergo rigorous cleaning and sanding to remove contaminants and create a smooth base that maximizes primer adhesion. The primer itself acts as a critical bridge, enhancing paint uptake and providing protection against peeling caused by the plastic’s non-porous nature.
Following priming, the base coat is applied in several carefully controlled layers. Each coat is allowed to dry thoroughly, building a uniform, vibrant color that resists fading from ultraviolet exposure and harsh weather conditions. The protective clear coat is then layered atop the base paint, adding both a glossy sheen and a powerful shield against scratches, dirt, and environmental damage. This clear layer enhances longevity, maintaining the fairings’ fresh appearance despite ongoing wear.
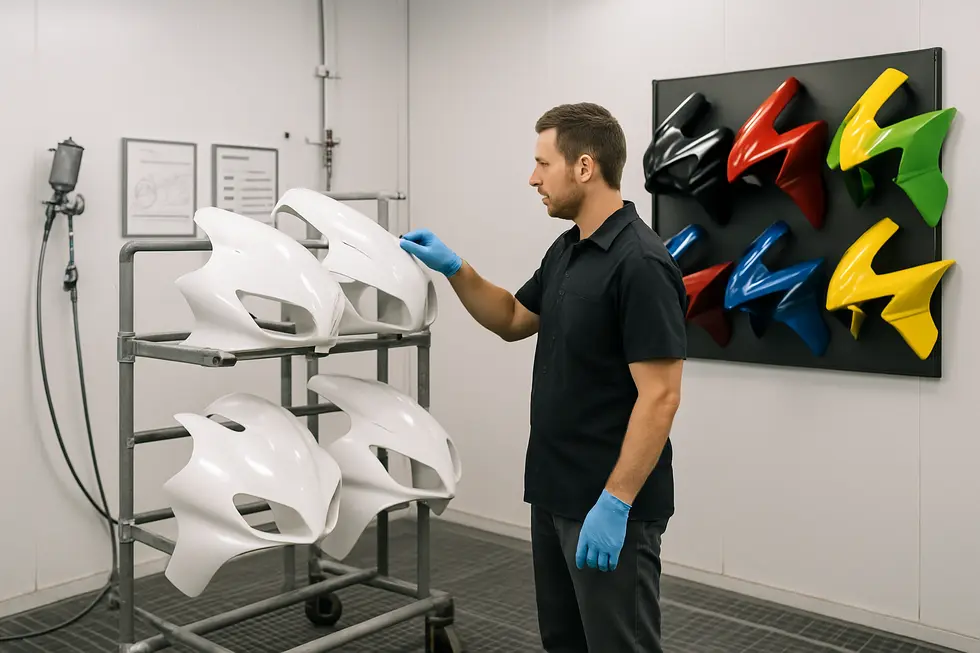
Industrial curing methods, often utilizing heat or UV light, accelerate drying and promote paint hardness to withstand the vibration and stresses unique to motorcycle use. The final stages involve meticulous polishing and buffing to achieve a smooth, reflective surface that highlights the depth and quality of the paintwork. Before completion, a thorough quality inspection confirms adherence to both aesthetic and durability standards.
These professional services also take advantage of temperature- and humidity-controlled environments, alongside premium coating materials, to further ensure long-lasting results unmatched by simpler techniques like vinyl wrapping. Some providers offer optional advanced protective treatments, such as ceramic coatings, to elevate resilience even further.
Understanding this thorough industrial repainting system emphasizes the value of expertise and high-quality materials in preserving and enhancing your motorcycle’s fairings. For those interested in exploring tailored options beyond repainting, there are informative resources available, such as this exploration of motorcycle fairings.
2. Mastering Airbrushing at Home: Beginner-Friendly Techniques for DIY Motorcycle Fairing Repaints
Airbrushing offers an accessible and creative DIY alternative for repainting motorcycle fairings, especially appealing to hobbyists who wish to customize their bikes affordably. Unlike professional spray booths, beginner airbrush kits are designed with simplicity and versatility in mind, usually including a dual-action airbrush, compressor, basic stencils, and practice materials. These tools allow novices to develop essential skills befor