
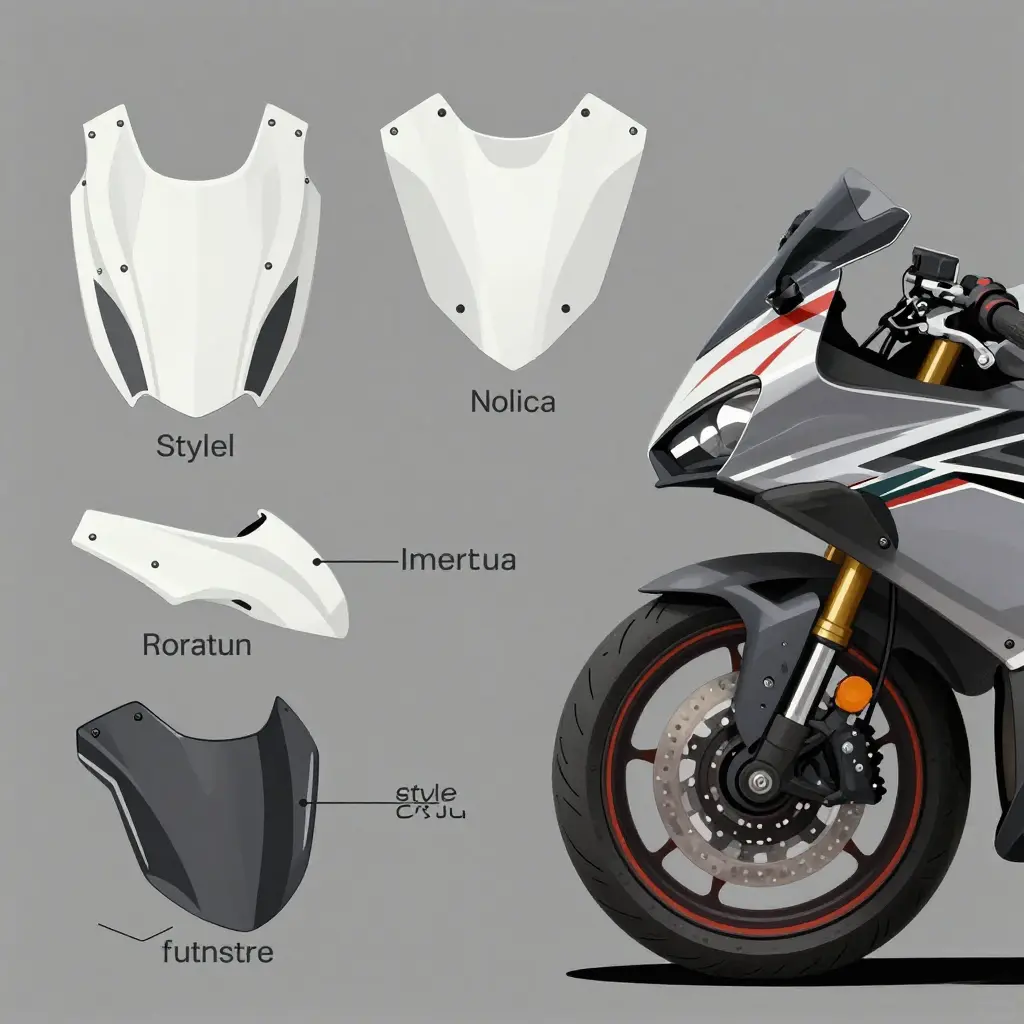
Why the Panel Name and Mount Point Decide Which Piece You Need
Two fairing panels can look almost identical in a photo and still sit in different zones of the same bike, with tabs that will never reach the same holes. That is why a useful motorcycle fairing parts list is organized by two things: what the panel is called and where it attaches.
Buying by photo alone causes most wrong-part orders. A side panel shot from a flattering angle can hide a different tab layout, screw spacing, or clip position. Order from that photo and you end up paying return shipping while the bike sits apart in the garage.
Every fairing panel name maps to a fixed location: nose, upper, side, mid, lower, or tail. What makes a piece unique to its zone is the fairing mount point — the tabs, clips, and bolt holes that fix the panel to the frame or subframe. Get familiar with common fairing panel types before you order.
Name plus mount point is the only combination that confirms fitment before money changes hands.
Motorcycle Fairing Panel Naming Conventions by Zone
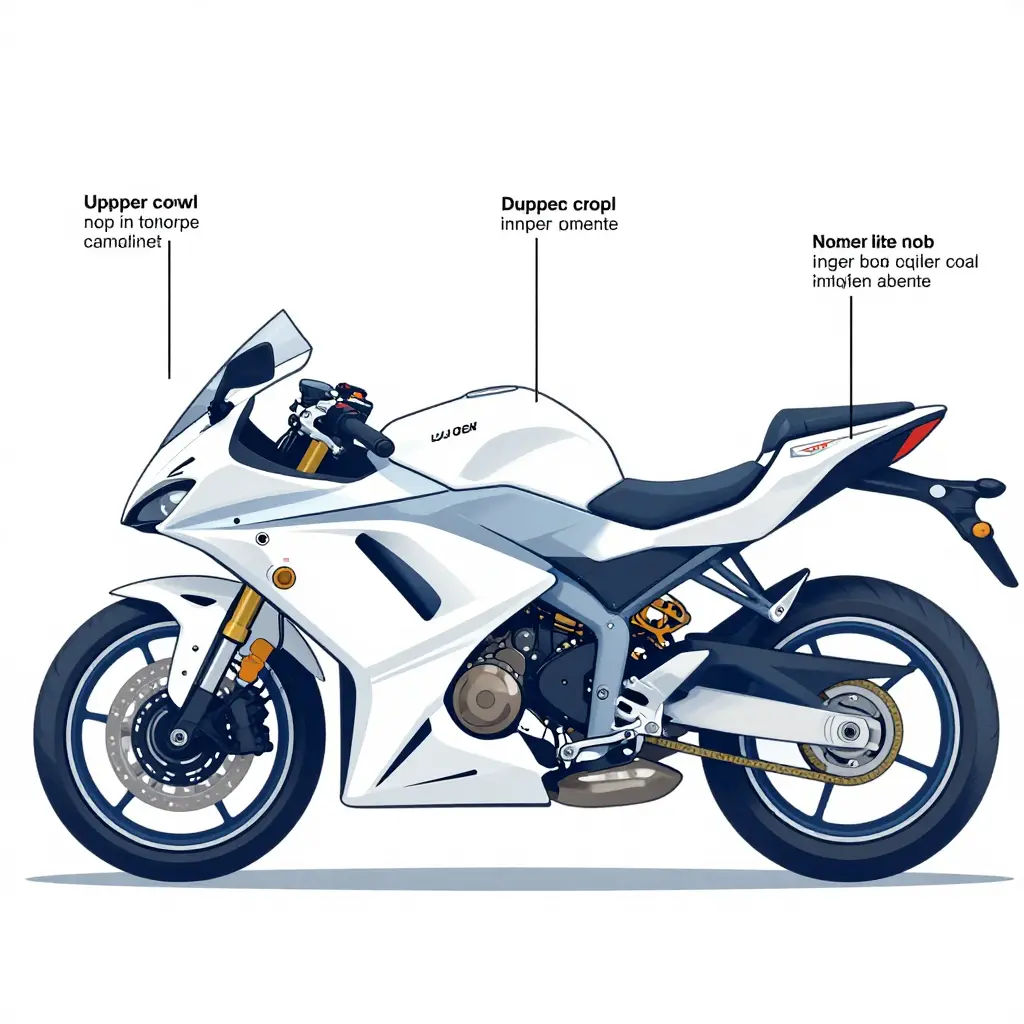
Every fairing panel name is really a location description. Manufacturers and parts sellers organize bodywork by zone — the physical area of the bike the piece covers — and the zone is the fastest route to accurate fairing panel identification. If you can point to the spot on the bike, you can almost always name the part.
Below are the standard zones, with the terms you’ll see most often in catalogs and on OEM microfiche.
Front Nose / Upper Cowl
The nose is the leading panel that wraps the headlight and mirrors. It’s called the upper cowl (OEM) or front fairing / nose fairing (aftermarket). Many bikes split it into a front cowl plus a separate headlight cowl or windscreen shroud.
Side Fairings (Left and Right)
The side fairing — also a side panel or main side cowl — is the large flank piece. Here’s the rule that trips up almost everyone: “left” and “right” always refer to the rider’s seated orientation. The left side fairing sits on the rider’s left when sitting on the bike, which is the bike’s right when you’re standing in front of it. Order by rider orientation, never by how the bike looks facing you.
Lower Belly Pan
The belly pan (or lower cowl / lower fairing) covers the underside of the engine and exhaust. On sportbikes it’s frequently a multi-piece set; on many standards it’s a single unit.
Mid Panels
Mid panels bridge the side fairings and the lower cowl, often wrapping the radiator. Aftermarket sellers may simply fold them into “side fairing” listings.
Tail / Seat Cowl
The rear section is the tail fairing, seat cowl, or rear cowl. It surrounds the seat and often includes a separate seat cowl cover for solo riders.
Tank Cover
The tank cover (or fuel tank shroud) is a shell that sits over the fuel tank rather than replacing it.
Inner / Infill Panels
Inner panels and infill panels are the smaller pieces that close the gaps between the main fairings and the frame, engine, or dash.
Why the Same Part Has Different Names
An OEM catalog lists a fairing panel name as a coded part number (e.g., 64300-XXXX), because dealers order by number, not by description. Aftermarket and used-parts sellers describe the same piece by feature instead: “left side fairing, blue, with decal.” Both refer to the identical panel — one rigid and manufacturer-specific, the other descriptive and cross-brand. Match on the zone first, then confirm the side, color, and mount points.
Once you think in zones, matching motorcycle fairing panels to your bike becomes a question of geometry rather than guesswork. For a closer look at how these pieces fit together as a complete set, see what motorcycle fairings actually include.
Fairing Mount Points and Attachment Systems
A fairing mount point is the exact location where a body panel fastens to your motorcycle — to the main frame, a metal subframe, or a neighboring panel. It is not a cosmetic detail; it is the geometry that decides whether a part physically fits.
For anyone doing a motorcycle fairing replacement, that position is where the job succeeds or fails. A panel can look visually perfect while sitting a few millimeters away from the holes it must match. Shape tells you how a fairing looks; the fairing attachment points tell you whether it bolts on.
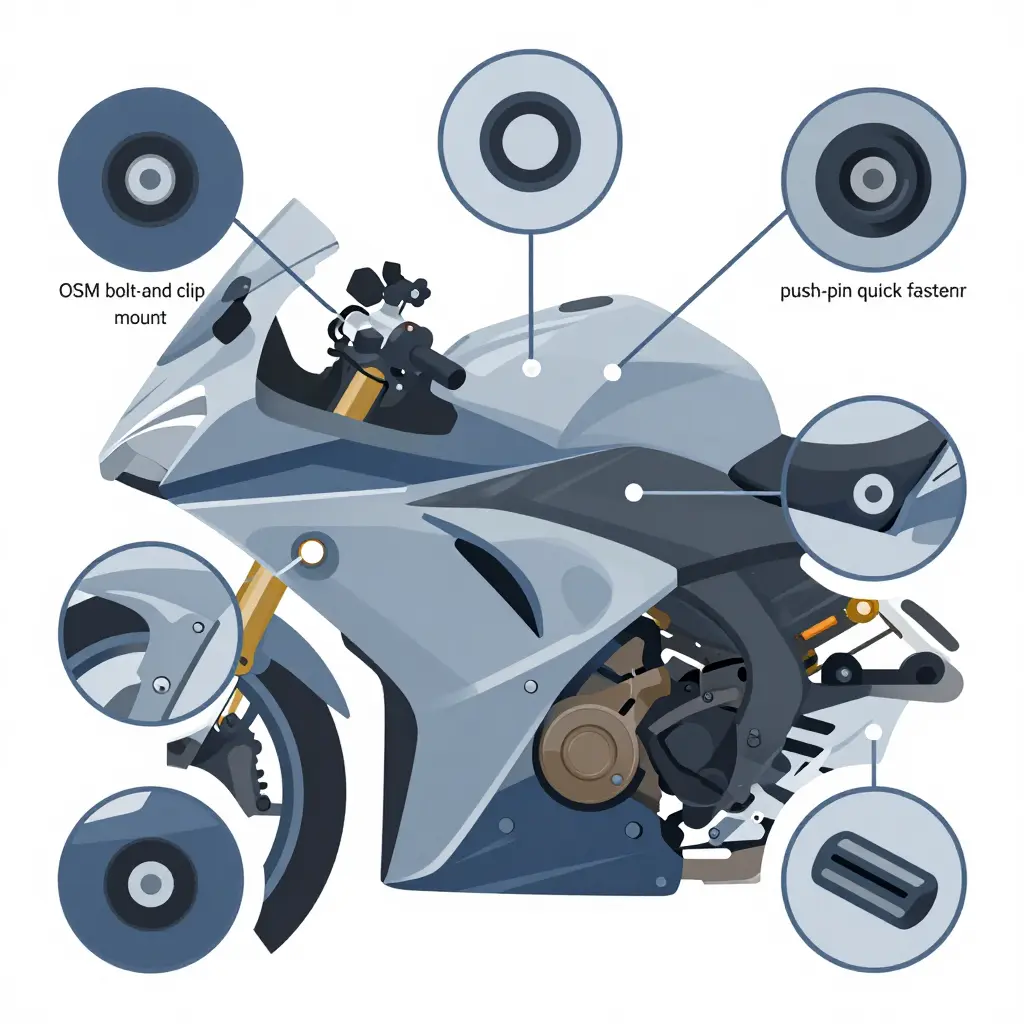
The Main Types of Attachment
Most bikes use more than one of these on a single machine:
- OEM bolt-and-clip mounts: threaded bolts paired with molded plastic clips that hold panels under tension.
- Push-pin/quick fasteners: removable pins that snap into a receptacle for fast teardown.
- Grommets: rubber inserts that isolate vibration and accept a pin or tab.
- Tabs: molded plastic protrusions that slot into a receiving slot or clip.
- Brackets: metal or plastic arms that bridge a panel to a hard point.
- Subframe stays: structural stays that connect the frame to outer bodywork.
- Hidden interlocking tabs: concealed tabs that lock panels together behind visible seams.
Why Identical Shapes Are Not Interchangeable
Two panels can share exactly the same outline and still be different parts. Their fairing attachment points may sit in different locations, one may use four tabs while the other uses six, and clip positions can be mirrored from left to right. Treating visual shape as proof of fit is one of the most common ordering mistakes.
Model Year, Sub-Model, and Market Differences
- Model year: minor refreshes often relocate tabs or add a fastener without changing the silhouette.
- Sub-model: base, R, and RR trims frequently carry different brackets, subframe stays, and clip counts.
- Market: regional lighting and emissions rules can shift or add fairing mount point positions.
Because of these variables, always verify the mount layout for your exact year, trim, and region before ordering. To understand the broader form and function first, review what motorcycle fairings are and how they fit.
The fastest way to get the right replacement piece is to match zone, mounting pattern, and left/right orientation before you add anything to a cart. If the vocabulary is still new, start with a clear overview of how fairings break down across a bike. The table below translates the confusing names on parts listings into the specific panel your motorcycle is missing.
Master Motorcycle Fairing Parts List
| Panel Zone | Common Panel Name(s) | Typical Mount Points / Fasteners | Orientation | Notes on Interchangeability |
|---|---|---|---|---|
| Nose / Upper Cowl | Nose fairing, upper cowl, front cowl, front upper | Windshield screws, side bolts to mid panels, headlight bracket, 2-4 push clips | Centered (front) | Year/model specific; rarely swaps between generations |
| Left Side Fairing | Left side panel, L-side cowl, left main fairing | M6 bolts to nose, belly pan clips, frame grommets, 3-5 fasteners | Left (rider’s left) | Left and right are not interchangeable |
| Right Side Fairing | Right side panel, R-side cowl, right main fairing | M6 bolts to nose, belly pan clips, frame grommets, 3-5 fasteners | Right (rider’s right) | Mirror of left; check cutouts for exhaust/radiator |
| Lower Belly Pan | Belly pan, lower cowl, lower fairing, chin fairing | Lower bolts, quick-release Dzus fasteners, side panel clips | Centered (lower) | Often differs between standard and race versions |
| Mid Panel | Mid fairing, middle cowl, side infill panel | Bolts to nose and side fairing, inner frame clips, 2-4 fasteners | Left and right variants | Trims vary by trim level; verify side and color code |
| Tail / Seat Cowl | Tail fairing, seat cowl, rear cowl, tail section | Seat mount bolts, subframe screws, taillight bracket, 4-6 fasteners | Left, right, and center pieces | Frequently year specific; check taillight shape |
| Tank Cover | Tank cover, tank shroud, air duct cover | Tank bolts, side fairing screws, adhesive clips | Left and right variants | Cutouts for fuel filler and ducts vary widely |
| Inner / Infill Panels | Inner panels, infill panels, air deflectors, heat shields | Small clips, push rivets, hidden frame screws | Left and right variants | Low-cost item; often interchangeable across trims |
| Front Fender | Front mudguard, front fender, front guard | Fork leg bolts, 4-6 bolts to fork lowers | Centered (front) | Depends on fork/brake setup; verify rotor side |
| Headlight Surround | Headlight cowl, headlight surround, front mask | Headlight screws, nose clips, 2-4 push pins | Centered (front) | Tied to headlight shape and model year |
How to Use This List
Read every parts listing against these three checks, in order:
- Zone first. Match the panel zone before anything else. A manufacturer’s “side cowl” may be listed as a “mid panel” by a reseller, but the zone tells you where it physically lives on the bike.
- Mount pattern second. Count the fasteners and note whether they are bolts, push clips, or quick-release fittings. A panel with the right shape but the wrong mounting pattern will not bolt on.
- Orientation third. Confirm left versus right and check for cutouts (exhaust, radiator, ducts). Getting this wrong is the single most common ordering mistake.
When in doubt, photograph your existing panel alongside a tape measure and compare it against the listing images. Zone, fasteners, and orientation checked together are what separate a correct order from a costly return.
How Panel Name and Mount Point Work Together to Define the Correct Part
A fairing panel name tells you which zone of the bike you are looking at: upper cowl, side fairing, mid-panel, belly pan, tail section, or front fender. That name is a starting point, not the final answer. Two motorcycles from the same family can share an identical panel name while using completely different attachment hardware underneath. That is why a motorcycle fairing parts list only helps when every line ties a name to a specific mount layout.
The fairing mount point is where the panel physically locks onto the motorcycle. It covers the tab count, the clip and grommet positions, and the bracket style that holds the piece in place. A left upper cowl for one model year may use three mounting tabs and a single push-clip, while the next year uses four tabs and a different bracket. The plastic looks nearly identical; the mounting geometry does not.
A Practical Decision Flow
- Confirm the panel zone by name. Identify whether the part is the upper cowl, side fairing, mid-panel, or another zone before anything else.
- Verify the left or right side. Mirrored panels carry separate names and separate part numbers, so a right-side piece will never cover a left-side gap.
- Confirm the fairing mount point pattern. Count the tabs, note clip positions, and identify the bracket style that the panel must meet.
- Cross-check model year and trim. The same name and even the same mount pattern can shift between trims and production runs.
The name narrows the search. The mount point confirms the fit. You have the correct part only when both match the exact bike on your lift.
Takeaway: A panel name identifies the zone, while the fairing mount point confirms the fit, and you need both to order the right piece the first time.
Common Failure Cases
Ordering by name only is the most frequent mistake. A buyer requests a “left side fairing,” receives a panel with a matching name, and discovers the tabs sit in the wrong spots for that model year. The plastic is correct in name, wrong in geometry.
Ordering by photo only ends the same way. Two fairings can look identical in a product shot while using different clip counts and bracket shapes. Without a mount point check, the photo gives false confidence.
The fix is simple and repeatable: confirm the zone by name, verify the side, match the mount point pattern, then validate against year and trim. When all four align, the panel bolts on cleanly the first time.
Which Panels Wear Out First? A Quick Reality Check
Before you start matching part names to mount points, it helps to know where riders actually spend their money. The chart below ranks the most commonly replaced motorcycle fairing panels by their approximate share of all replacement purchases. Think of it as a demand map: the taller the bar, the more likely that panel is the one you will be hunting for. It also explains why a parts list sorted by name alone can be misleading — the panels you are most likely to need sit at the top, while the ones you rarely touch sit at the bottom. Use it to sanity-check your order and to understand how each fairing panel earns its place in the different fairing panel categories and their roles.
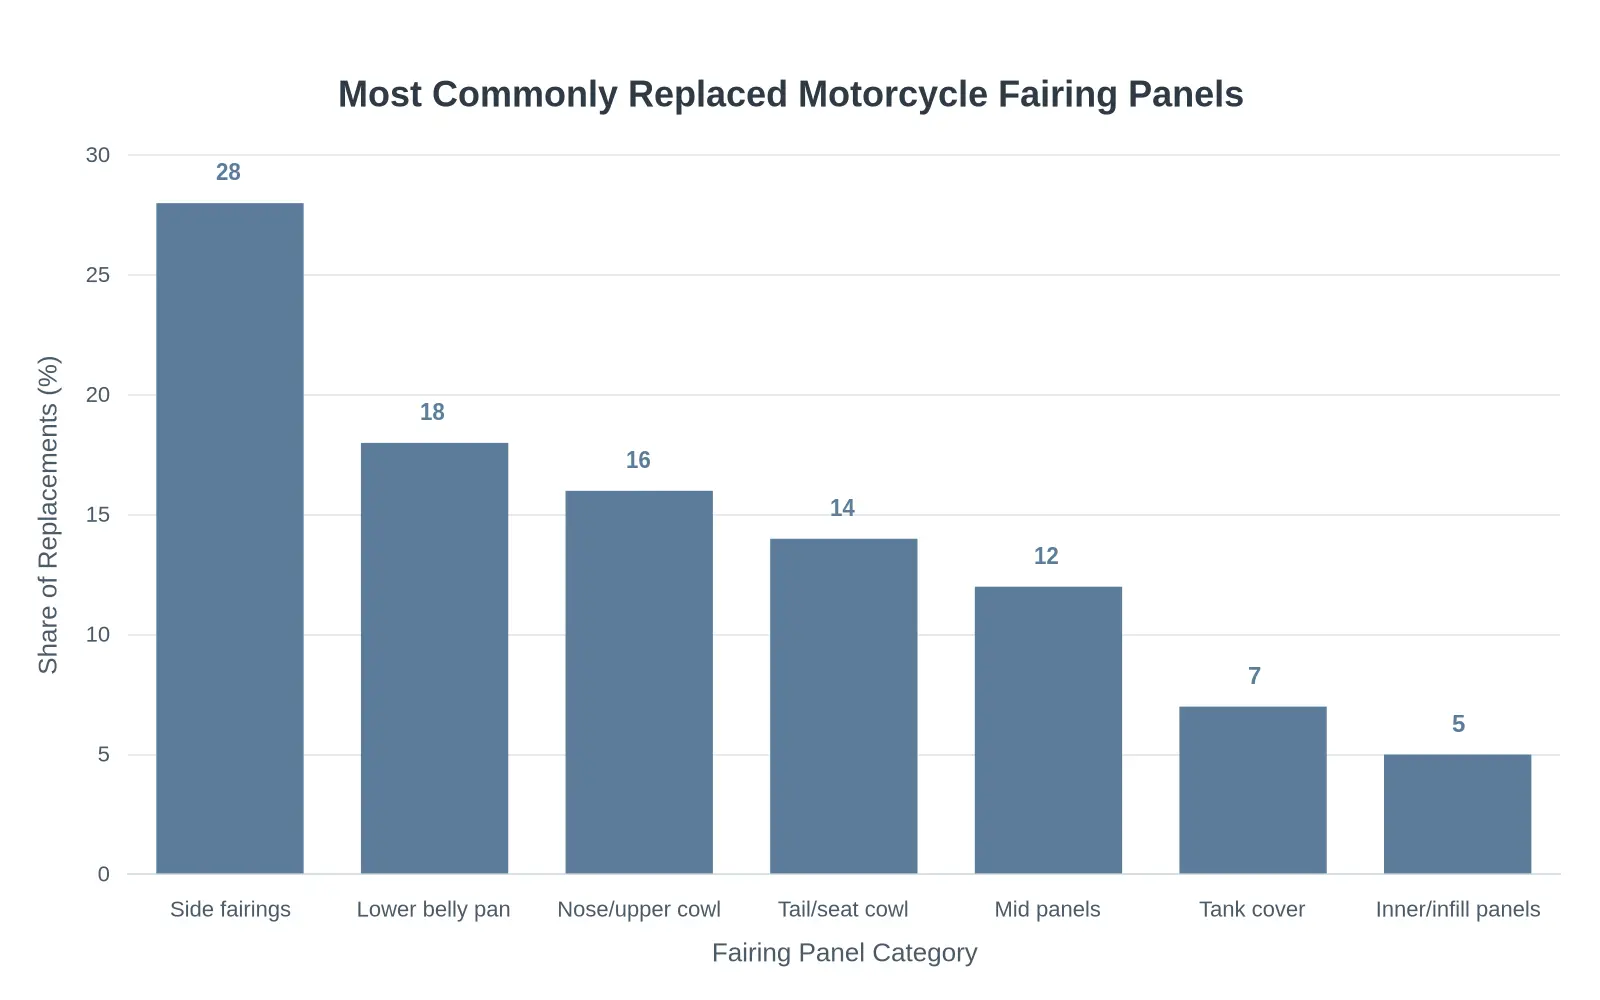
Side fairings dominate because they are the largest, most exposed panels and the first to meet the pavement in a low-side. The lower belly pan and nose/upper cowl follow closely, absorbing impacts and road debris. Tail/seat cowls and mid panels make up the middle of the range, while tank covers and inner/infill panels are the least frequently replaced — usually damaged only in heavier hits. Knowing this ranking helps you prioritize your parts list and anticipate what a typical repair is likely to require.
Step-by-Step Checklist to Identify the Right Fairing Panel
Matching a fairing piece by picture alone is how riders waste money on parts that almost fit. Approach fairing panel identification the way a body shop does: work through each step in order, and confirm every detail before you buy. This checklist keeps your motorcycle fairing parts list accurate from the first photo to the final order.
- Locate the panel zone and confirm its panel name. Identify where the piece sits, such as the upper nose, side mids, lower belly pan, or tail, and write down its proper panel name.
- Confirm left or right orientation from the rider’s seat. Sit on the bike in your mind: left means the clutch side, right means the throttle side. Get this backwards and nothing lines up.
- Count and photograph all mount points and tabs. Shoot each bolt hole, alignment tab, and hook from two angles so the count is impossible to misread later.
- Note grommets, clips, and bracket style. Record whether mounts use rubber grommets, push clips, or metal stays, since these decide whether the panel bolts on cleanly.
- Match it to your exact model year and trim level. The same model can change mid-cycle, so a 2019 base bike may use different panels than a 2021 special edition.
- Cross-reference OEM part numbers. Compare the factory number on your damaged panel against the seller’s listing to confirm a true match.
- Verify against the seller’s panel description and images. Check that hole counts, color, and finish line up with your own photos before you commit.
What to Have Ready Before Ordering
- Year, make, and model written down
- Exact trim level or edition
- Clear photos of every mount point and tab
- OEM part numbers from your current panel
- Color and finish reference
Why Mount Points, Not Looks, Decide Fit
A panel fits because its mount points line up with the bike’s bracket points, not because it looks like the right shape. Two fairings can share the same silhouette, the same color, and the same nickname, yet only one will bolt on. The diagram below shows the difference at a glance — on the left, the panel’s mount dots sit directly on the bracket dots; on the right, the same-looking panel is offset, so the holes never line up.
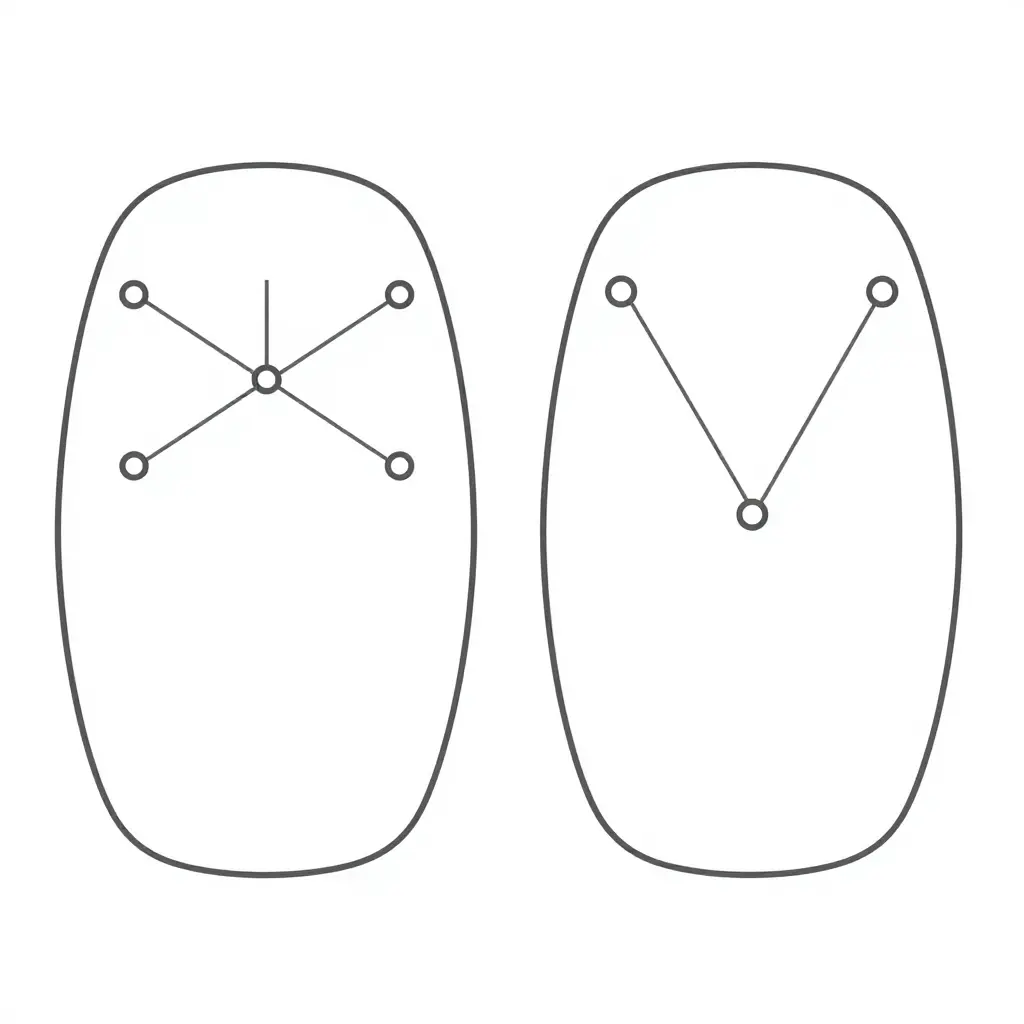
Reading the Diagram
- Left panel (aligned): each mount dot on the fairing lands exactly on its matching bracket dot, and the thin connecting lines run straight and vertical. This is a correct fit — the fasteners, clips, and grommets all engage as designed.
- Right panel (offset): the panel is the same size and shape, but every mount dot is shifted. The connecting lines run at an angle or leave a gap, which is exactly what you feel when a panel “almost” fits and one or two bolts just won’t reach.
What This Means in Practice
- Measure the mount points, not the outline. A ruler across the mounting holes tells you more than a photo of the whole panel ever will.
- Trust the part number over the nickname. “Left mid fairing” can describe different panels on different model years.
- Expect visual twins to be mechanical strangers. Aftermarket and OEM panels can look identical while mounting differently.
Before you order, it helps to review what motorcycle fairings actually are and how each piece mounts to the frame. When in doubt, confirm the mount point layout against your specific model and year — that single check prevents the most common wrong-part order in fairing repair.
Frequently Asked Questions
Can I use a fairing panel from a different model year?
Sometimes, but only when the panel’s part number and mount geometry match your bike. Manufacturers often refresh bodywork every two to three years, so a panel that looks identical may have a shifted fairing mount point that will not bolt up cleanly. Always cross-reference the OEM part number for your exact year, model, and trim before buying.
How do I know if a panel is left or right?
Left and right are determined from the rider’s perspective seated on the motorcycle, not from the front looking back. A left side panel sits on the bike’s left side as you ride it, while the right panel mirrors it on the opposite side. When in doubt, check for asymmetry cues like cutouts for the exhaust, kickstand, or radiator vents that only face one direction.
What if my panel name differs from the seller’s description?
Naming varies wildly between sellers, so trust the shape and mounting hardware over the label. A piece you call a “side scoop” might be listed as an “air duct cover” or “mid-fairing,” but the bolt pattern and silhouette are what truly define it. Compare photos and part numbers, and consult a documented motorcycle fairing parts list to align the terminology.
Do mount points differ between base and higher trims?
Yes, they frequently do. Higher trims often add features like ram-air ducts, winglets, or wider radiator shrouds that create an extra fairing mount point the base model does not have. Confirm your specific trim level and VIN before ordering, because a premium-trim panel may not seat correctly on a base bike.
Can I install an aftermarket panel without OEM brackets?
Generally no, and attempting it usually leads to rattles, misalignment, or cracked panels. OEM brackets establish the exact spacing and angles that keep aftermarket motorcycle fairing panels seated properly, so reuse your factory hardware whenever it is intact. If brackets are missing, source replacements first, then attach the new panel.
How do I confirm the correct piece before ordering?
The most reliable method is to match the OEM part number stamped or molded on the back of your existing panel against the seller’s listing. Pair that with photos of the mounting tabs and overall shape, and verify the fitment notes for your year, model, and trim. When the details line up exactly, you can order with confidence. See how Summit Fairings organizes its inventory by make and model.
Bringing It All Together: Name the Panel, Find the Mount Point, Order the Right Piece
Two details decide everything: the panel name and its mount point. The master parts list shows you what each fairing is called, where it sits on the bike, and which fasteners or clips hold it in place. The identification checklist turns that list into a routine — confirm the zone (front, side, tail, or lower), match the panel name to the diagram, and verify the mount points before you add a part to your cart. Skip a step and you risk paying for a piece built for a different year, trim, or model.
The FAQ answers point the same way. Most ordering errors trace back to a single assumption: that two similarly named panels are interchangeable, or that a photo is enough. Identify the zone first, verify the mount point second, and those mistakes stop happening.
Ready to put this into practice? Start with a clear foundation by reviewing what motorcycle fairings actually are, then compare the main fairing types and their benefits. If you prefer a complete set over a single panel, explore motorcycle fairing kits and why riders choose them, or take a personalized route with custom motorcycle fairings. Budget-minded builders can also check this guide to affordable motorcycle fairings.
Summit Fairings offers over 3,000 styles across almost all motorcycle models, prices that run 10-40% lower than other sites, and a six-hour answer guarantee, all at summitfairings.com.