
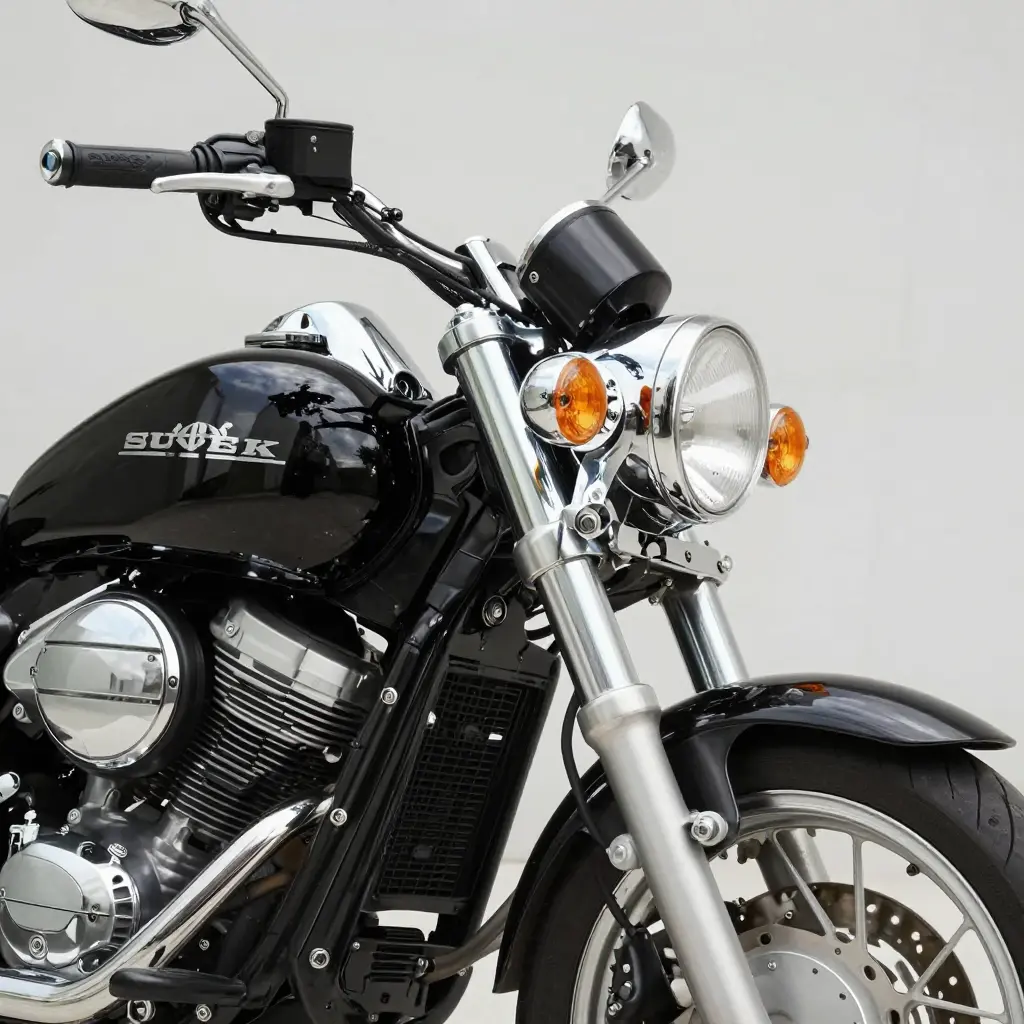
Two dimensions decide whether a batwing fairing fits a 2006 Suzuki Boulevard: the center-to-center spacing of the fork tubes, and the outer diameter of the headlight bezel. Get either one wrong and the shell will not sit straight, no matter how much you shim or re-torque the hardware.
Nothing in the assembly can be adjusted to compensate. The upper triple tree clamps the fork tubes and fixes their centers, the headlight bezel defines the ring the shell has to clear, the mounting bracket ears carry the load, and the batwing shell ties the whole thing together. Because the batwing fairing mount clamps onto the forks and wraps around the headlight bucket, both numbers have to come off the bike itself rather than out of a parts listing.
Fork tube spacing is the center-to-center distance between the two tubes, taken at the upper triple tree with the front end unloaded and the bars pointed straight ahead. Hook the tape on the outside face of one tube, read across to the outside face of the other, and subtract one tube diameter, or lay a caliper across the tube centers if there is room. Headlight size is the outer diameter of the bezel, taken across the widest point of the ring the bucket sits in, tape parallel to the ground and straight through the center of the lens. Record both in millimeters, so the figures line up with the bracket drawings.
Both numbers drive bracket selection and shell clearance, so keep them on the same sheet as your order for custom Suzuki fairings.
Measure at the upper triple tree, not at the axle or the sliders. The tubes run parallel through both trees, so the spread you read at the top is the spread the bracket has to match, and it is where the clamps actually land. On the inverted forks fitted to the M50, the tube at the tree is the larger slider, not the stanchion that shows lower down; a reading taken near the axle there comes out at a different diameter. Set a caliper or a steel rule across the two tubes where the upper tree pinches them and read center to center. That figure is what a batwing mount is built around, because the clamp shells sit on the tubes right at the tree.
Cross-check outside-to-outside, then subtract one tube diameter. A second reading across the outer faces of both tubes, minus one tube diameter, should land on the same center-to-center value within a fraction of a millimeter. Diameter matters as much as spread: the C50 and M50 both run 41mm tubes, the M109R’s inverted legs are thicker, and the S40’s are thinner. A clamp bored for a 39mm or 43mm tube will not seat correctly however accurate the spacing is, and will rock, distort, or leave a gap at the parting line. Compare the bracket’s stated tube size and center spacing against both readings before anything goes near the bike.
Hold the fit to roughly 2-3mm and never force the shells. A bracket built for a wider or narrower spread will not clamp down on its own. The usual workarounds are shimming the shells off the tube, bending the bracket legs to pull them in, or ovalizing the clamp shells to close the gap, and each of those loads the mount unevenly, pinches the fork tube, and invites cracking at the bolt holes. Within roughly 2-3mm of the measured spread, a mount clamps with full contact on both shells. Outside that window, change the bracket.
Six numbers go on the order sheet, all in millimeters, because each one tells the builder which dimension of the batwing mount to machine.
| Measurement | Where to Take It | Tool Needed | What It Decides |
|---|---|---|---|
| Fork tube center-to-center spacing | Across both tubes, at the triple tree | Caliper or tape | Clamp width |
| Fork tube diameter | Outer surface of one upper tube | Caliper | Clamp bore |
| Headlight outer bezel diameter | Widest point of the bezel ring | Tape measure | Opening diameter |
| Headlight bucket depth | Bezel face to rear of housing | Tape measure | Shell clearance |
| Headlight mounting bolt spacing | Bolt hole center to bolt hole center | Tape measure | Bracket pattern |
| Triple tree to headlight center | Top clamp face to light center | Tape measure | Shell vertical position |
Headlight Size and Bucket Depth: What Actually Sets the Opening
Put the tape on the chrome bezel, not the lens. A stepped bezel ring overhangs the glass by roughly 1/4 to 3/8 inch, and that overhang is the surface the fairing opening has to meet. Measure the outer diameter at the widest point, the flat lip that contacts the shell, and write it down in the same unit as the rest of your numbers. A 5-3/4 inch headlight reads about 5.75 inches across the lens but closer to 6.1-6.3 inches across the bezel; a 7 inch unit lands near 7.4 inches at the lip. Cut the opening to the bezel dimension plus 0.030-0.060 inch per side for paint and gelcoat build, then radius the corners generously. On the smaller opening you keep a full 3/4 inch of material from the aperture out to the shell’s leading edge; the 7 inch opening eats most of that margin, so lay out and drill the aperture before trimming, or the shell loses its structural band above the cut.
Bucket Depth Drives Standoff
Behind that bezel sits the headlight bucket depth, the number first-time installers most often skip. The bucket body projects rearward from the mounting flange by a fixed amount, typically 4-1/2 to 5-1/2 inches of can plus the bulb socket and wiring boot. On a batwing fairing with a shallow inner shell, a deep bucket physically pushes the outer shell forward of the fork tubes, so the mounting brackets need longer standoff spacers to keep the shell from resting on the bucket. Fit a deeper bucket and the whole fairing moves 1/2 inch or more ahead, which changes reach to the bars and the angle of the windshield. Check the bolt spacing at the bucket base as well: the Boulevard housing uses a narrow pattern there, and brackets drilled for a wider spacing will pull the bucket off-center until the bezel binds against one side of the opening.
Undersized and Oversized Openings
An opening cut too small does more damage than one cut too large. The bezel cannot seat flush, so the installer keeps tightening the retaining fasteners to close the gap, and the shell stress-cracks along the cut line, usually radiating from the tightest radius. A thin hand-laid shell cracks fast once that starts, and it is not a simple cosmetic repair. An oversized opening fails the other way: the bezel drops through with visible gaps at the top and sides, wind noise rises sharply above highway speed, and water walks in along the upper gap and drips onto the back of the headlight connector. If you have already trimmed past the bezel line, a bezel trim ring or a backing plate is the practical fix; patching the cut edge is not. Mock up the bezel and bucket in cardboard before the saw touches the shell, and look at our Suzuki-specific fairing options if you are starting from a bare shell.
Measure the bezel, confirm the bucket depth, then cut once. On a batwing shell, the opening size and the bucket behind it decide the bracket standoff, not the other way round.
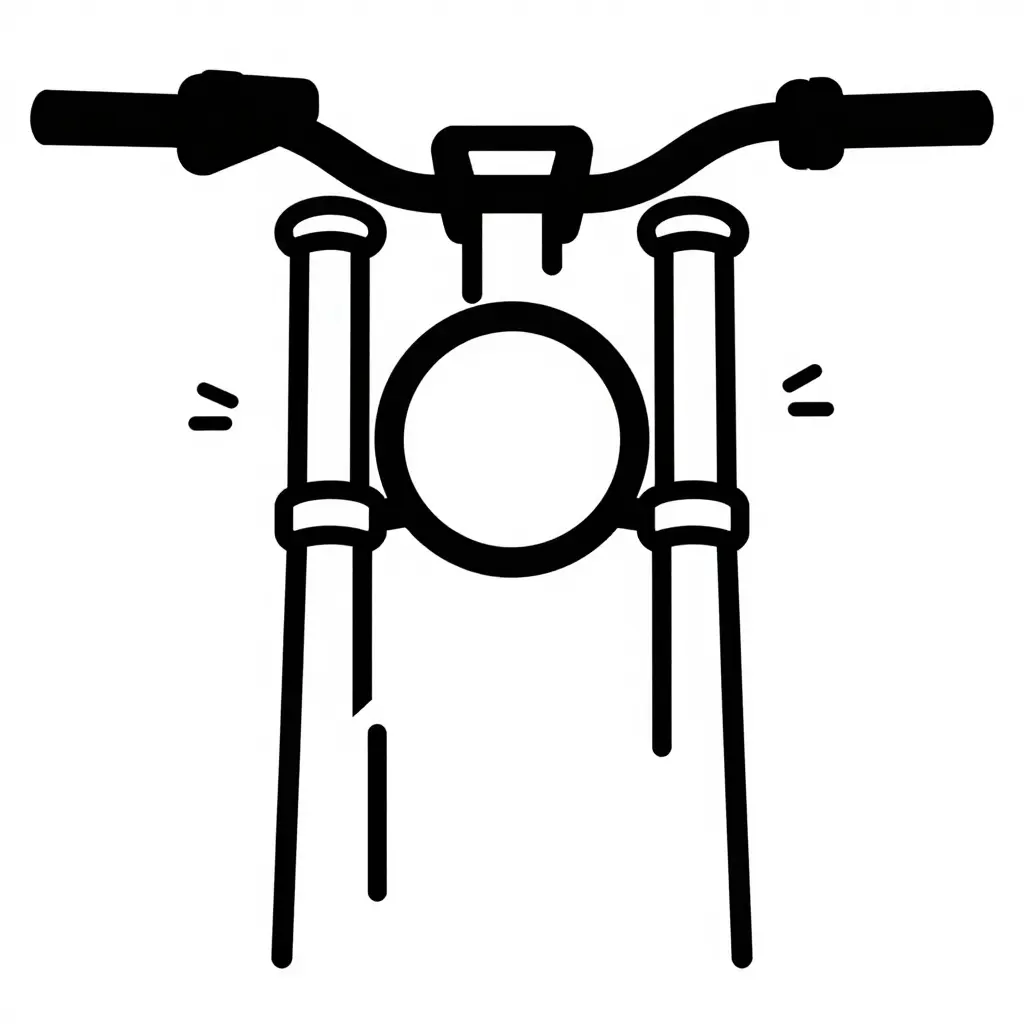
Schematic front view. The upper tick pair spans the fork tubes center-to-center at the triple tree. The lower tick pair spans the headlight bezel’s outer edge. Take both readings before ordering a batwing fairing.
Pre-Purchase Measurement Checklist
Twenty minutes with a tape and a set of calipers is cheap next to return freight on a mount that will not clamp. Put the bike on level ground with the front wheel pointing straight, leave the headlight bolted in place, and log each number as you take it. Read the fitment notes on a Suzuki fairing listing only after your own measurements are in hand.
- Confirm the model year and exact Boulevard variant on the VIN sticker and tank badge.
- Measure fork tube spacing center-to-center at the upper triple tree, twice, and chase down the difference if the two readings disagree.
- Confirm fork tube diameter at the clamp area with a caliper rather than eyeballing it.
- Measure headlight bezel outer diameter across the widest point of the ring.
- Measure headlight bucket depth from the bezel face to the back of the housing.
- Measure headlight mounting bolt spacing center-to-center with the lamp still installed.
- Check for existing turn signal or windshield mounts that will conflict with the bracket.
- Confirm the bracket clamp style, whether U-bolt, split clamp, or bolt-on plate, matches the fork tube.
That is six measurements and two fitment checks. Send them to the supplier with a photo of the front end, and the mount should bolt on the first time.
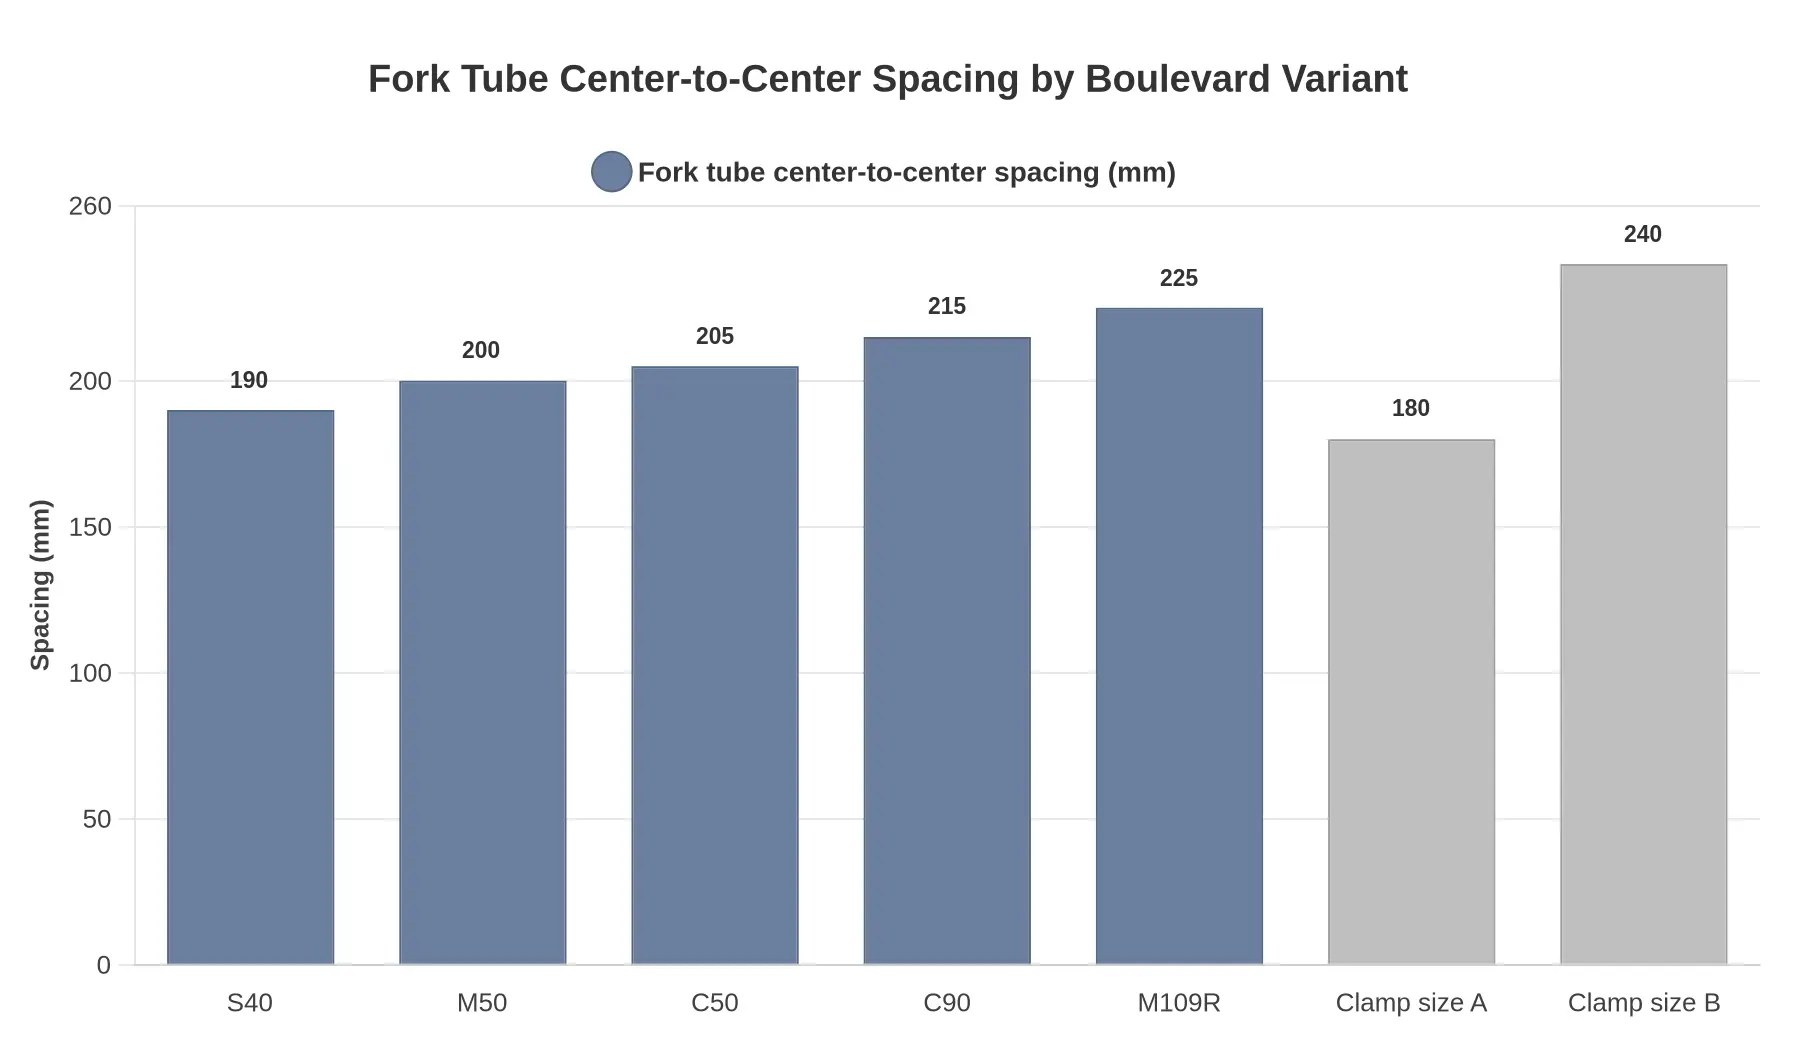
Buy a clamp width that sits inside the spread you measured, not one that matches a model name on a fitment list. When a batwing fairing mount refuses to seat, a mismatched clamp width is the first thing to rule out.
Mounting Bracket and Hardware for a 2006 Boulevard Batwing
Fork-clamp or triple-tree: let the measurement decide
On a 2006 Suzuki Boulevard, the batwing fairing mount starts with two numbers you take off the bike rather than out of a catalog: fork tube center-to-center distance and headlight bucket diameter. Fork-clamp brackets saddle the tubes themselves and suit the wide fork tube spacing typical of cruiser triple trees, because the two clamps sit square on round tubes and the shell rides far enough forward to clear the headlight bezel. Triple-tree bolt-on brackets reuse the riser or top-clamp hardware, which is the better answer when the tubes are closely spaced, when turn signals crowd the fork legs, or when fork covers keep a clamp from gripping cleanly. Take the spacing at the upper tree, where the clamps land. If it reads differently from side to side, you have a bent tube or a mis-machined tree, and no fairing bracket will fix that.
Standoff length lives or dies by bucket depth
Standoff length is set by headlight bucket depth plus the thickness of the shell ear, nothing else. A deep bucket on a Boulevard needs a longer standoff so the fairing lip sits clear of the bezel and the headlight aim stays adjustable; too short, and the shell contacts the bucket and starts stress-cracking within a few hundred miles. Fit rubber isolators at every mounting ear, keep them compressed roughly 20-25 percent, and torque the ear bolts evenly in a cross pattern to about 8-12 ft-lbs (11-16 Nm), or to the bracket maker’s figure where it differs. Isolators are not comfort padding: they absorb the vibration that opens cracks at the ears, and over-torquing flattens them.
Leg angle tells you the spacing is wrong
When the spacing is off, the bracket legs show it before the fairing does. Too wide, and they splay outward and load the inner ear; too narrow, and they pull in, bowing the shell and lifting the outer edge away from the headlight opening. Visible leg deflection means the bracket is wrong for the bike, not that the bolts need more torque. Test-fit everything before paint or bodywork is committed, so a swapped bracket or a different standoff set costs you an afternoon instead of a repaint on custom Suzuki fairings. Shops treat any of the featured fairings they install the same way: verify the hardware on bare gelcoat, then finish.
Test-fit sequence
- Mount the bracket to the forks or triple tree and check leg angle with the shell off.
- Hang the shell on the bracket with isolators and standoffs in place, then check the ear gaps.
- Check the headlight opening last, with the bucket installed and the beam aimed.
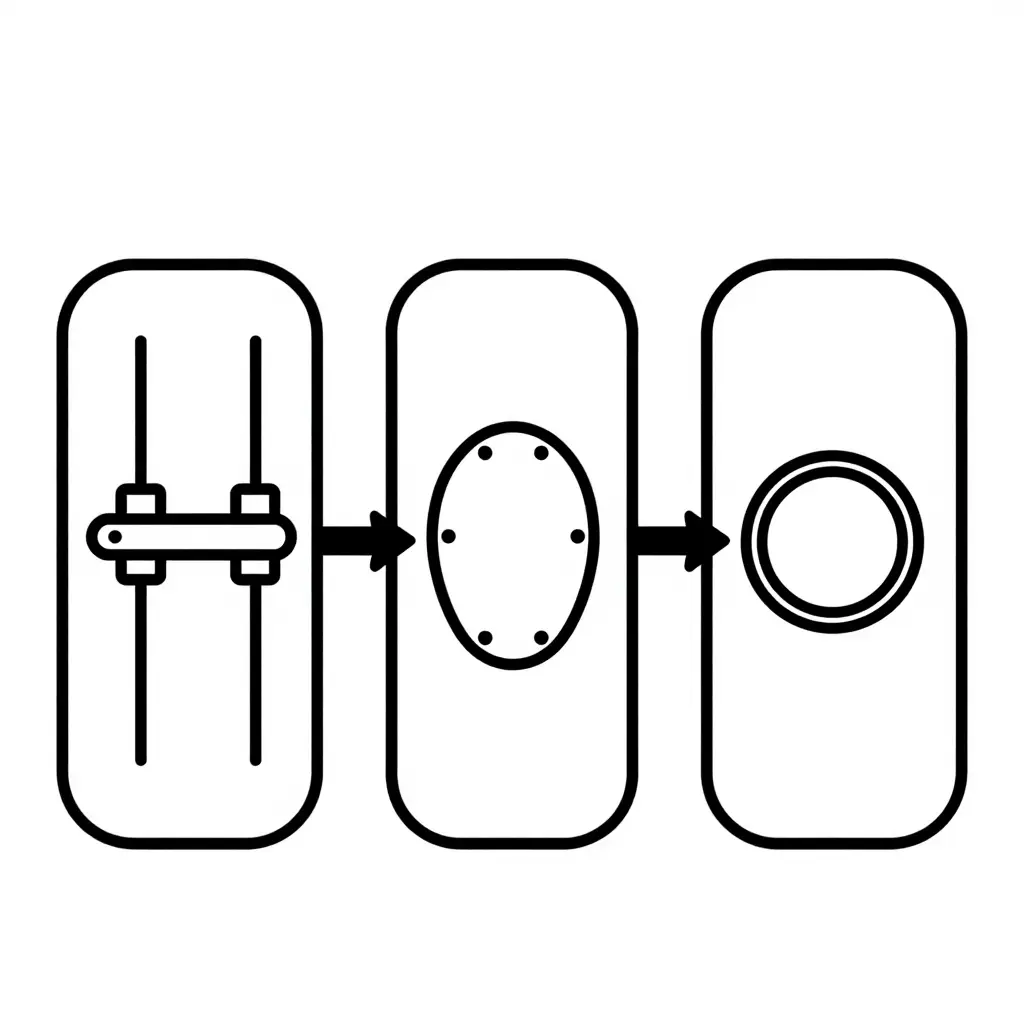
Flat line-art schematic of the three-stage fairing bracket test fit: clamp and spacing check, bolt-hole alignment, then bezel-to-headlight centering.
Troubleshooting a Mismatched 2006 Suzuki Boulevard Fairing
Nearly every complaint about a Boulevard batwing that will not fit, or will not stay put, comes back to fork tube spacing and headlight size. Work through these in order and correct the geometry before you drill, cut, or add torque. If you are starting fresh instead of fixing an existing install, compare custom Suzuki fairings built to the correct mounting geometry.
- Clamps slip on the fork tubes under load. The bracket spread is wider or narrower than the bike’s, so the clamp halves never sit parallel and vibration walks them downward. Measure center-to-center spacing, then shim or replace the mount until the bracket matches that dimension before final torque.
- Shell contacts the fork tube at full steering lock. The standoff is too short, so the shell sits far enough rearward to intersect the tube arc as the bars turn. Add a longer standoff or spacer at the mount legs and push the shell forward until you have 10-15 mm of clearance at both locks.
- Bezel will not seat in the headlight opening. The opening is undersized for the 2006 bucket, so the bezel bottoms on the rim instead of dropping flush. Verify headlight size against the aperture, then open it with a drum sander and trim ring until the bezel seats without force.
- Shell buffets or vibrates at cruising speed. One bracket leg is preloaded against the frame, leaving the shell under constant tension that flexes with airflow. Loosen every mounting point, let the shell settle unloaded, torque in a cross pattern, and shim any remaining gap rather than pulling it closed.
- Cracks at the mount ears. Over-torqued hardware or missing isolators send engine and road vibration straight into the shell. Fit fresh isolators at every ear and torque the mount bolts to spec with a calibrated wrench.
Fitment is a measurement problem, not a strength problem: confirm spacing and bezel size first, and the rest of the install lines up.
FAQ: Fitment Questions Answered
What fork tube spacing does a 2006 Suzuki Boulevard need for a batwing fairing?
There is no single figure. Measure center-to-center across the two tubes at the upper triple clamp with the fork caps seated and the bars straight; Boulevard cruisers land between roughly 190 mm and 225 mm depending on variant, so the mount’s clamp spacing has to match your reading rather than a model-year guess. Work to a tolerance of about ±1/8 inch (3 mm), which is what quality adjustable brackets allow. Exceed it and the clamps bind on the tubes, the fairing cocks off-center, and steering effort rises noticeably.
How do I measure headlight size for a fairing opening?
Use calipers across the widest point of the headlight bezel’s outer rim, not the lens, and note the depth of the seating flange behind it. Then measure the fairing opening at its inner lip and confirm the bezel sits proud by roughly 1/16 to 1/8 inch (1.5 to 3 mm) for a clean, rattle-free seat. A mismatch shows up fast as either a bezel that cannot pass through the opening or a gap ring that lets water into the bucket.
Can I fit a 7 inch headlight bezel into an opening cut for a 5-3/4 inch unit?
No. The nominal sizes differ by 1-1/4 inch, so the larger bezel will not pass the opening, and spacer rings relocate the gap instead of sealing it. The opening has to be trimmed and re-edged, or you stay with the smaller headlight.
Will a fairing bracket for another Boulevard variant fit my 2006?
Only if the donor bike matches your fork tube spacing, triple clamp width, and headlight bucket depth, which is why cross-variant brackets often fit one model and miss the next. Compare the bracket’s stated slot spacing against your own measurement before buying. A bracket that is off by a quarter inch loads one fork leg and leaves the other clamp loose.
How do I confirm fitment before ordering a fairing online?
Log three numbers first: fork tube spacing, headlight bezel outside diameter, and clearance from the risers to the top of the headlight. Match those against the listing’s spec sheet, and confirm the batwing fairing mount is listed for your exact year and model. Send the supplier those figures before you commit; browse ready to ship fairings once your measurements match a listing.
Closing Fitment Summary
However the listing is worded, the rule holds: fork tube spacing sets the clamp width, headlight size sets the shell opening, and both have to match the part before the order goes in. A wrong clamp width and the fairing will not sit square over the triple tree; a wrong opening and the bezel either fights the shell or rattles inside it. No bracket, spacer, or amount of persuasion fixes either mismatch cleanly.
Measure center-to-center at clamp height and the bezel’s outer diameter, write both down, match them against the published specs of the custom fairings you are considering, test-fit dry with the hardware loose, and only then torque the fasteners and hang the outer shell. The same pair of numbers is what you use to cross-check a fairing against another model or model year, including the Suzuki fairings listed for nearby Boulevard variants: fork spacing and headlight diameter travel well across model lines, while bodywork styling, mounting tabs, and paint codes do not.