
Why the Headlight Cutout and Stay Bracket Decide the Build on 1996 Honda CBR 600 F3 Fairings
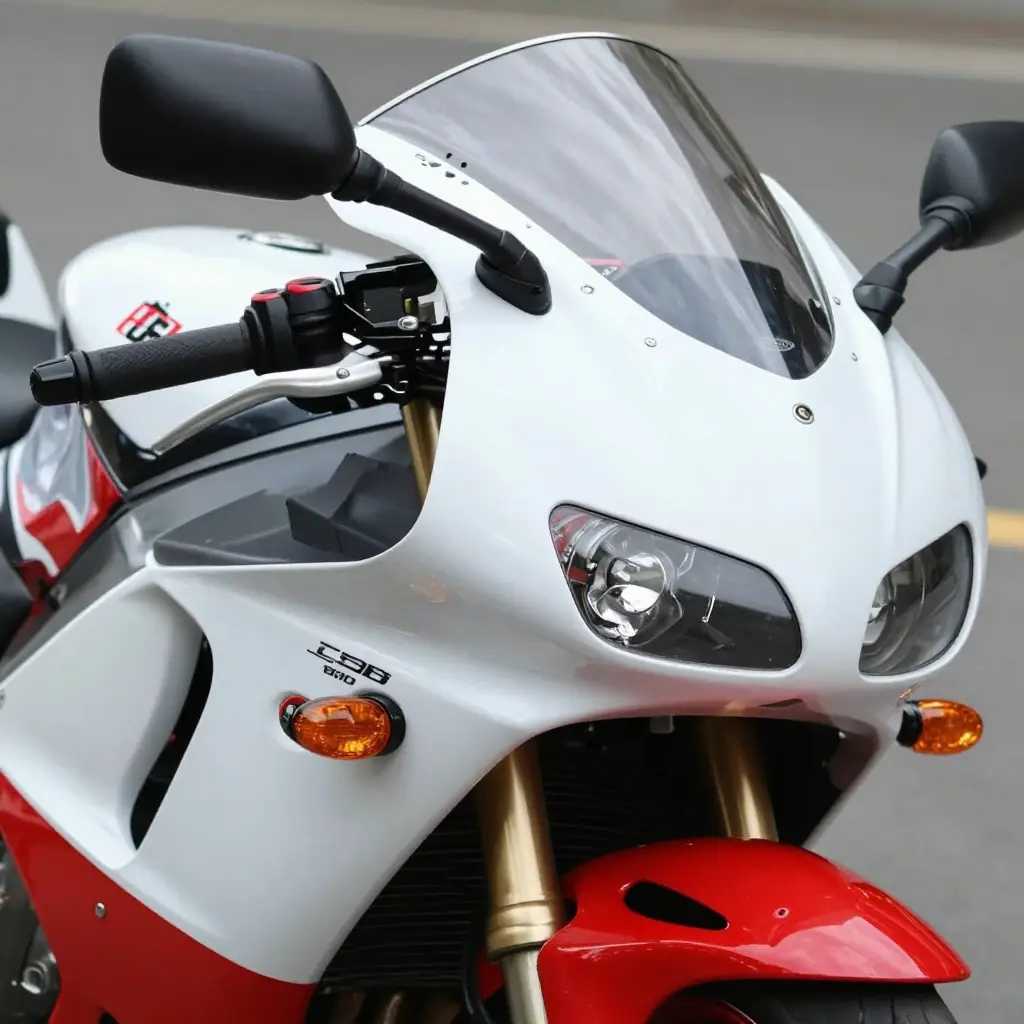
Two parts decide whether a set of F3 panels sits square: the headlight cutout in the upper cowl and the stay bracket behind it. Paint and panel count come later. Stock Honda plastic and race bodywork both register off those two features, and a nose bolted on in the wrong place stays wrong however much you drill, shim or trim. If you are comparing replacement Honda fairings for classic sportbikes, check the cutout and the stay first, because every panel behind the nose inherits their error.
The Nose Is a Registered, Load-Bearing Assembly
The cowl stay bolts to the steering head and fixes the height and lateral position of the front body, along with the rake of the upper cowl against the fork axis. Everything else in the nose is positioned from that datum, which is why the instrument bracket bolts to the stay, not to the plastic. The headlight cutout then carries the datum forward: its aperture lines the upper cowl up with the tabs on the stay, so panel and hardware sit in one reference frame.
How Error Propagates Through the Panels
Because the cutout is a fixed window, an error at the stay shows up larger at the panel edges. A stay that is a few millimetres off axis rotates the upper cowl, which moves the aperture and pushes the mounting tabs out of plane. What you see at the bike is an uneven gap along the side panels and a lower that will not meet the uppers without force.
The ram air ducts make it worse. Their grommets and locating pins assume the nose is where the factory put it, so a displaced upper cowl loads the ducts sideways and holds the side panels in a bind. Race bodywork has less room to absorb any of this: thinner flanges, no adjustment allowance. A misregistered stay produces gaps there that shimming will not close.
The Diagnostic Order
Measure the stay before you judge a single panel: symmetry to the fork centreline, tab height, twist. Then dry-fit the upper with the lowers unbolted and check the cutout against the stay’s tabs. If the cowl lands cleanly and the aperture sits square to the stay, the panels behind it usually follow. If it does not, nothing further back in the stack is worth adjusting yet.
Anatomy of the F3 Nose: Cowl Stay, Headlight Housing, and Ram Air Duct Grommets
The nose of the 1996 CBR 600 F3 is not one shell bolted on in one place. It is a stack of parts that locate off each other in sequence, and that sequence explains why your gaps either close up or fight you at every fastener. Once you know the load path, the fitment problems stop looking random.
Step 1: The stay defines the geometry
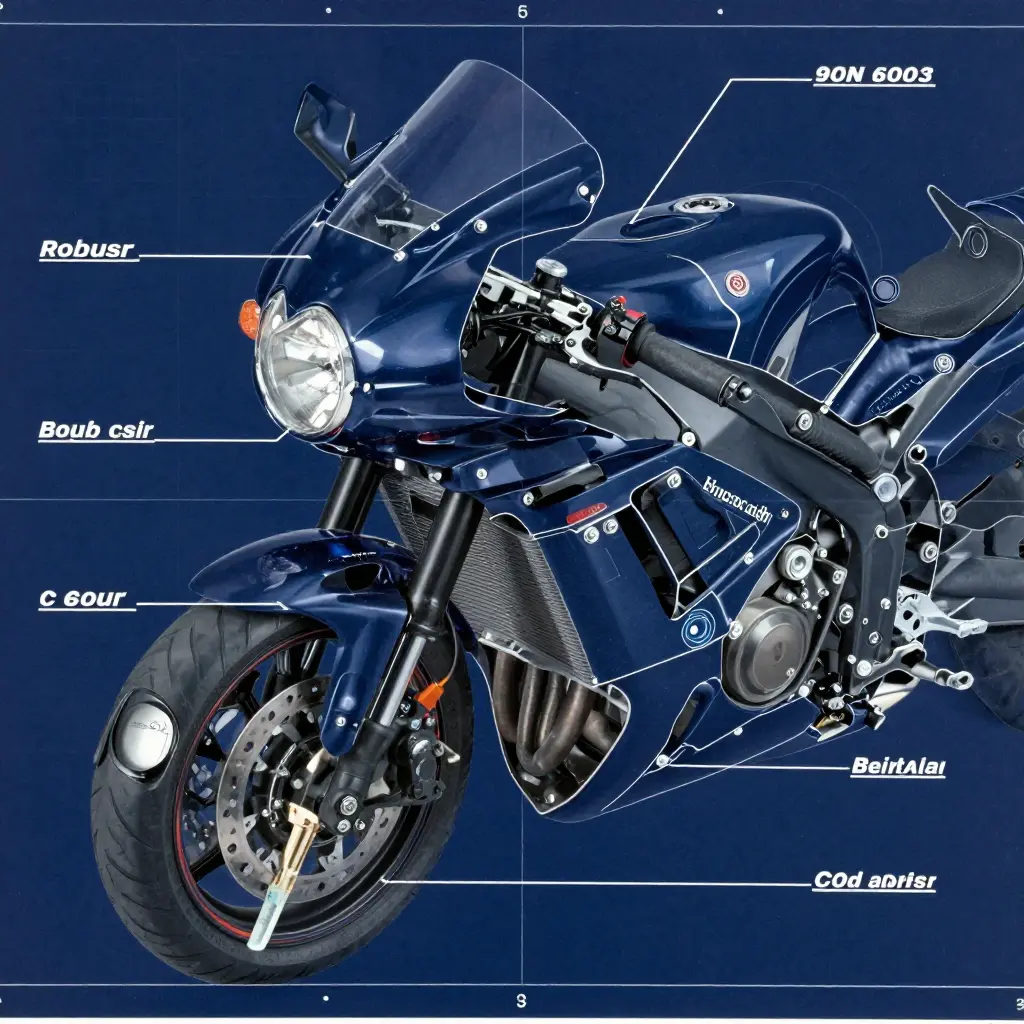
The cowl stay is the anchor. It bolts to the frame and the steering head area, and everything else in the nose is positioned relative to it, including the headlight housing and the meter bracket, both of which mount to the stay. Neither touches a body panel.
None of those three parts flex into alignment. They are rigid, and they do not respond to a pry bar or a longer bolt.
Step 2: The upper cowl registers off rigid points
The upper cowl locates on the stay and on the headlight housing. Both are stiff references, so the panel inherits their position exactly, and there is no adjustment built into that interface.
That is why one bent bracket shows up as gaps across several panels. A tip-in from a drop, a twist from a front-end impact, a bent tab: the error passes through the rigid headlight housing and lands on the upper cowl, which then sits where the stay says it sits rather than where the mould was designed. The side panels index off the upper, so they move with it.
Step 3: Grommets absorb – or transmit
The ram air ducts pass through grommets in the upper and side panels. Those are the only compliant parts in the chain.
They are isolators, not trim. Their job is to let the ducting and the panels move relative to each other without cracking plastic or wearing through the duct wall, so a healthy grommet takes up misalignment and vibration and keeps the nose quiet. A grommet that has hardened, flattened or gone missing does the opposite: it removes the compliance, turns the duct into a hard locating feature and loads the panels through the mounting points. You see that as a distorted nose, hairline cracks around the duct openings and panels that will not stay seated whatever you do with shims.
Rigid versus compliant at a glance
| Component | Function in the stack | Behaviour |
|---|---|---|
| Cowl stay | Bolts to frame and steering head; carries the housing and meter bracket | Rigid; sets position |
| Headlight housing | Mounted on the stay; second locating reference for the upper cowl | Rigid; repeats the stay’s position |
| Meter bracket | Mounted on the stay | Rigid; hangs off the stay |
| Upper cowl | Locates on the stay and the headlight housing | Follows the datums; no adjustment |
| Ram air duct grommets | Isolate the ducts where they pass through the upper and side panels | Compliant; absorbs until it hardens, then transmits |
What this means in practice
Work down that stack in order. Rigid parts set position, compliant parts absorb error. When the nose does not line up, the misalignment is coming from the cowl stay and the headlight housing and being amplified by the upper cowl and the panels hanging off it, with worn grommets adding a load path of their own.
So check the stay for straightness and correct mounting at the frame before you touch a panel fastener, confirm the headlight housing and meter bracket sit square, then replace the grommets as part of any restoration. Quality custom Honda fairings will only sit correctly on a nose whose rigid references are true. Panels cannot straighten a bent stay, and no adjustment compensates for isolators that no longer isolate.
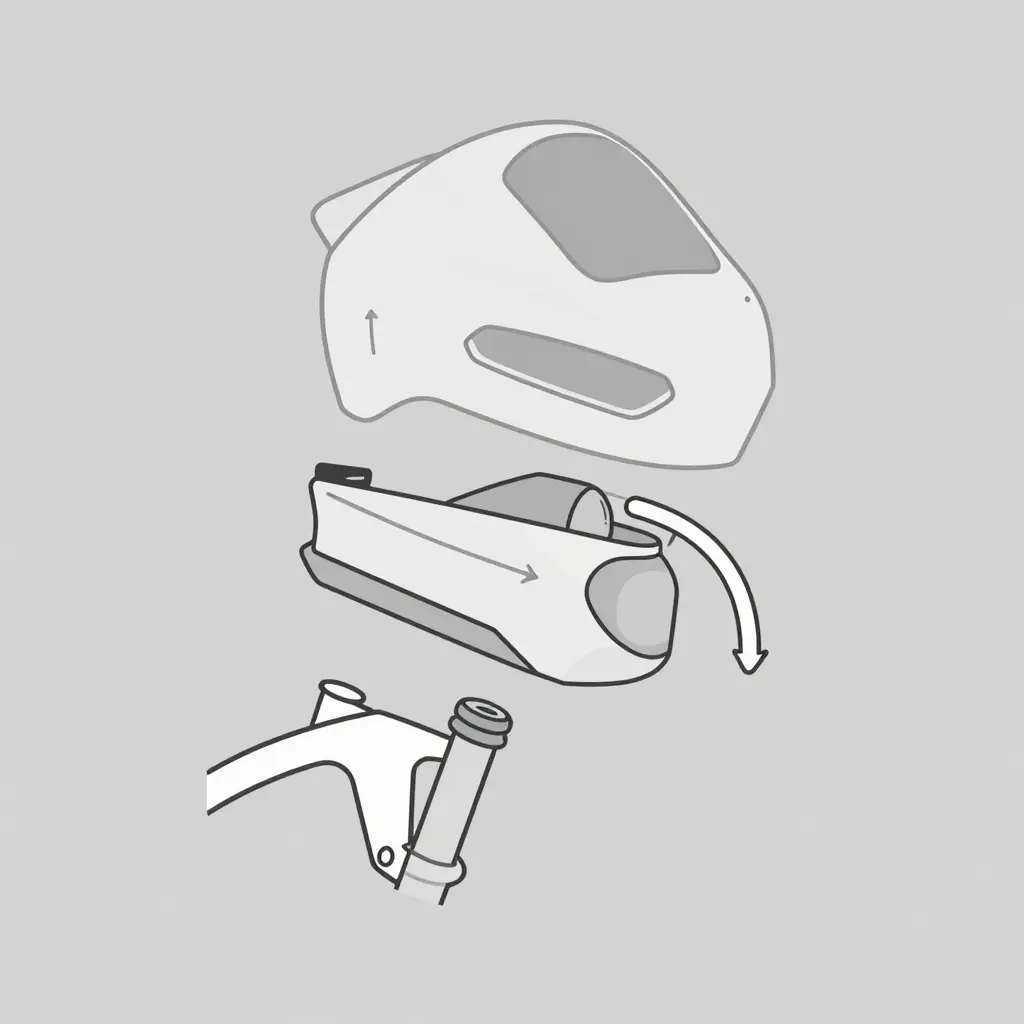
Read the diagram from the frame outward. The steering head anchors everything, the stay carries the nose, and each panel forward of that registers off what came before it, which is why one bent bracket or a hardened grommet turns up as a gap three components downstream. If you are weighing replacement panels against repair, compare a fresh set of custom Honda fairings against your current hardware before committing.
How a Bent Cowl Stay Produces Nose Panel Gaps
Observation: the gap is a symptom, not the fault
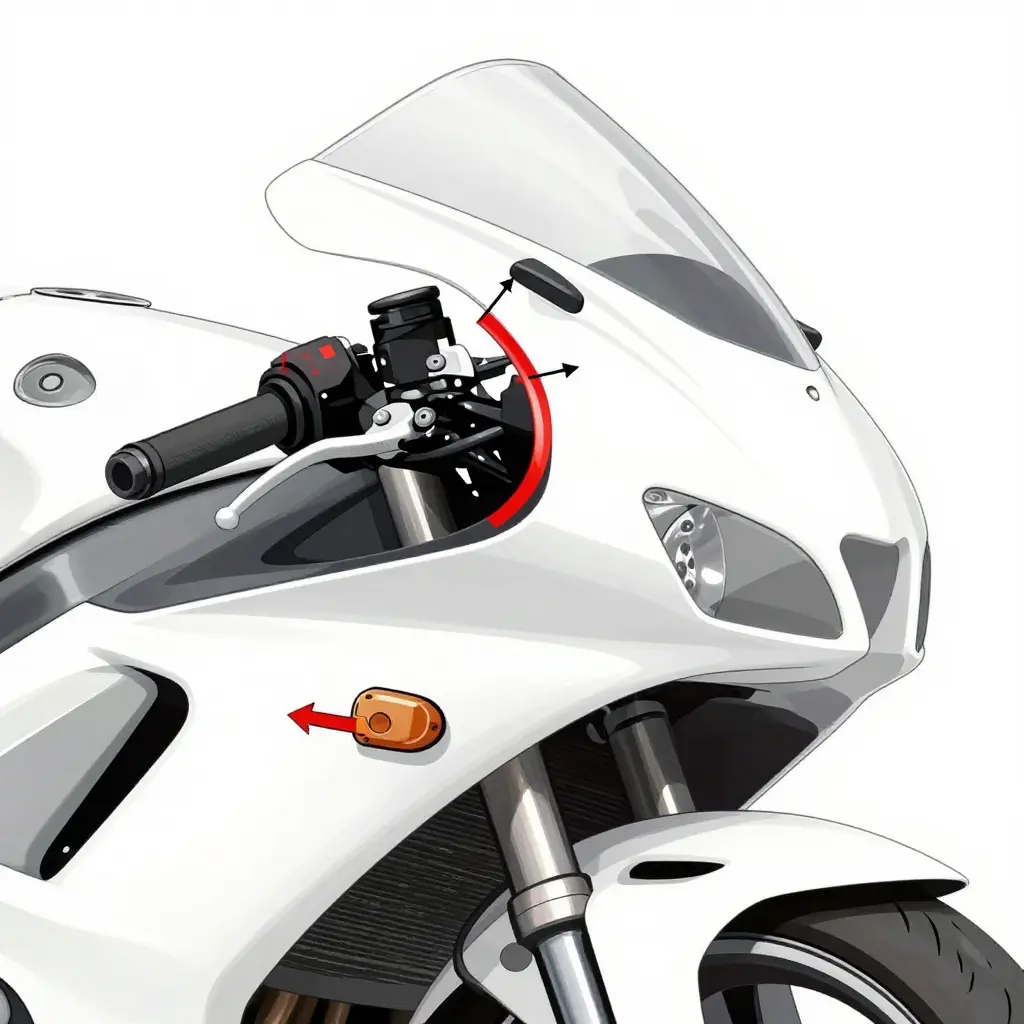
On the 1996 CBR 600 F3 the nose panels hang off a tubular steel cowl stay bolted to the frame around the headstock. The stay carries the headlight housing, the mirror stalks and the leading edge of the upper cowl. Restorers chase a 10 mm asymmetric gap at the headlight cutout, or a step at the side-panel seam, by shimming, slotting brackets or ordering new bodywork. Usually the panels are fine and the stay is bent, and the fairing is reporting the bend accurately.
Mechanical explanation: how the stay bends
Four things go wrong on a machine this age:
- Tip-over or low-speed drop. The stay’s upper arms stand proud of the frame and take the first hit. A fall at a standstill can rotate an arm inboard or aft by several millimetres.
- Over-tightened fasteners. The mounting bolts at the headstock are threaded into thin-wall tube. Excess torque crushes and ovalises it, and the arm then creeps out of position under vibration.
- Fatigue at the welded joints. The mirror-stalk tabs and headlight ears are welded to the main hoop. Years of bar shake and road load start cracks at the weld toes, and the joint yields for good.
- Load transfer from misaligned panels. A fairing pulled into place preloads the stay and bends it slowly further, so the gap grows with every assembly cycle.
Why millimetres become centimetres
The stay is a cantilever. Its mounts cluster near the frame centreline while the outer edge of the upper cowl hangs roughly 300 mm away, so any angular error at the attachment is multiplied by that lever arm. Two millimetres of rotation where the stay meets the frame becomes 10 to 15 mm of movement 300 mm outboard, which is the scale of gap that gets blamed on a bad mould. The same geometry explains the shape of the error: the headlight cutout is the longest unsupported span, so it shows as an asymmetric gap, a stepped side-panel seam, or a nose sitting high or low against the ram air duct aperture.
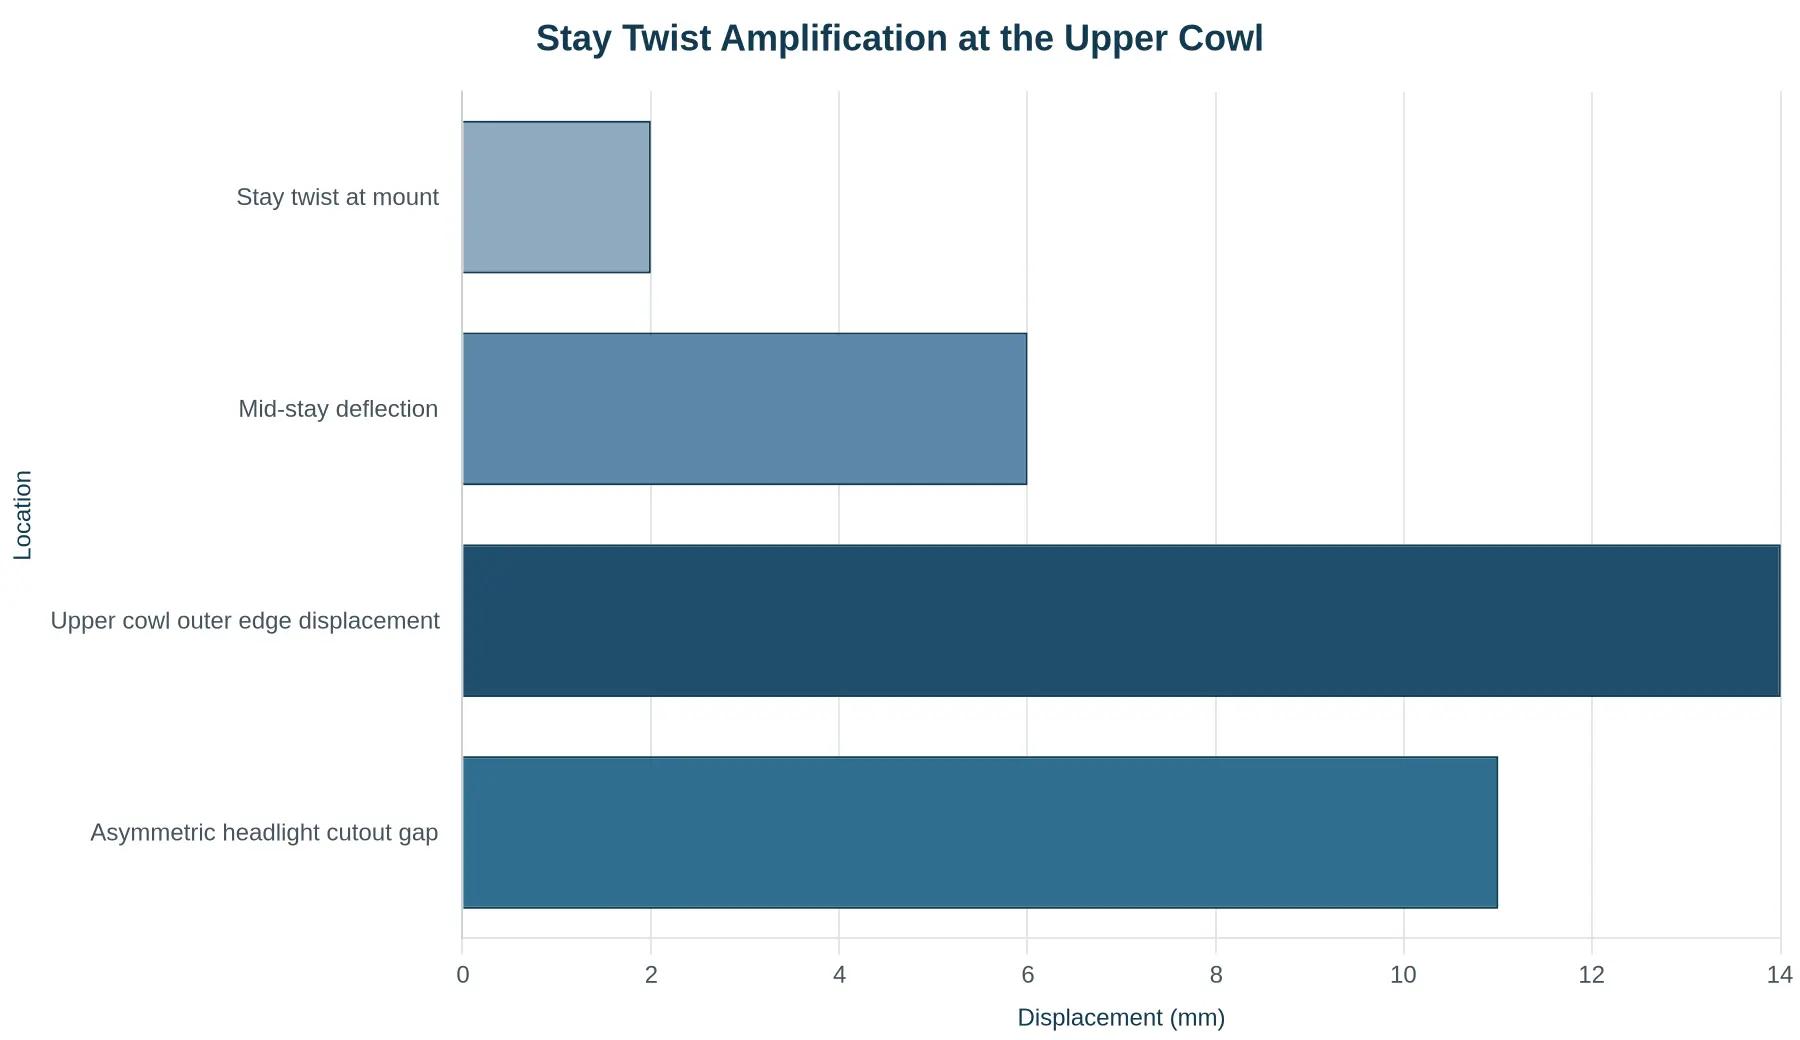
Check points to measure before fitting anything
| Check | Method | Pass criterion |
|---|---|---|
| Stay symmetry left-to-right | Datum from frame centreline to each upper arm tip | Equal within 1 mm |
| Perpendicularity to frame centreline | Engineer’s square or plumb line against the hoop | No visible lean; square contacts flush |
| Headlight housing mounting ears | Lightly bolt housing, check ear-to-ear span and plane | Ears coplanar, cutout centred on the housing |
| Weld toe condition | Dye penetrant or close visual at all tabs | No cracks, no fretting at joints |
| Fastener condition | Thread and tube roundness at each mount | No ovalised holes, correct spec bolts |
Conclusion: correct the stay first
A gap that closes once the stay is straight was never a fairing problem. Measure the stay, correct it, then trial-fit panels. New bodywork on a bent stay transfers the load into the new panels, preloads them and brings the same gap back, or cracks the paint at the seam. Browse Honda fairing options once the stay measures straight and square.
Set the three panel routes side by side and the same point comes up: the headlight opening and the cowl stay set the rules. The breakdown below is for weighing stock OEM panels, race bodywork and aftermarket replica fairings against the way you actually ride the bike.
| Feature | Stock OEM panels | Race bodywork | Aftermarket replica fairings |
|---|---|---|---|
| Headlight cutout | Pre-cut at the factory to suit stock lens | Blank upper, no opening molded | Pre-cut, often with optional blank upper |
| Headlight and stay compatibility | Direct fit to stock lens, harness and stay | No lens; stay usually removed or trimmed | Takes stock lens; stay must be straight and square |
| Mounting point count and type | Stock count, threaded inserts bonded in place | Fewer points, Dzus clips or zip ties | Stock pattern, glassed-in inserts; accuracy varies by maker |
| Ram air duct provision | Molded ducts, grommets and screens fitted | Ducts often closed off or trimmed for ram air | Molded ducts present; grommet quality and hardness vary |
| Material and thickness | ABS, approx. 2-3 mm, consistent wall | Fiberglass, approx. 1.5-2 mm, light layup | ABS or fiberglass, approx. 2-3 mm, maker dependent |
| Weight | Heaviest, but it stiffens the whole nose | Lightest by a clear margin | Slightly lighter than OEM, depends on layup |
| Panel gaps out of the box | Tight and repeatable; panels designed together | Wide and uneven; accepted as normal | Close but rarely perfect; shimming and slot filing expected |
| Prep work before paint | Scuff, prime, minor scratch fill | Sand gelcoat, fill pinholes, prime | Sand, remove mold flash, prime; some panels need filler |
| Road legality and lighting | Road legal with DOT lens and wiring intact | Track only; no lights, no plate provision | Road legal if stock lights refitted and aimed correctly |
| Best use case | Restoration, resale and daily riding | Track days and race builds | Ridden bikes that need fresh, painted bodywork |
Before you pick a panel type, put a straightedge or a string line on the cowl stay and check that both headlight ears sit equidistant from the frame rails. No panel, OEM, race or replica, closes a nose gap made by a bent bracket. Once the stay measures true and the grommets still hold their shape, the full Honda fairings collection is worth browsing.
Headlight Cutout Geometry: The Alignment Reference for the F3 Nose
On the 1996 CBR 600 F3 the upper fairing is not centred by the paint line, the decal split or the mould parting seam. It is centred by the headlight cutout, because that aperture is the one feature on the nose shared with a component fixed to the frame: the headlight housing on the cowl stay. Every other gap at the front of the bike is measured back from it. Treat the cutout as the fixture and the bodywork follows. Treat it as cosmetic and you will spend a weekend on gaps that cannot close.
Concentricity Is a Clearance Value, Not a Fit
The cutout edge should run concentric with the lens perimeter and with the housing flange behind it, which means a constant clearance the whole way round. Check it at 12, 3, 6 and 9 o’clock with a divider or feeler stock. Variation beyond about 2 mm around the circumference shows up as a heavy shoulder at the top or a sliver of daylight at the bottom. The housing hangs on rubber grommets and slotted mounts on the stay, so a bent stay or collapsed ram air duct grommets move the housing and spoil concentricity even when the panel itself is moulded correctly. Check the stay and the grommets before you reach for a file.
The Cutout Centreline Sets the Visual Centre of the Motorcycle
The vertical centreline through the lens and bulb axis is what the eye uses to judge the machine. Mirrors, indicator recesses, intake ducts, screen, tank and seat line are all read against it, and a 3 mm lateral shift of the upper on its mounts does not look like a panel offset. It looks like a bent front end. That is the argument for positioning from the cutout rather than from the mounting holes.
What a Misregistered Cutout Does Downstream
- Nose gap: a cutout cut high, low or rotated forces the upper fore or aft on the stay. The bridge gap opens at the top and pinches at the bottom, and the two upper halves stop meeting symmetrically at the centre seam.
- Mirror and indicator mounts: the mirror bases are moulded into the upper, so a shifted panel puts the stalks at unequal heights and angles. Indicator recesses stop running parallel to the cutout edge, and one pod ends up proud while the other sits sunk.
- Side-panel seams: the lower edges of the upper set where the side panel joint begins at the frame spar. Lateral error at the cutout is multiplied along that lever arm and turns into a wedge-shaped seam with a visible step at the mid-panel joint.
Three Build Routes, One Datum
- Stock headlight, pre-cut upper (road bike): the cutout arrives as the datum. Check concentricity and leave the aperture alone. All adjustment belongs in straightening the stay, replacing grommets and shimming mounts.
- Race bodywork, blank or partly cut upper: mount the housing on the stay first, fit the upper, then transfer the housing flange outline to the panel with a divider or a card template. Cut undersize and creep up with a drum sander, refitting between passes.
- Mixed stock and race panels: accept that the cutout, not the paint line, will set the final panel gap. The paint line follows the aperture.
Whichever route you take, work from measurements and template transfer, not trial and error. Record cutout diameter at four points, centreline offset against the steering head, and the gap at three reference points before and after every change. Fit fasteners finger-tight, and correct the stay before anything else. If you are buying panels, start with custom Honda fairings that match the housing you actually have instead of forcing a generic upper onto a specific lens.
Reading the Numbers: Panel Gap at Four Nose Reference Points
Before you buy a single replacement panel, measure. That takes four readings, and they only mean something if every one comes off the same rigid reference and is taken the same way.
Where the Four Reference Readings Come From
All four readings come off the cowl itself, not the side panels. The schematic below carries no labels on purpose, so read it as geometry. The dashed vertical axis is the vehicle centreline. If the upper cowl sits off that axis, one side gap will always read wider than the other, however far you slide the side panels.
Four circular markers show where the gauge tips go: left and right headlight cutout edges, then left and right upper-to-side-panel seams. The arrowed dimension lines give the measurement direction at each point, always perpendicular to the seam and never diagonally across the flange.
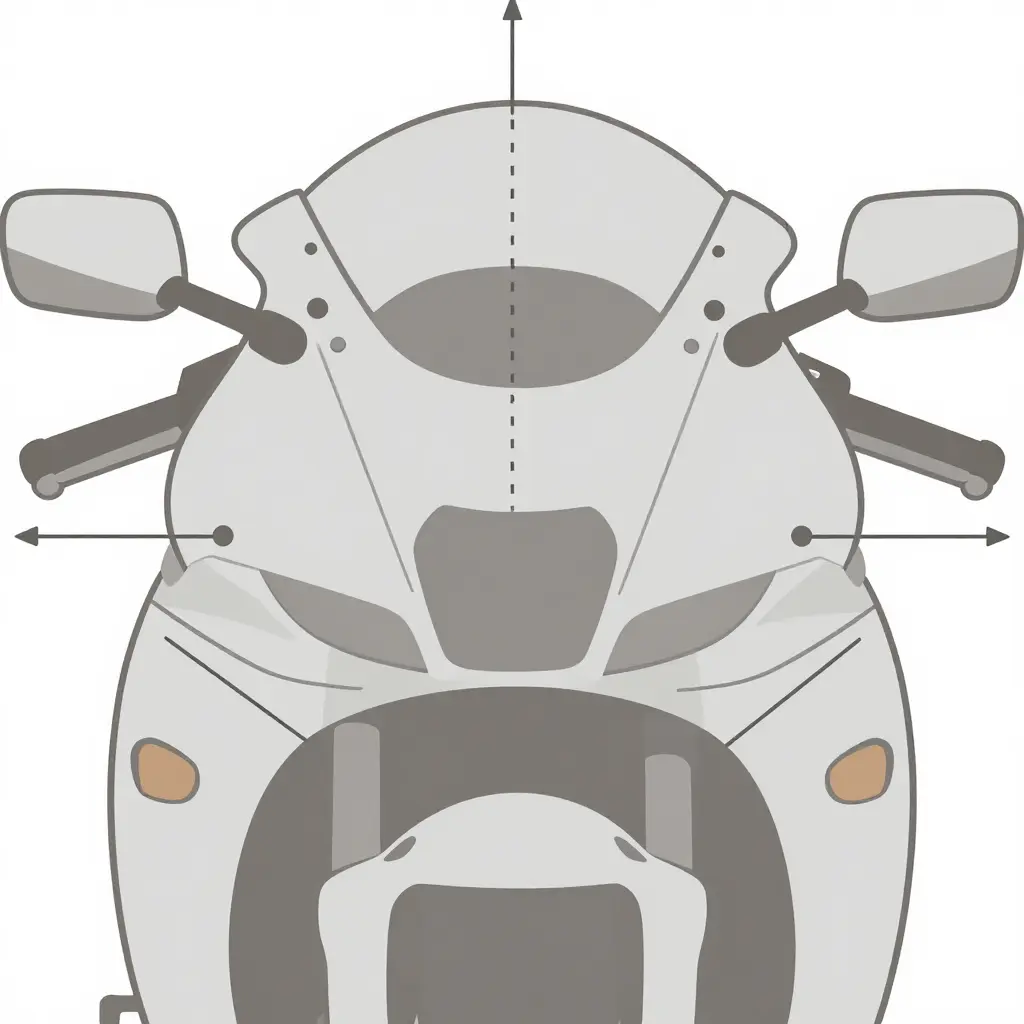
Take all four numbers before you loosen anything and write them down. Matched readings that are both wide point to a bent cowl stay. One hard, uneven corner usually means a hardened ram air duct grommet, or a custom Honda fairings panel that has already been heated and bent once too often.
The chart below plots the same four points across three configurations. Take the readings with the bike on a level lift, the front wheel straight and the mounting bolts finger-tight before final torque.
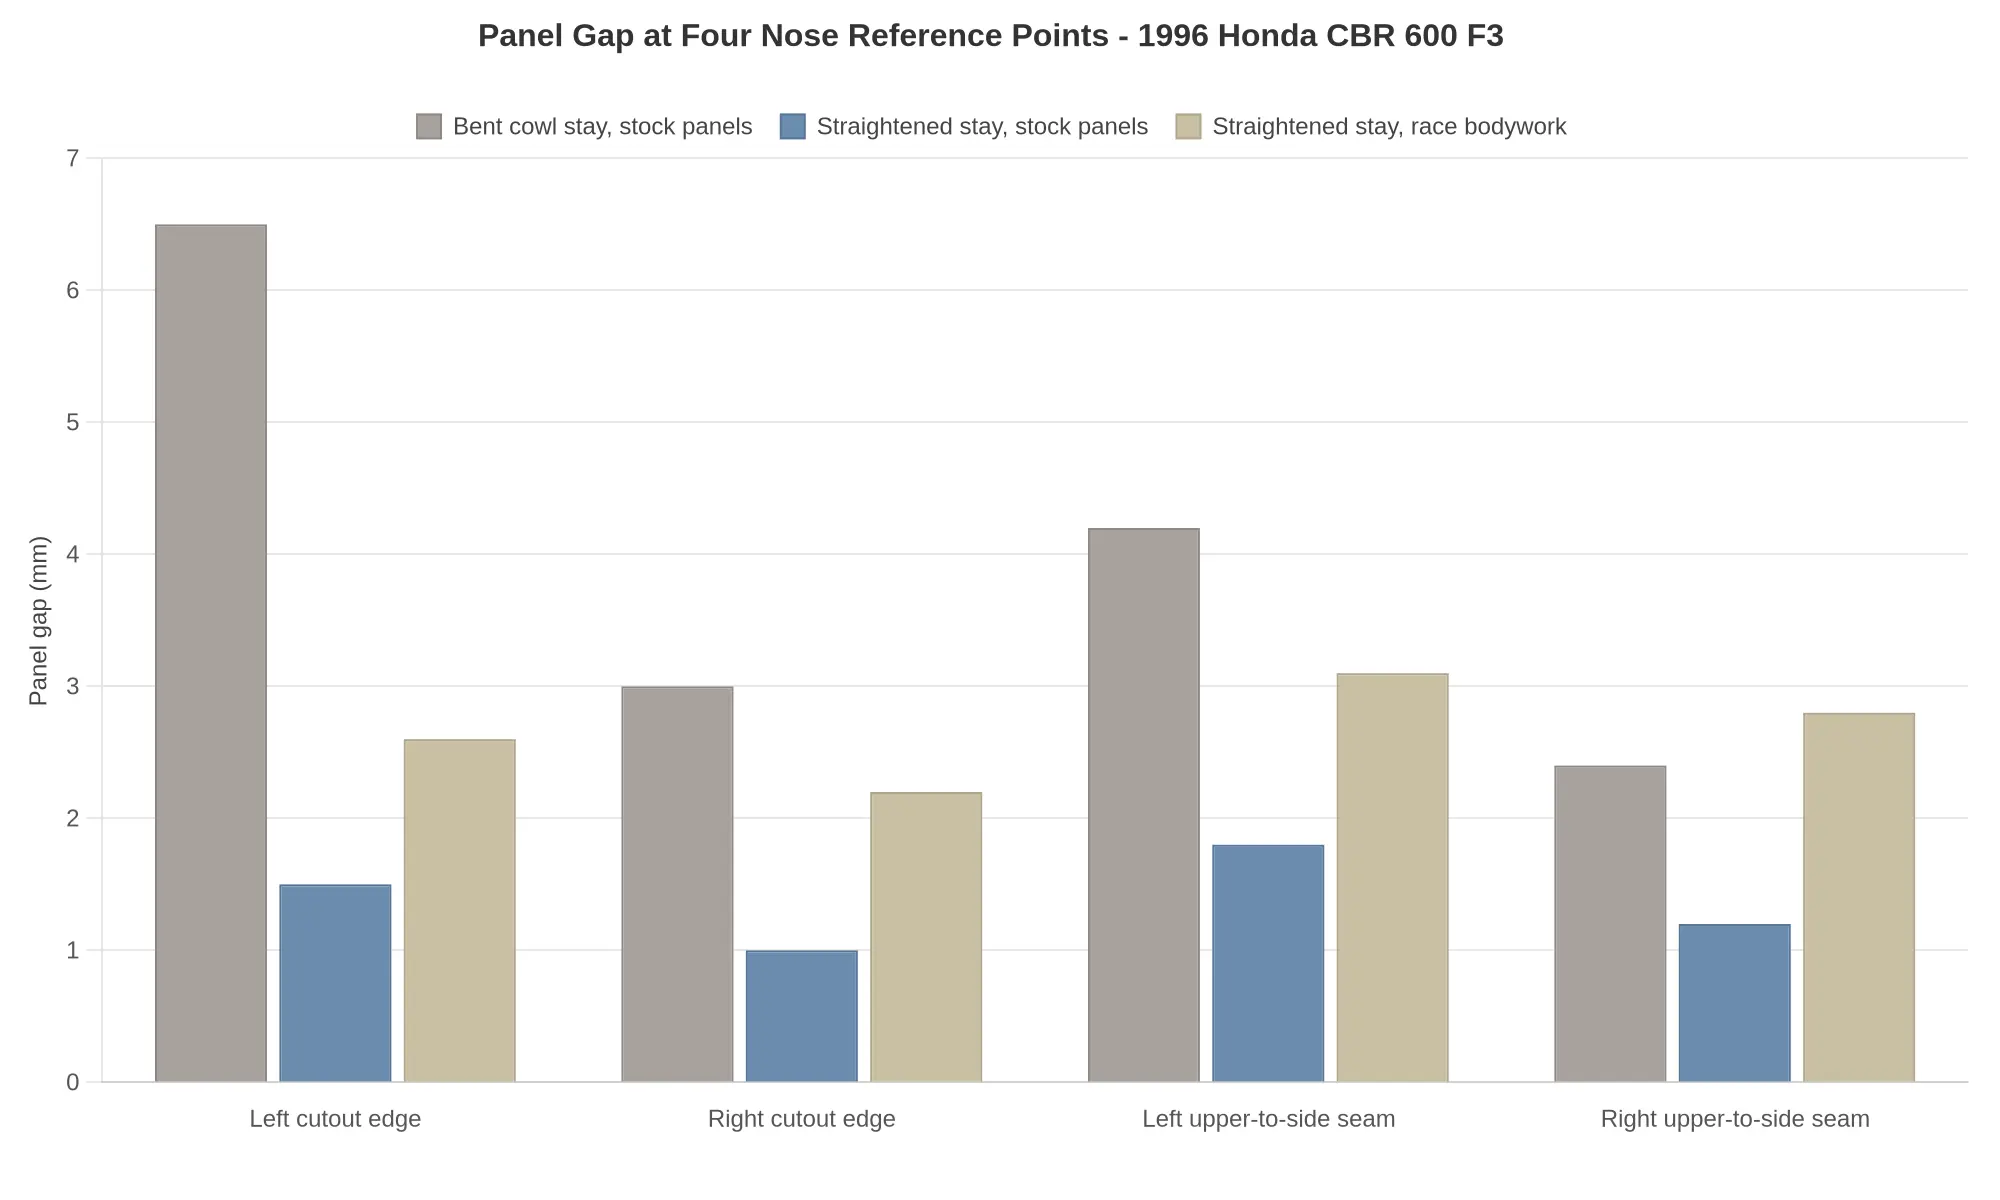
Figure 1 – Grouped bar chart of panel gap (mm) at four nose reference points across three build configurations, bent stay against straightened stay.
The pattern is the point, not the exact figures. A tweaked stay pulls the upper cowl sideways and rearward, so the gap opens asymmetrically: the bent-stay run reads about 6.5 mm at the left cutout edge against 3.0 mm on the right, which is the usual sign that the bracket rather than the plastic is at fault. Straighten the stay on a jig, re-measure, and both edges come back to 1.5 mm and 1.0 mm. If the gap follows the stay, the stay is bent.
Look at the third series too. Fresh race bodywork on a corrected stay still reads slightly wider than stock panels (2.6 to 3.1 mm) because aftermarket laminates rarely match OEM mounting flange thickness. Our Honda fairing fitment guide covers how aftermarket moulds index against the stock stay and grommet positions.
Treat the numbers as a shape to look for, not a specification to hit. Real gaps vary with stay history, subframe alignment, ram air duct grommet condition and which panels you are bolting on, so record your own baseline before bending anything.
F3 Nose Fitment Diagnostic Checklist: Diagnose Before You Buy
Support the front end and strip the nose. Put the bike on a front stand or headstock lift so the fork carries no load on the steering, then remove the upper cowl, side panels, headlight and screen with a 4 mm and 5 mm hex key and a JIS screwdriver. Bag and label every fastener, because mixed hardware will corrupt your gap readings later.
Inspect the cowl stay for twist, cracks and weld fatigue. Sight down the stay from the front with one eye closed, then look at every weld at the frame tabs and mirror-mount tangs under a bright light with a magnifier. Flex each tang by hand. Any movement or a hairline crack means the stay is scrap or needs welding before you spend a cent on panels.
Check stay perpendicularity to the frame centreline. Drop a plumb line from the steering head, clamp a straightedge across the frame rails, and measure from that centreline to each mirror tang with a steel rule. A left-to-right difference beyond 2 to 3 mm confirms a bent stay, and a digital angle finder laid across the tang faces will show the twist in degrees.
Verify the headlight housing mounting ears and lens seating. Test-fit the headlight and confirm every mounting ear sits flush against the stay without shimming, and that the lens seats evenly in its recess. A housing pulled down at one corner pushes the upper cowl outward and creates the lopsided gap owners blame on the panels.
Inspect the ram air duct grommets for hardening and elongation. Squeeze each grommet between thumb and forefinger and measure the hole with a caliper. Glazed, rock-hard rubber or a hole stretched 4 to 5 mm lets the duct wander and preloads the nose, so plan on replacement.
Dry-fit the upper cowl with fasteners finger-tight. Thread every bolt two turns only, working from the mirror mounts outward, then measure gaps at four points: left and right mirror bases, and left and right upper-to-mid panel seams. Use feeler gauges or a caliper with a light, consistent touch.
Record the measurements before touching anything. Write the four readings down with a note on which side is tight, so you have a baseline to compare against after correction. Photograph the worst gap with a rule in frame.
Correct the stay, then re-measure. Straighten the stay on a hydraulic press or with a soft mallet and gentle levering, or fit a known-good replacement, then repeat step 6 exactly as before. The corrected stay should bring all four gaps within a couple of millimetres of each other.
Re-check grommets, brackets and headlight seating after correction. Confirm the ducts now sit relaxed in fresh rubber and the headlight still seats without force. If gaps persist after a true stay, look at the subframe and frame tabs before blaming the bodywork.
Only then select your panel type. With a straight stay and clean measurements, choose between stock-style Honda fairings with an accurate headlight cutout and race bodywork that accepts your lighting setup. Match the panel to the bike, not the bike to the panel.
This sequence keeps you from buying panels to compensate for a structural fault that fresh plastic cannot fix.
Hardened Ram Air Duct Grommets: The Second Decisive Fitment Variable
The cowl stay takes most of the blame for nose gaps on the F3, but it is only half the story. The ram air ducts mount through rubber isolators, and those isolators are a fitment variable in their own right, because whatever load they carry goes straight into the upper cowl and side panels.
What the isolators are asked to do
The ducts are not rigidly bolted to the bodywork. Each one locates through a rubber grommet set into the upper cowl, and the fastener clamps an inner sleeve so the rubber stays in compression instead of being crushed. The duct is meant to float: the grommet flexes, takes engine and road vibration, tolerates thermal expansion and lets the panels move a millimetre or two without fighting the duct. A grommet that no longer flexes has failed, even if it is still bolted in place and looks intact from the outside.
Cause and effect: from hardened rubber to an open gap
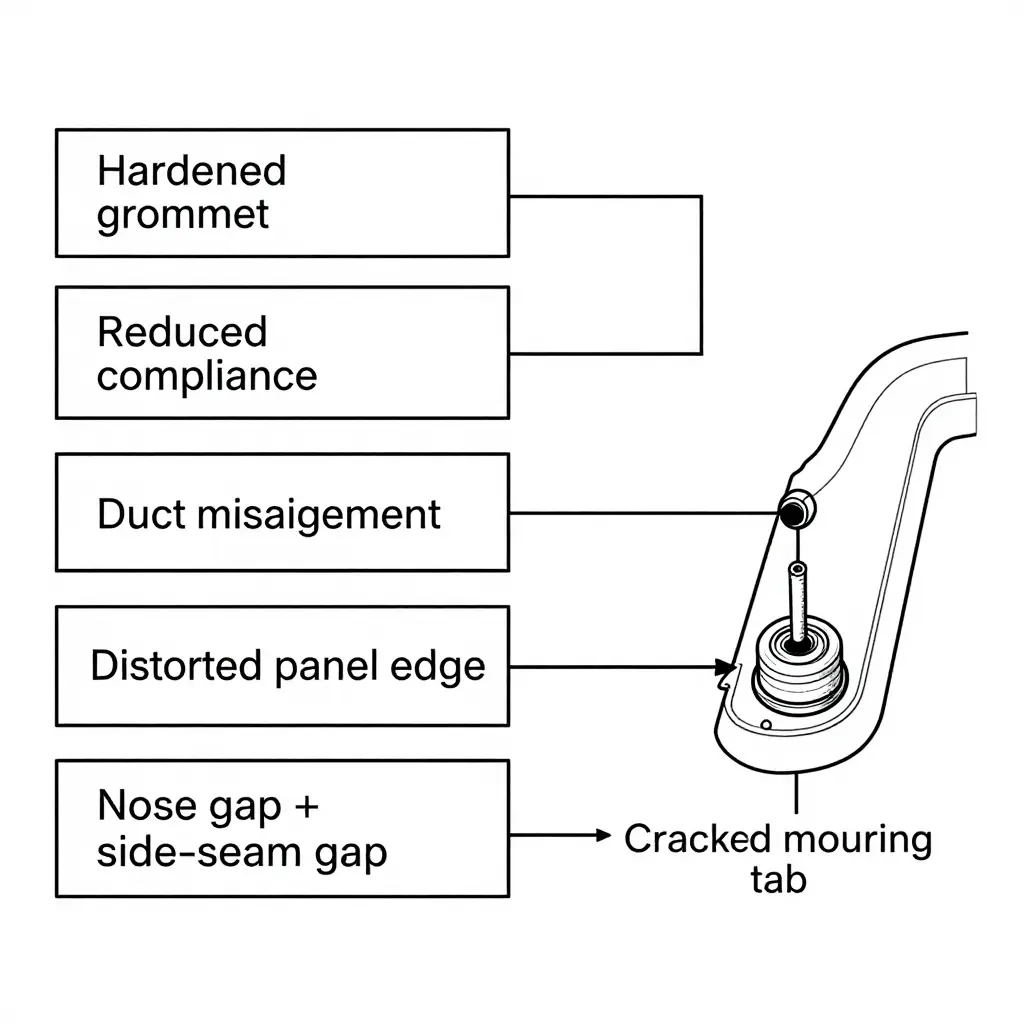
Heat cycling, UV, ozone and fuel vapour all harden the rubber, and the flange is usually where it shrinks or tears first. What follows is predictable:
- The grommet hardens, shrinks, or tears through at the flange.
- Compliance drops, and the duct becomes a rigid strut between the airbox side and the cowl panel.
- The duct can no longer sit centred in the panel aperture, so it preloads the upper cowl as the fasteners are tightened.
- The panel edge is pushed out or pulled in around the duct opening, usually on one side more than the other.
- A visible gap appears at the nose and along the side-panel seam.
- In severe cases the mounting tab at the duct or on the upper cowl cracks, because the load path now runs through a hard bushing with no give left in it.
Testing compliance by hand
With the duct fasteners just snug, grip the duct body and work it radially and axially against the panel. A healthy isolator gives several millimetres of springy movement and returns to centre on its own. A hardened one feels like a plastic bushing: no give, occasionally gritty, or crumbling at the flange edge. Repeat the check cold and again after a full heat cycle, because aged rubber firms up further when hot and a marginal grommet can pass the cold test.
Grommet fault or stay fault? Work by measurement order
Do not adjust the stay until the duct has been taken out of the equation.
- Loosen, do not remove, the duct fasteners, or disconnect the duct at the isolators, then re-measure the nose gap and the side-panel seam with a straight edge and feeler gauges.
- If the gaps close and the panel relaxes into line, the fault is preload from the grommets, not stay geometry.
- If the gaps remain with the duct floating free, measure stay symmetry left to right from a fixed datum such as the steering head before touching anything else.
| Symptom with duct fasteners loosened | Interpretation |
|---|---|
| Gap closes, panel sits flush | Hardened or mis-seated isolators |
| Gap unchanged, one side only | Bent or twisted cowl stay |
| Gap unchanged, both sides | Damaged panel aperture or aftermarket mismatch |
New fairings will not fix a hardened-grommet fault
A replacement upper cowl is drilled to the same datum as the original, so a hardened grommet distorts it exactly as it distorted the old panel. It can also crack fresh gelcoat or a mounting tab within a few hundred miles. Renew the isolators before you fit new Honda bodywork, then set the panels once and set them properly.
Fit replacement isolators at the correct seating depth
The flange should sit flush against the correct face of the panel with the retaining groove fully through the hole, and the fastener should clamp the sleeve rather than the rubber. Over-torquing flattens the isolator and removes the float just as effectively as age does, which gives you back the distorted edge and the nose gap you were trying to cure. Seat them dry, without grease or silicone, so the rubber cannot walk out of the aperture under load.
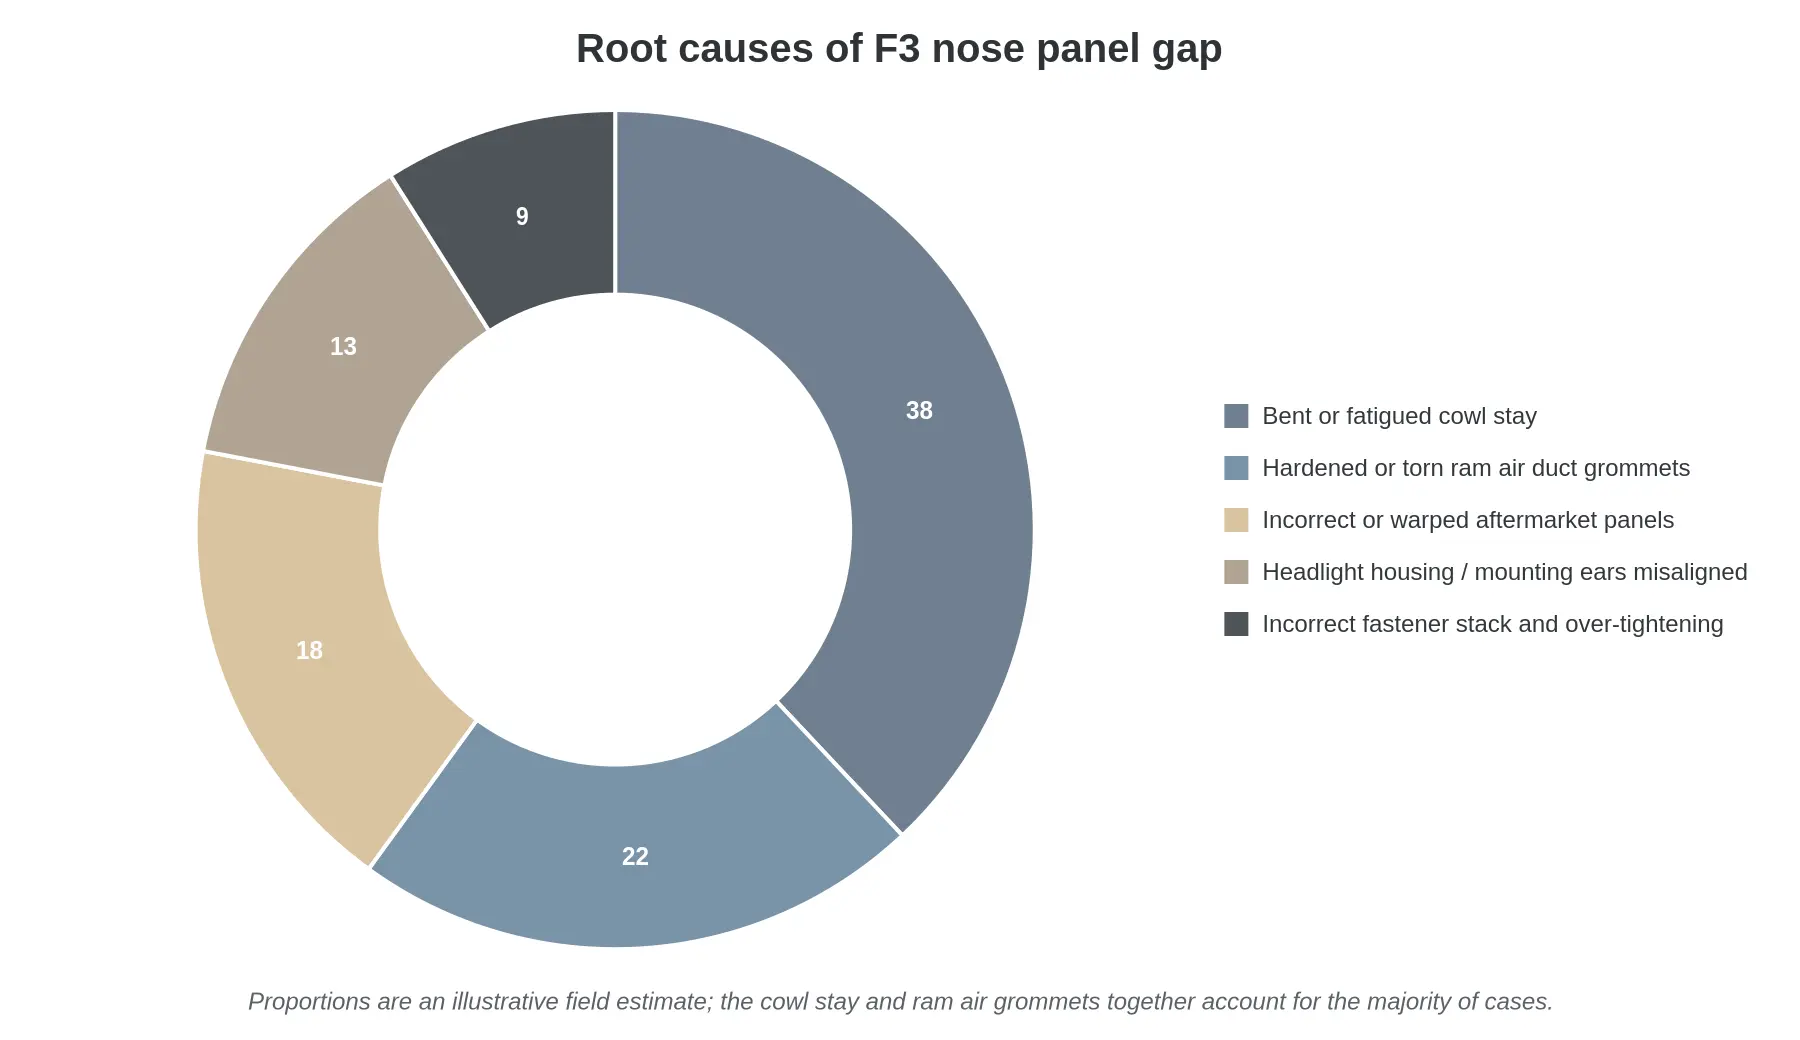
Figure 2. Root causes of F3 nose panel gap, an illustrative field estimate rather than a measured sample, with the cowl stay and ram air duct grommets together accounting for the majority of cases (60%).
F3 Headlight Cutout and Stay Bracket: Six Fitment Questions Answered
These come up most often on a 1996 CBR600F3 nose, and the answers all trace back to the cowl stay and the nose opening.
Does race bodywork need the headlight cutout?
Race bodywork typically arrives with a blank nose, and whether you cut it depends on what the bike actually runs. If you keep the stock headlight, or use a duct that feeds through the nose opening, the cutout has to be there and positioned correctly. A pure track bike with a closed nose and a block-off plate can stay blank, but the ram air path still has to seal against the frame. Both configurations are common, so suppliers list pre-cut and blank uppers side by side.
A bent cowl stay: straighten it or replace it?
Mild, single-plane bends can be straightened, but the F3 cowl stay is thin-wall steel that work-hardens fast. If it is kinked, twisted at the mounting ears, or the two mirror mounts sit on different planes, replace it. A straightened stay often cracks at the welds or relaxes back out of alignment under load. Check symmetry against a straightedge and measure mirror-to-mirror before you trust the part.
How much panel gap is acceptable on a 1996 CBR600F3?
Most builders aim for a consistent 3-5 mm at the seams, with the gap running parallel along its full length. Up to roughly 6-8 mm can be tolerated on original stock panels where the plastic has aged, but only if the gap is even. A taper, a gap that opens at the nose, or one side wider than the other points at the cowl stay or a grommet, not at the panel.
Will aftermarket fairings fit without correcting the stay?
Rarely, and never when the stay is already bent. Aftermarket fiberglass and ABS uppers vary in thickness, cure shrinkage and hole placement, so expect to slot mounting holes, shim at the frame and fine-tune the cowl stay. New panels bolted to a tweaked stay reproduce the old misalignment in a new material.
How do you check ram air duct grommet condition?
With the upper off, squeeze each ram air duct grommet: it should feel pliable and spring back, not hard or crumbly. Look for cracks at the lip, flattening where it meets the duct, and a sealing face that no longer contacts the frame evenly. A strip of paper should not slide through the joint. Hardened grommets hold the nose out and open up panel gap, so replace them before blaming the fairing.
Can stock panels and race bodywork be mixed on the same nose?
Not successfully on the same nose. Stock panels and race bodywork use different mounting planes, material thicknesses and edge radii, so the headlight cutout and the seam line will not align and the two halves fight each other. A stock tail with a race nose can work, but the nose itself should be one family. Mixing is a shortcut that shows up later as uneven panel gap and cracked mounting tabs.
Build Direction Is Decided by the Stay and the Cutout, Not the Catalogue
Everything in this guide comes back to one sequence. If the cowl stay is straight and the frame-mounted housing is intact, a road build keeps the stock headlight assembly and the factory pre-cut upper, and the panels become the last variable in the alignment rather than the first. A track build takes race bodywork with a blank or self-cut upper, and the fixed nose position that results is a compromise to work around. Mixed builds, where road panels sit over race-spec mounting hardware or the reverse, only work when the upper is cut to the housing template actually bolted to that motorcycle, measured with the stay torqued and the forks loaded. Correct the stay and the cutout first and panel selection turns into a purchasing decision instead of a fitment gamble.
Purchase Checkpoints
Four checks, in order. Skip one and the next is invalid, so the sequence matters more than the individual steps.
- Verify stay symmetry. Measure from each upper mount point to a fixed datum on the frame. A bent stay biases every panel downstream of it, so straighten or replace it before taking a fitment measurement.
- Verify grommet condition. Ram air duct grommets harden, shrink and deform with age. A new panel cannot close a gap an old grommet opened, so inspect the rubber and replace anything firm or cracked.
- Confirm the supplier’s cutout option. Ask whether the upper ships pre-cut for the F3 headlight, blank, or self-cut, and get that answer in writing against the part number rather than assuming a default.
- Confirm panel material and thickness. ABS gauge and reinforcement placement determine how the upper behaves under torque. A thinner shell deflects at the mirror and headlight mounts and reopens gaps that were already closed.
Sourcing the Panels
Summitfairings.com lists more than 3,000 styles across makes and eras, which matters here because a 1996 model is old enough that not every supplier still makes a correct upper for it. The company’s own figures put its prices 10% to 40% below comparable sites, and it promises an answer to fitment questions within six hours, which is the practical way to confirm cutout state and ABS thickness before committing to a set. Start with the custom Honda fairings collection for model-specific coverage, and check the featured products page for panels currently offered in ready configurations.
Once the set is mounted, torque the stay fasteners to spec, seat the grommets fully in their apertures, and re-measure the nose-to-side panel gaps after the first hundred miles of riding, since heat cycling and vibration will reveal any fastener that was only snug.