
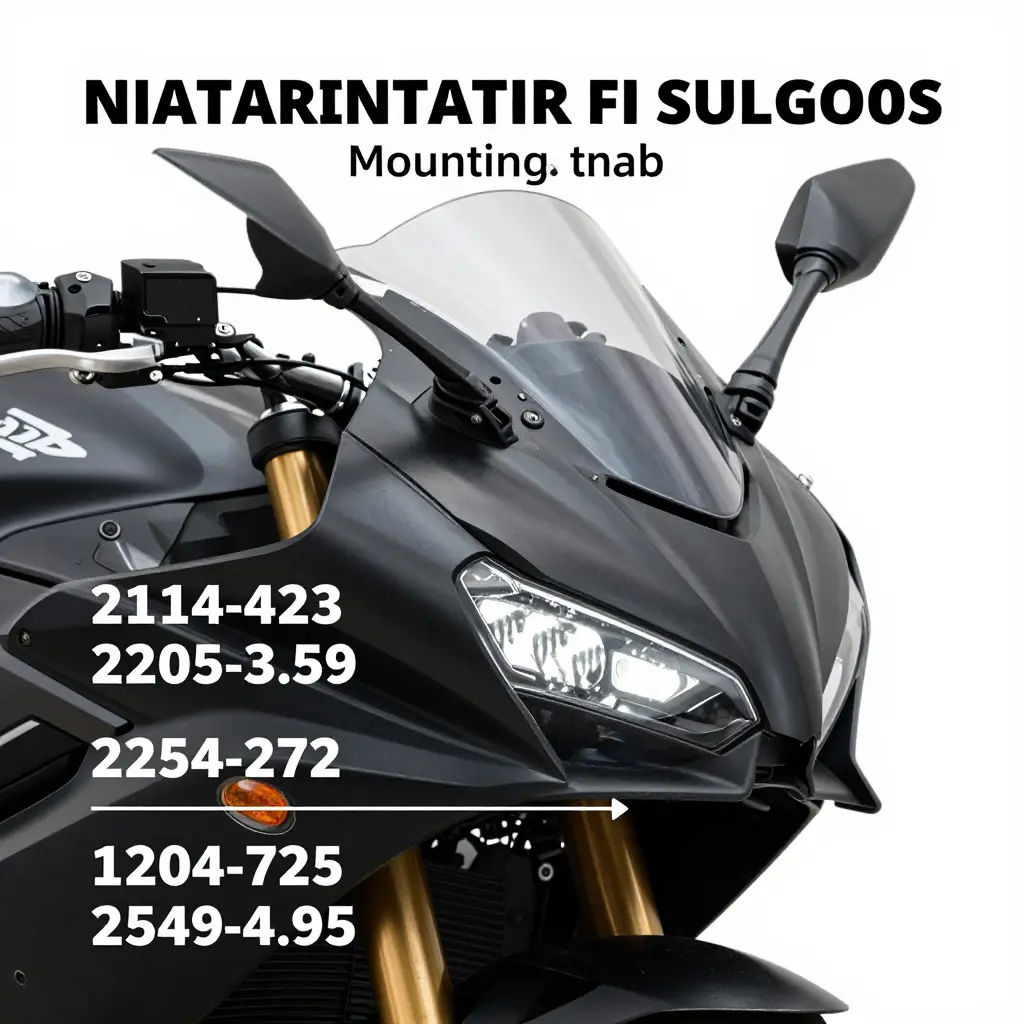
Introduction to Aftermarket Fairing Fitment
Aftermarket fairing fitment is the job of matching a replacement body panel set to one specific motorcycle so the seams, edges, and panel gaps line up. Two things decide the result more than anything else: the model year and the mounting tabs. A fairing advertised for your bike can still sit badly if it was tooled for a different model year, or if its tabs do not reach your frame’s mounting points.
The sections below cover how fitment works, what causes uneven gaps, and what to check before money changes hands. Panels are molded against a fixed set of reference points, and model year revisions move those points by a few millimeters, which is enough to open a seam. The usual causes of a bad gap are warped tabs, missing grommets, a mismatched stay bracket, or aftermarket exhaust routing that crowds the inner panel. Before you pay, verify the exact model year, compare tab layouts, and test-fit the panels loosely before tightening anything. For background on the parts themselves, see what motorcycle fairings are and how they attach to the frame.
Riders, builders, and shops all run into the same rule: fitment is decided before installation, not after. Get the model year and the mounting tabs right, and most gaps never appear.
What Fairing Fitment Actually Means
Fairing fitment is the alignment between the aftermarket panels, the frame, and the factory mounting points. It is not simply whether a panel “bolts on”; it is whether each panel meets its neighbor, its hardware, and the frame with even spacing. What riders call fairing gaps or uneven seams is usually a fitment problem rather than a paint or style problem. Fitment is measured in millimeters, and those millimeters decide whether the finished bodywork looks factory or aftermarket.
Fitment comes down to four measurements:
- Panel-to-panel seam alignment. Where two panels meet along a shared edge, the seam should run straight and the gap should stay consistent the whole way down. A seam that pinches at one end and widens at the other points to a mismatch somewhere else on the panel.
- Panel-to-frame clearance. This is the distance between the inner surface of the fairing and the frame or internal components. Too little clearance means the panel rubs, buzzes, or cracks; too much leaves a visible standoff at the edges.
- Bolt-hole alignment. Every mounting hole in the panel has to line up with its matching tab, boss, or clip on the bike. When holes sit a few millimeters off, the panel twists as you tighten it, which throws off every other seam.
- Edge flushness. This is whether adjoining edges sit in the same plane, so the surface reads as one continuous shape instead of a stepped, mismatched skin.
What Physically Causes Visible Gaps
Gaps are rarely random. They come from measurable physical causes:
- Mold tolerance drift. Tooling wears and shifts across production runs, so panels pulled from an older mold no longer match the original factory dimensions. Because fairing panel alignment depends on hundreds of reference points, small drift compounds into wide gaps.
- Uneven tab positions. Mounting tabs that are placed a few millimeters off, or trimmed inconsistently, pull the panel out of square once it is fastened, opening seams on the opposite side.
- Material shrinkage. ABS and similar plastics cool and shrink at slightly different rates, especially on large curved sections. That shrinkage pulls edges inward, so two panels that fit in the mold can gap once they are mounted.
Shops and manufacturers who allow for model year and mounting-tab variation up front get cleaner seams, and buyers who know what to look for can avoid badly built complete fairing kits entirely. Fitment is a chain of tolerances, and the visible gap is where that chain broke.
Why Model Year Decides the Gaps
Try bolting a fairing from a 2007 bike onto the 2009 version of the “same” motorcycle and the hard truth of bodywork shows up fast: the model year often matters more than the model name. A model year fairing is engineered against one specific set of mounting points. Revise a body panel, a subframe, or a bracket, and every panel edge shifts, leaving gaps that no amount of shimming will close cleanly. Knowing why manufacturers make those changes is the fastest way to judge fairing compatibility before you spend money.
Manufacturers rarely freeze a design at launch. They revise it on a schedule, in season, and sometimes only for certain regions. Each revision is a chance for a mounting tab to move a few millimeters, and a few millimeters is all it takes to break aftermarket fairing fitment. For how these panels are built and marketed, see our overview of motorcycle fairing kits and their benefits.
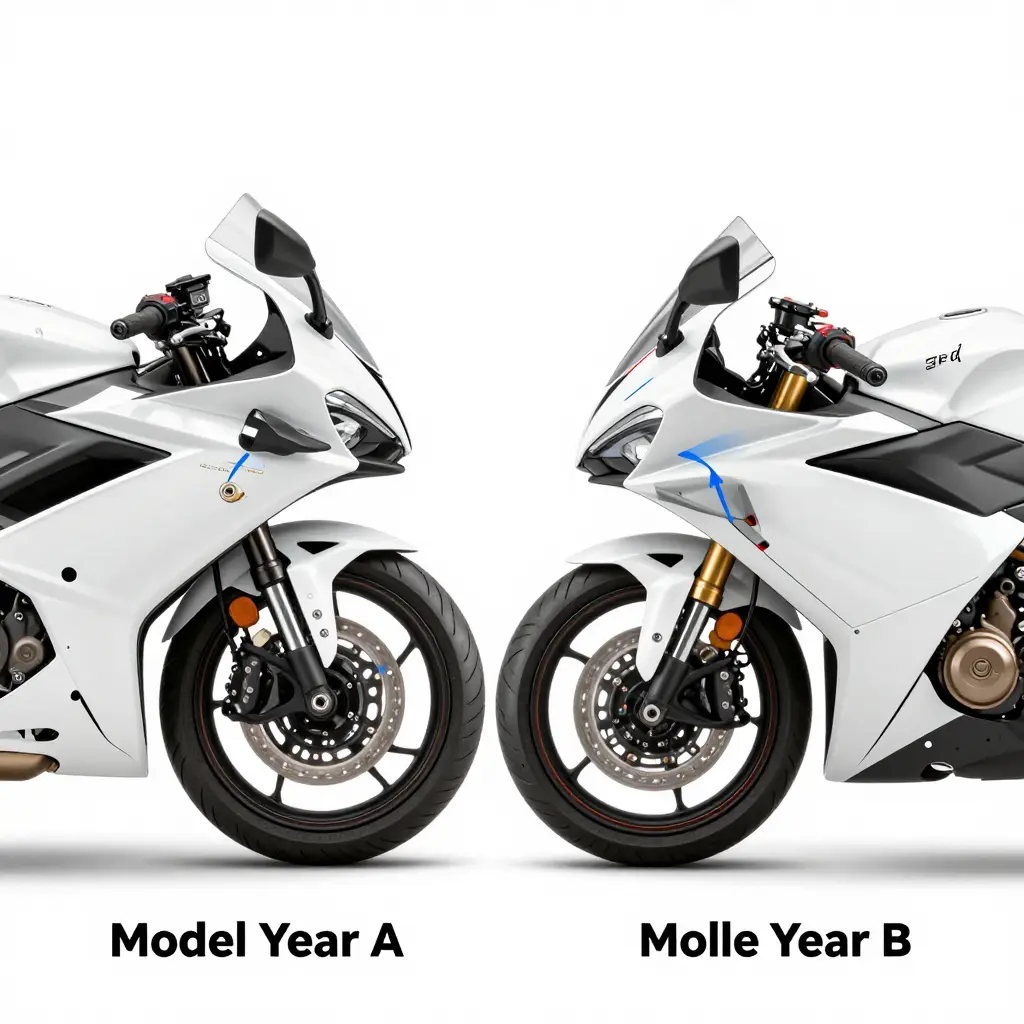
Mid-Cycle Refreshes Reshape Panels, Subframes, and Mounts
A mid-cycle refresh is the most visible trigger. When a manufacturer updates styling to stay competitive, the changes usually go deeper than paint. New headlight shapes force new upper-cowl tabs, a revised tail section moves the seat-cowl bolts, and a reworked radiator shroud shifts where the side panels clip in. Because the subframe carrying those panels is often revised at the same time, a body kit molded for the pre-refresh bike can sit high at the nose and low at the belly, the diagonal gap that signals a mismatch.
Running Changes Inside a Single Model Year
Not every change waits for a new year. “Running changes” are updates introduced mid-production, sometimes without a bump in the model designation. A supplier switch, a vibration complaint, or a small crash-test fix can add a reinforcing rib or relocate a single mounting grommet. Two bikes sold as the same year can therefore carry slightly different mounting geometry, which is why a fitment that worked on one bike may not work on another from the same model year.
Regional Variants Carry Different Hardware
Compliance hardware differs by market. Emissions canisters, reflectors, and lighting regulations push manufacturers to add brackets or reshape inner panels for specific regions. A fairing designed around a US-spec machine may collide with an emissions canister on a European-spec equivalent, even when the sticker reads the same model and year.
Example: Sportbike Generation Splits
Across sportbike lines, manufacturers commonly redesign the side-fairing mounting tabs when a new generation introduces a revised twin-spar frame. The engine may look unchanged, but the frame spars, air-intake ducts, and inner cowls move together. Fairings made for the outgoing generation will still bolt up to the same holes and then misalign at the seams.
Example: Touring Models and Vent Redesigns
On touring platforms, mid-cycle updates often redraw the front fairing to improve airflow or add venting. That new vent geometry changes the inner bracket layout, so a windscreen and outer shell from one model year can leave an uneven reveal against the next.
What This Means for Buyers and Shops
Treat the model year as part of the part number, not an afterthought. Confirm the generation, production range, and market spec before ordering; fitment guides organized by year exist for a reason. When a seller lists a fairing as fitting “2008-2012,” ask which subframe it was molded against. That single question prevents most of the gaps you would otherwise fight in the garage.
Fitment Factors by Model Year Change Type
Model year changes rarely affect every fairing equally, but they almost always move something, and mounting tabs are usually first. Understanding what a fairing actually is explains why one tab shift shows up as a panel gap three panels away.
| Change Type | Typical Affected Parts | Mounting Tab Impact | Expected Gap Risk |
|---|---|---|---|
| Cosmetic refresh | Nose fairing, side panels, decals, headlight shroud | Tabs typically reused; clip positions shift slightly | Low to moderate; usually 1-3 mm at panel seams |
| Subframe revision | Tail section, seat cowl, side fairings, undertail | Frame mount points relocate; OEM tabs no longer align | High; can exceed 10 mm without adapter brackets |
| Tab relocation | Any tabbed panel (side, mid, or lower fairing) | Tabs move a few mm or change mounting angle | Moderate; 3-8 mm mismatches are common |
| Mid-year running change | Panels revised within the same model year | Same part number, updated tab geometry | Moderate to high; model year alone is an unreliable guide |
| Unchanged carryover year | All fairings | Tabs identical to the previous year | Low; factory gaps reproduced if OEM geometry is matched |
Model year alone is a weak predictor of fit. The type of change behind that year is what actually moves the tabs, so confirm tab positions and subframe geometry before ordering, not just the production year.
Why Mounting Tab Position Decides Your Panel Gaps
Before you blame the mold, the paint, or the shipping box, look at the tabs. The diagram below isolates the most common reason aftermarket fairings fit or fail to fit: where the mounting tab sits along the panel edge.
On the left, two fairing panel edges meet at a tab that lines up exactly with its receiver, so the seam sits flush and the gap is even. On the right, the same panels use a tab that is offset by just a few millimeters. That shift forces the adjoining edge to ride high, opening a visible gap and throwing off every panel downstream.
Model-year updates often nudge mounting points, frame geometry, and panel tabs by only a few millimeters, which is why a fairing built for one year can bolt onto the next and still look wrong. Install a kit engineered around the wrong tab position and those millimeters compound into the wide, uneven seams riders notice immediately. The tab is the anchor; the gap is what it reports. If you are sourcing replacement bodywork, confirm the tab layout matches your exact year and trim, and treat that comparison as the deciding factor when comparing motorcycle fairing kits.
A disciplined fitment check before you spend anything is the cheapest way to avoid a return. That means lining your specific bike up against the listing rather than browsing motorcycle fairing kits by model name alone.
Fitment Checklist Before You Buy or Install
Lock down the exact model year. Manufacturers quietly revise bodywork between model years, so record your motorcycle’s full model year rather than assuming “close enough” will fit.
Identify the sub-model or trim level. A base model, an R, an RR, or an ABS variant can each wear different side panels and mounting points.
Compare the tab count and positions. Count every mounting tab on your stock fairing, then match that number, shape, and location against the replacement before you buy.
Verify bolt-hole spacing. Measure the distance between fastener holes with calipers, because even a 3 to 5 mm drift will force you to drill or enlarge holes.
Confirm the material type. ABS plastic, fiberglass, and injection-molded panels flex and mount differently, so match the material to how you actually ride.
Check the included hardware and clips. Ensure the kit ships with the correct grommets, rubber insulators, and push-pins, since missing clips are a leading cause of rattles.
Dry-fit every panel off the bike. Lay the new panels against your original bodywork or a spare frame and look for obvious mismatches before you commit.
Test-fit on the motorcycle without tightening. Snug each bolt by hand first to see how the panel seats and whether the fasteners reach their threads.
Torque gradually, then inspect seam gaps. Tighten in a cross pattern to the recommended spec, then measure the panel-to-panel gaps to confirm they stay even.
Photograph and document the fit. Keep pictures of the gaps and mounting tabs so you have clear proof if you need to request a replacement.
Run through that list in order and fitment stops being a guess. Verifying the model year, mounting tabs, and bolt spacing before you order protects both your paint job and your patience.
Frequency of Fairing Fitment Issues Reported by Owners and Shops
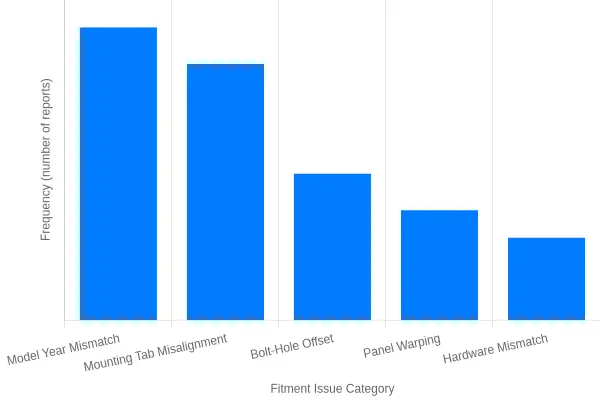
Fitment complaints cluster around a few repeat offenders. The chart above ranks the most common issues our owners and shop partners report, and the two tallest bars are no accident: model year mismatch and mounting tab misalignment account for the large majority of complaints. Both failures share a root cause, since a fairing built or sold against the wrong generation of a bike never quite lines up. Bolt-hole offset, panel warping, and hardware mismatch appear far less often, which suggests most of those cases are solved with shims, a fresh set of fasteners, or a little adjustment rather than a replacement. Note: values are illustrative and intended to show relative frequency, not exact tallies. To sidestep the two biggest offenders from the start, buy compatible motorcycle fairing kits that document their model years clearly.
OEM vs Aftermarket Tolerances
Every gap you can measure with a feeler gauge was decided long before the panel was painted. OEM fairing fitment starts with steel molds cut to tolerances measured in tenths of a millimeter, and every panel that leaves the line inherits that precision. Aftermarket manufacturers aim at the same numbers, but whether they hit them comes down to three variables most riders never see: factory tooling tolerance, mold age, and material behavior.
Tooling tolerance sets the baseline. A cavity that is off by 0.3 mm produces hundreds of panels that are all off by roughly the same amount. Mold aging erodes that baseline, because steel wears and residue accumulates; a mold in its eighth year does not close the same gaps it did in its first. Material selection decides how forgiving those small errors are, because polypropylene, ABS, and fiberglass shrink and flex in very different ways.
Here is how the three common materials compare:
| Material | Flex | Shrinkage | Gap behavior |
|---|---|---|---|
| Polypropylene (PP) | High | Moderate, predictable | Forgiving around tabs; takes up small misalignment |
| ABS | Moderate | Low, uniform | Holds tight OEM-style gaps; good for painted panels |
| Fiberglass | Low | Minimal | Rigid and stable; gaps locked in by the mold |
ABS gives you the most paint-ready consistency. Its low, uniform shrinkage keeps tab geometry where the designer placed it, so a good injection mold can reproduce OEM gaps panel after panel. Fiberglass holds its shape just as well and barely shrinks, but it forgives the least: if the mold is right the gaps are right, and if the mold drifts there is no flex left to hide it.
A well-made aftermarket fairing can match OEM gaps when the model year is correct and the tab geometry is faithful. Fairing tolerances are less a brand problem than a tooling-and-material problem. Get the model year and mounting points right, choose the material that suits the job, and the gaps fall in line. To see how thoughtful fairing design shapes fitment, explore how performance-driven fairing design works.
How to Choose Fairings That Fit the First Time
Bodywork that arrives with the wrong mounting pattern is useless no matter how good it looks. Three checks before you order separate a clean, factory-tight seam from a pile of gaps: model year, tab geometry, and kit completeness.
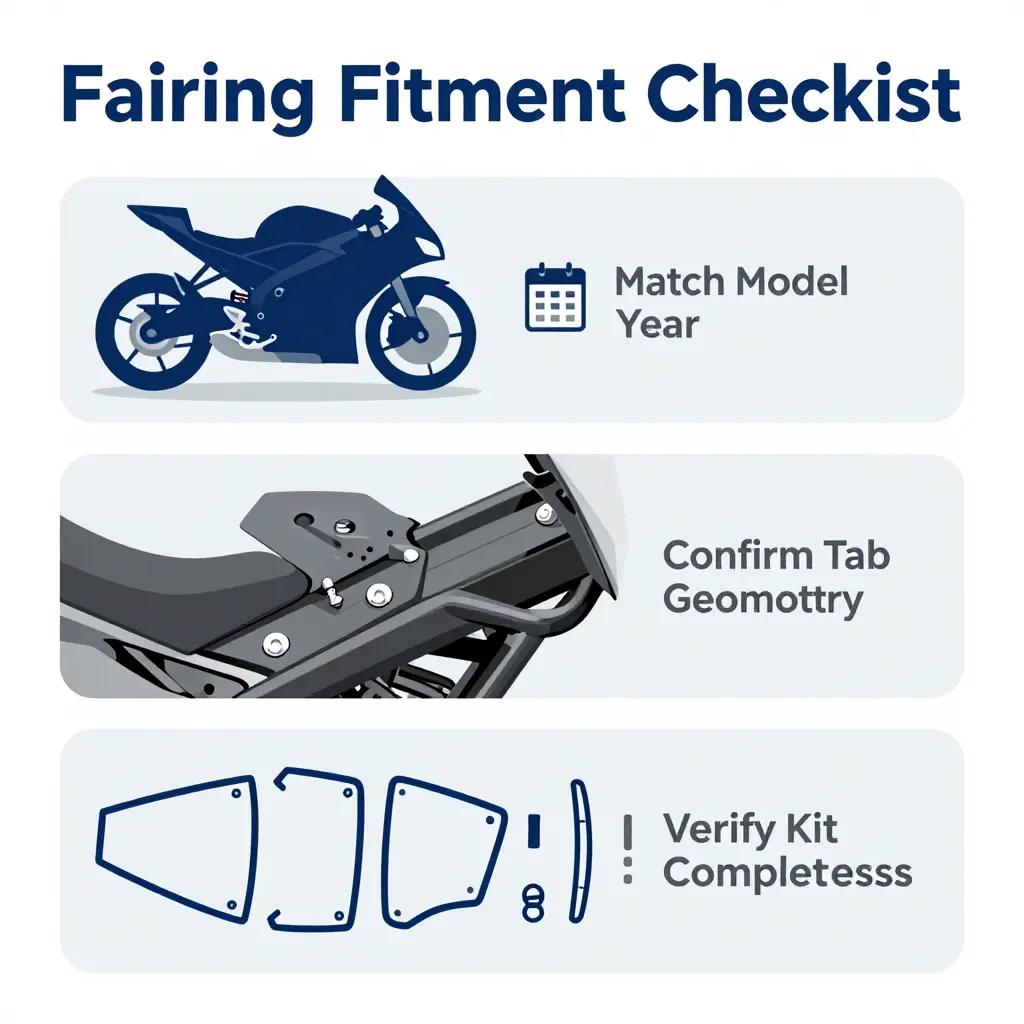
Step 1: Match the Kit to the Exact Model Year
Motorcycles change more often than the model name suggests. Manufacturers frequently revise mounting points, radiator shrouds, and side-panel shapes mid-generation, sometimes without changing the badge on the tank. A “2007 through 2012” kit may bolt onto a 2010 frame yet leave visible gaps on a 2011 because the tabs shifted by a few millimeters.
Confirm the seller’s fitment list by VIN or exact year range, not just the model name. When you compare fairing types and their benefits, note that full kits and partial kits carry different mounting hardware; choosing the wrong class of kit is one of the most common reasons a first attempt fails.
Step 2: Confirm Tab Geometry Against the Bike’s Frame
Tabs are the small plastic or metal fingers that lock fairings into the frame, and they do not forgive. A tab that is 3 mm off will not “settle in”; it will stress the panel and can crack it under vibration. Before buying:
- Photograph your frame’s mounting points and any existing brackets.
- Ask the vendor for close-up images of the kit’s tabs, grommets, and gaskets.
- Check whether the kit reuses stock hardware or ships its own.
- Weigh the material, since ABS plastic flexes slightly while fiberglass stays rigid, and each reacts differently to a tight tab.
If you are considering upgraded panels, custom motorcycle fairings are usually molded from a specific reference bike, so always confirm which year that mold was taken from.
Step 3: Verify the Kit Is Complete
Count the pieces. A typical sportbike kit includes the upper, lower, two side panels, tail, front fender, and windscreen, plus a hardware bag of bolts, well nuts, and trim clips. Missing grommets are the single most common reason a “perfect fit” still rattles.
Ask for a numbered parts list and compare it to your bike’s exploded diagram. A quality motorcycle fairing kit ships with its hardware and installation notes; if a listing is vague about contents, treat that as a warning sign.
Where to Source Fairings That Fit the First Time
SummitFairings.com lists over 3,000 styles across almost every motorcycle model, with prices the company says run 10 to 40 percent lower than other sites. If you are unsure which tabs match your frame, the team answers questions within six hours, so you can confirm fitment before you commit. Browse the full range of fairings for motorcycles and match your year and frame before you order.
Frequently Asked Questions About Fairing Fitment
Does model year always determine fitment?
No. The model year is your starting point, not the final answer. A fairing listed for a 2016-2018 range may bolt onto one year cleanly and fight you on another, because manufacturers quietly revise subframes and brackets mid-cycle. Cross-check part numbers and physical mounting points instead of trusting the year stamp alone; aftermarket fairing fitment lives or dies on those hidden differences.
Can mounting tabs be modified?
Yes. Tabs can be slotted, trimmed, or reinforced to close small gaps, and a good body shop does this routinely. Remove material in tiny increments and test-fit repeatedly, because a tab you shave too far is hard to rebuild. Heavy modification weakens the panel, so if several tabs need major surgery, you probably have the wrong part.
Why do gaps appear after installation?
Usually because a replacement panel’s curvature does not match the bike’s real geometry, which can shift after a minor drop. Vibration and uneven fastener torque make it worse over time. Tighten bolts gradually in a crisscross pattern and work from the center of the fairing outward, so the panels pull into alignment instead of against each other.
Will an aftermarket fairing ever be a perfect match?
Possible but uncommon. It depends on mold quality, material, and how much the factory piece has aged. Premium suppliers using modern injection molds get very close, while cheap hand-laid kits usually need light persuasion. Buying well-made motorcycle fairing kits from a trusted source removes a lot of the guesswork, but treat a 95% match as a win and expect some adjustment on almost every job.
How do I confirm the correct model year?
Start with the VIN: on a 17-character VIN, the tenth character encodes the model year. Confirm that against the frame sticker and your bike’s official parts fiche. Some regions use a separate compliance plate, so check that as well. When in doubt, match the mounting layout and panel shape to clear reference photos rather than relying only on the seller’s year label.
What causes bolt holes to misalign?
Warped panels, bent mounting tabs, or simply the wrong model year. Temperature matters too, because cold plastic flexes less; a panel that seats easily in a warm shop can fight you in an unheated garage. Loosen every fastener, seat the panel by hand, and tighten only once all the holes line up freely.
Can I avoid fitment problems before ordering?
Yes. Confirm the exact model year, compare photos of the mounting tabs, and ask the supplier whether the kit was test-fitted on your specific bike. Inspect your existing tabs for cracks or bends first, and a short check before checkout saves hours of wrestling panels later.
Quick Reference: Common Fitment Factors
| Factor | Typical Symptom | Simple Fix |
|---|---|---|
| Wrong model year | Offset bolt holes | Verify VIN and part number |
| Bent mounting tabs | Uneven panel gaps | Straighten or slot tabs |
| Uneven fastener torque | Stress cracks, gaps | Tighten in a crisscross pattern |
| Warped replacement panel | Wide edge gaps | Gently heat and reshape |
| Aged or sagging OEM bracket | Panels sit too low or high | Replace or shim the bracket |