
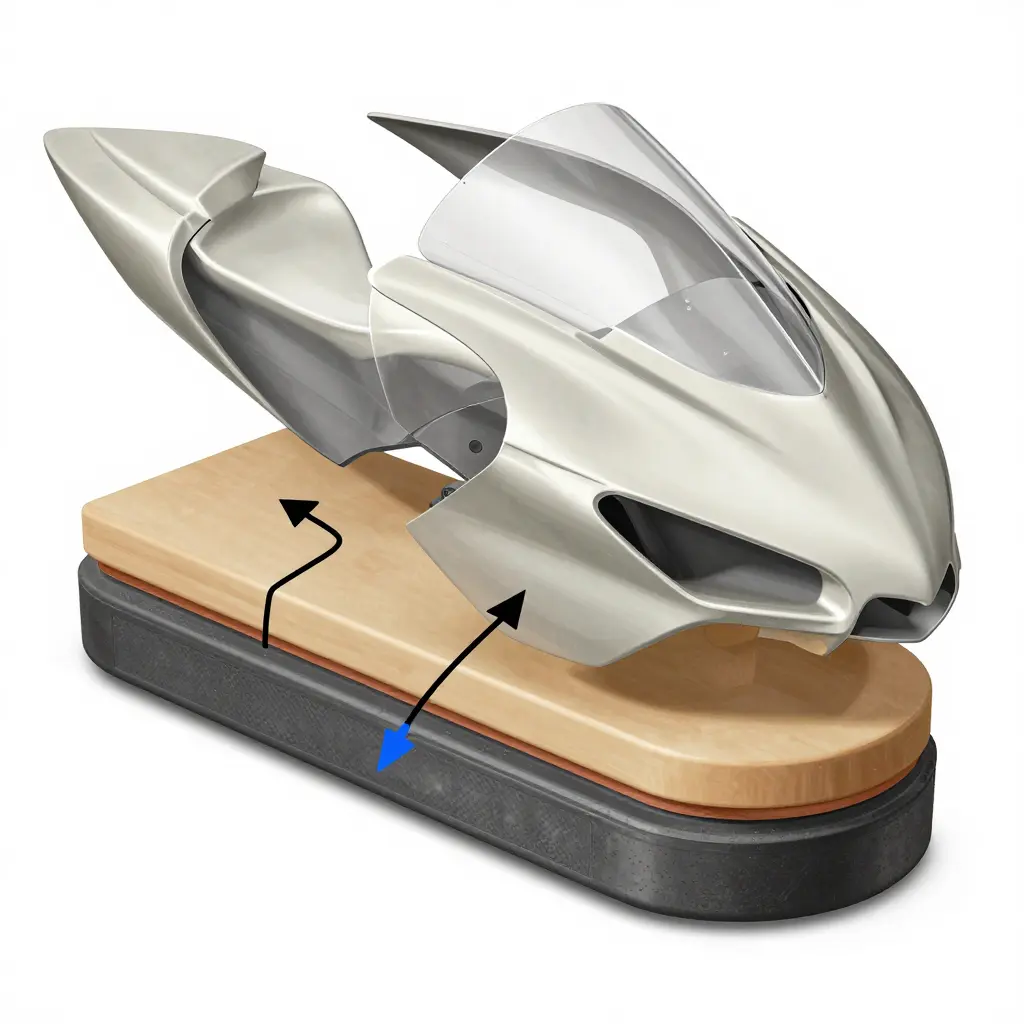
Why Primer Coats Need Room to Breathe
Before the topcoat goes on, the primer stage decides whether the fairing comes out glass-smooth or dotted with pinholes and sanding scratches. The stacking order in the diagram above is fixed: bare substrate at the base, a first primer coat, a deliberate flash-off gap, a second coat, a curing layer, and finally the topcoat. Each arrow beside a band marks elapsed drying time. Skip one of those waits and the defects are already in the film.
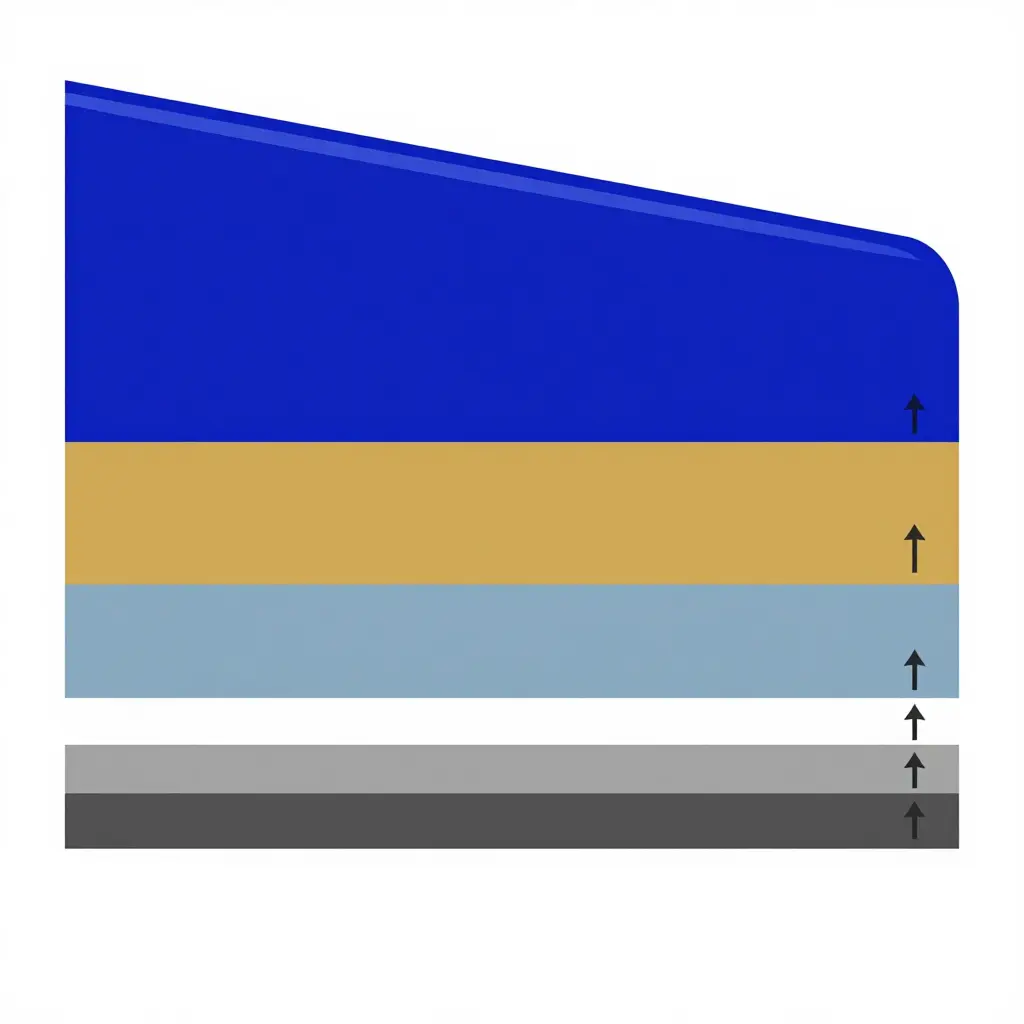
The flash-off gap is the one DIY painters rush past most. Spray the second coat too soon and solvent trapped underneath pushes to the surface, opening the tiny pinholes and solvent-pop craters that sanding never quite fixes. Give each coat its full flash-off window and let the primer cure completely, and the topcoat has a stable, sealed foundation to bond to. The whole sequence, from prep through final clear, is worth studying before a respray – start with these motorcycle fairing paint techniques.
Where Pinholes in Motorcycle Fairing Paint Actually Come From
Pinholes are tiny craters that perforate the paint film, and they rarely start at the surface. They start underneath it. Rush the primer coats and air and solvent get sealed into the film before either has a chance to escape.
A primer film has to breathe. Each coat releases its solvent before the next one goes on, so applying coats too fast or too wet buries the breath of the layer below under every new one. The top can feel dry to the touch while the film underneath is still wet.
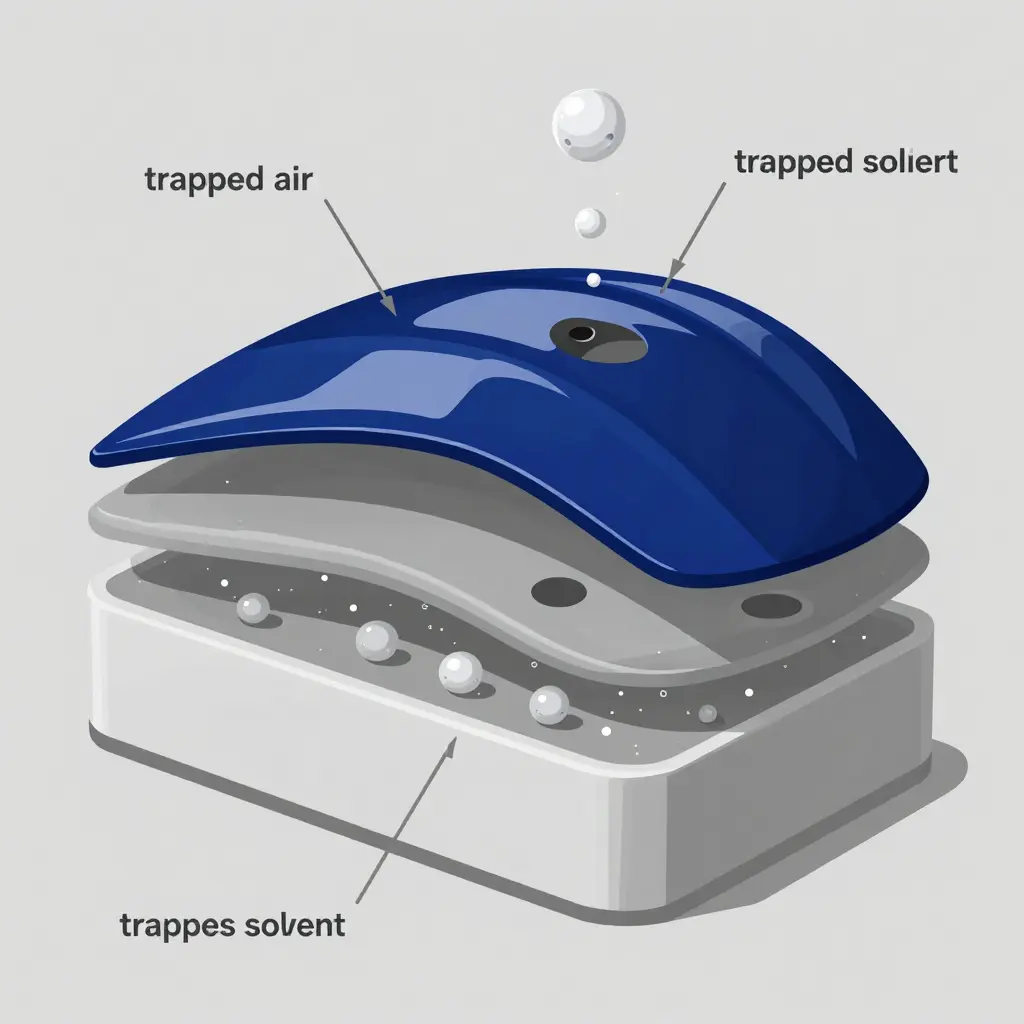
Heat and a fast-reducer thinner make it worse by flashing the surface dry in minutes and sealing a wet film beneath a dry skin. As the coating cures, that trapped solvent and air push upward as micro-bubbles. The bubbles rise, break through, and pop, leaving small craters behind. That is a pinhole.
The triggers caused by rushing
- Applying primer coats too wet or too close together
- Skipping or shortening the flash-off time between coats
- Using fast-reducer thinners that dry the surface before the film below
- Sanding too soon, before the film has finished releasing solvent
- Spraying topcoat or clear coat before the primer has fully cured
Once you understand proper fairing paint techniques, pinholes stop being a mystery. They stay hidden until the topcoat or clear goes on, when the wet gloss floods each crater. Under direct light the finished film shows a scatter of tiny dark dots that sanding alone cannot chase out.
Quick Reference: Primer-Related Defects at a Glance
Before you reach for sandpaper or sealer, it helps to know which defect you are actually looking at. All four below usually trace back to primer that was rushed. Keep the table handy while the fairing is still on the stand.
| Defect | Root Cause from Rushing Primer | When It Appears | Prevention Step |
|---|---|---|---|
| Pinholes | Air or solvent trapped by overly thick or too-quick primer coats; primer sprayed before body filler fully cured | Shows through the color coat as tiny craters or dimples | Apply thin fog coats, respect full flash-off times, use a pinhole-filling primer-surfacer, then block sand |
| Sanding Scratches (sand scratch swelling) | Coarse prep grit left under too-thin primer; topcoat solvent re-wets and lifts old scratches | After the topcoat or clear flashes, as scratches “swell” to the surface | Finish prep with progressively finer grit, build adequate primer film, and seal before topcoat |
| Solvent Popping | Trapped solvent escaping because recoats landed before flash-off; heavy wet coats sealed the surface | During or shortly after spraying, as blistered, popped bubbles | Allow full flash-off between coats, keep coats light and even, control booth temperature, use a slower thinner |
| Lifting or Shrinkage | Primer not fully cured or chemically incompatible; aggressive topcoat solvent attacks the softened undercoat | Minutes to hours after topcoat, showing as wrinkling or sinking over filler | Confirm product compatibility, let primer cure completely, apply a barrier sealer, and avoid heavy wet topcoats |
Every one of these is a timing problem wearing the costume of a finishing problem. Rushing the flash-off window, the cure time, or the film build does not save work; it moves the damage downstream, where fixing it costs more time and material. Solid motorcycle fairing paint techniques cover the rest of the process, but the primer stage is where the finish is won or lost. When in doubt, slow down – a coat that has properly flashed and cured is the cheapest insurance you will ever buy for a flawless topcoat.
Where Sanding Scratches Come From: The Primer Curing Trap
You lay down a finish that looks like a black mirror, roll the bike out of the booth, and three weeks later faint parallel lines bloom across the panel like a ghost. Those lines are sanding scratches that have finally telegraphed through the topcoat, and almost always the cause is rushed primer curing during motorcycle fairing spraying.
The chain of events is simple. Primer releases solvent and shrinks as it crosslinks and hardens, and that shrinkage needs to be essentially finished before sandpaper touches the film. Sand too early and you are cutting into a coat that is still soft and still moving. The grit tears deep, ragged grooves instead of a fine feathered tooth, and a film that has not reached full hardness keeps settling under those grooves instead of holding a clean pattern.
Four things keep those scratches alive:
- Primer must fully cure and shrink before it is sanded; a film that is still moving cannot hold a clean scratch pattern.
- Sand a soft film and coarse grit cuts stay open instead of being feathered out.
- The primer keeps shrinking after the topcoat goes on, pulling away from the shoulders of each scratch and leaving a shallow depression.
- Grit selection and sanding direction decide whether those depressions are invisible or glaring.
Topcoat over open scratches only hides them. The primer keeps shrinking beneath the fresh paint, receding from the edges of every groove, until a scratch a few microns deep becomes a tiny valley in an otherwise flat surface – more than enough to catch light at a different angle and telegraph straight up through the gloss. It stayed invisible at the primer stage because matte, chalky primer scatters light and disguises shallow geometry. A glossy topcoat is an unforgiving mirror.
Grit selection and sanding direction matter just as much. Jumping from 180 straight to 600 leaves a coarse scratch signature that finer paper never fully erases, and working in one direction or against a curve buries deeper cuts that a crosshatch pattern would have feathered out. The fix is disciplined: let the primer cure fully, then step through the grits so each stage removes the marks of the last.
If you are chasing defects at this stage, go back to the fundamentals before the next round. Our guide to repainting a fairing walks through prep, cure times, and troubleshooting.
The primer phase sets the ceiling for the whole job. Give the film the time it needs, choose grits and directions with intent, and the topcoat will stay as flat as the day it was sprayed.
How Drying Time Drives Pinholes and Sanding Scratches
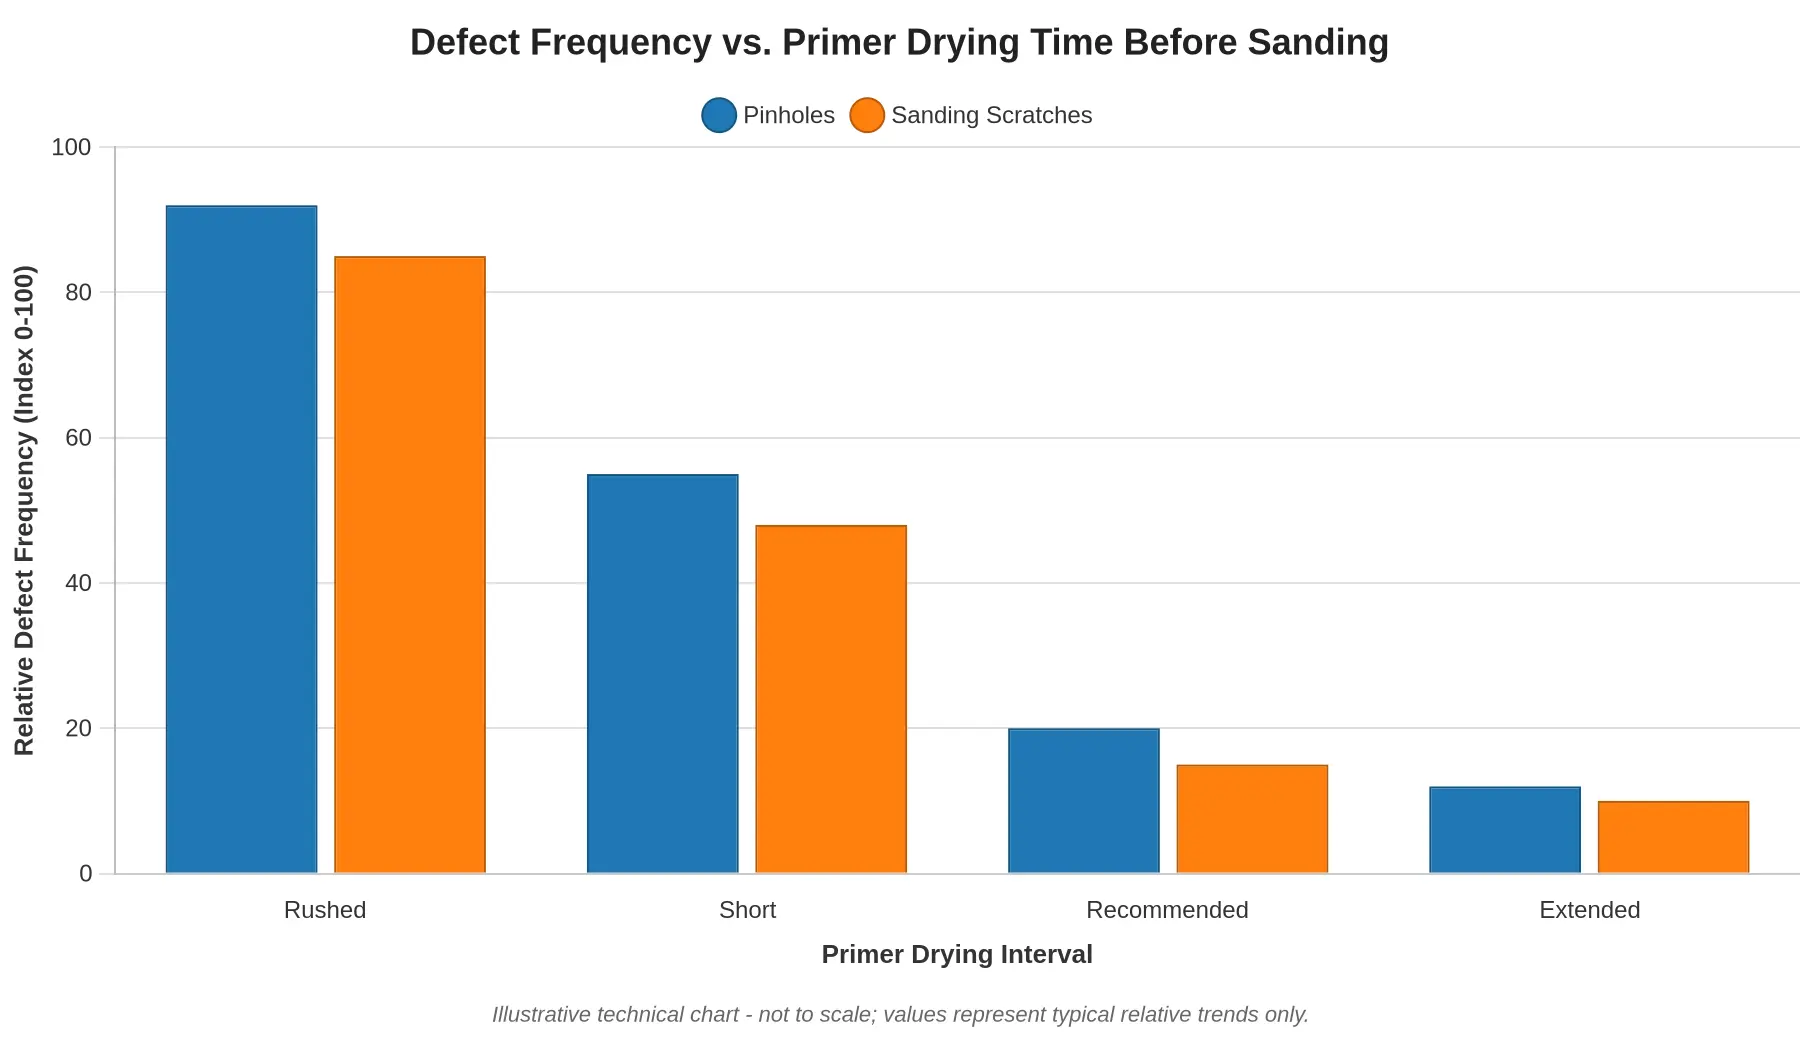
Rush a primer coat and the film stays soft and solvent-rich under a surface that looks dry. Sanding that green film tears the surface instead of cutting it cleanly, and outgassing solvent punches tiny holes through the layer. Pinholes and sanding scratches both spike the moment you shorten drying time, and both fall back toward manageable levels once you respect the recoat window.
The chart below plots relative defect frequency on a 0-100 index across four drying intervals, from a rushed coat to an extended cure.
Reading the Trend
| Drying Interval | Pinholes (Index) | Sanding Scratches (Index) |
|---|---|---|
| Rushed | 92 | 85 |
| Short | 55 | 48 |
| Recommended | 20 | 15 |
| Extended | 12 | 10 |
- Rushed: Both defects are near their peak. Solvent entrapment and a soft film guarantee a rough finish.
- Short: Better, but still risky, especially in cold or humid shops where the film stays soft longer and is easy to sand too early.
- Recommended: The sweet spot. Defect frequency drops sharply and the film sands to a clean, flat featheredge.
- Extended: Marginal further gains. Once the primer is fully cured, extra waiting yields only small improvements.
The largest single reduction in both pinholes and sanding scratches comes from moving out of the rushed zone into the manufacturer’s recommended drying window. For the full step-by-step breakdown of coat timings and prep, see this guide on how to paint motorcycle fairings.
Illustrative technical chart – not to scale; values represent typical relative trends only.
The Correct Primer Schedule, Step by Step
After any sanding work, and before you reach for the color gun, run this sequence. Skipping a step is how pinholes and scratches get into an otherwise clean job.
Prepare and degrease the sanded surface. After the prep covered in how to paint motorcycle fairings, wipe the panel with a wax-and-grease remover and tack it off. Any oil, dust, or silicone left behind will show up as a fisheye or a pinhole the moment primer lands on it.
Apply primer in light, even coats. Hold the gun at a steady distance and lay down thin, overlapping passes instead of one heavy wet coat. A thick single pass traps solvent and pulls open the tiny craters that read as pinholes.
Observe the full flash-off interval between coats. Wait the product’s full flash time before adding the next layer. Rushing lets solvent stay trapped under a skinned surface that has already off-gassed, which weakens adhesion and bubbles later.
Allow full cure before sanding. Let the final primer coats cure completely, not merely dry to the touch. A fully cured film hardens evenly, so block sanding cuts cleanly instead of smearing and loading the paper.
Block sand with a progressive grit sequence. Start coarser and step up through finer grades on a firm block. Jumping grits or hand-sanding leaves deep scratches that telegraph straight through the topcoat.
Inspect under raking light before topcoat. Shine a light across the panel at a low angle and feel it with a gloved hand. This catches stray pinholes, edges, and sanding scratches while fixing them is still cheap. Throughout motorcycle fairing repair, patience here saves a full repaint.
Prevention and Best Practices: Slow Down at the Primer Stage
Patience at the primer stage is what separates a lasting finish from a rework cycle during motorcycle fairing spraying. Most pinholes and sanding scratches are not a skill problem; they are what happens when the primer gets pushed too fast. Slow down at the start and everything downstream gets easier.
Control the environment before you pick up the gun. Temperature and humidity dictate how the materials behave – high humidity slows solvent release and traps moisture, cold air stalls the cure. Work inside the range your product specifies and let the booth stabilize before you spray.
Match reducer and catalyst speed to those conditions. A fast reducer in a hot booth can flash too quickly and seal solvent beneath the film, while a slow one in cold air sags and stays soft. Pick the speed that matches reality, not whatever label is on the shelf.
Respect the recoat windows at both ends: applying the next coat too soon traps solvent, and waiting far past the window can leave a surface that no longer bonds cleanly. Measure film build with a gauge instead of trusting your eye, because an even, adequate thickness is what keeps pinholes from breaking through.
When the substrate is porous or the repair is deep, a sealer builds a uniform foundation. And read the product data sheet rather than guessing – it lists the exact temperatures, mix ratios, and windows for your system. For a broader walkthrough, review these motorcycle fairing paint techniques before the next job.
Treat the primer stage as the foundation it is. The extra minutes spent here prevent hours of sanding and respraying later.
Frequently Asked Questions About Pinholes, Sanding Scratches & Primer Coats
Why do pinholes appear only after the clear coat is applied?
Beneath the surface, pinholes are microscopic air or solvent pockets that stay hidden until a glossy top layer magnifies their topography. Once clear coat flows into those voids it acts like a lens, and every crater becomes visible in the reflection. Rushing the primer – spraying too heavy, or recoating before the previous layer flashes – is what traps the solvent that later escapes and leaves the craters.
Can pinholes be fixed without sanding back to primer?
Small, isolated pinholes can sometimes be handled with a thin glaze or polyester spot putty, then re-primed and re-sanded locally. If the voids are deep or spread across a panel, though, cutting back to a stable primer layer is the only reliable fix, because surface fillers shrink and sink over time and tend to fail once the paint fully cures.
Why do my sanding scratches show up weeks later?
Sanding scratches often reappear because fresh paint and primer keep shrinking and curing long after you spray, gradually exposing grooves that were previously buried. Too-coarse grit, or skipping the finer grades, leaves deep marks that only surface as the film settles – a defect commonly called “ghosting.” A proper grit progression and adequate dry time between primer coats prevent it.
Does adding more primer coats fix pinholes?
No. Piling on more primer usually makes it worse. Each additional wet coat can trap more solvent and air, and thick builds tend to shrink, crack, or expose even more pinholes. Seal the substrate properly, apply thin coats with correct flash times, and resolve voids by spot filling or sanding instead of drowning them in paint.
How long should primer coats dry before sanding or recoating?
It depends on the product and the conditions, but most primers need to flash off for roughly 15-30 minutes between coats and cure 4-24 hours before sanding. Temperature, humidity, and film thickness all shift those windows, so follow the manufacturer’s technical data sheet and test a small area first. Rushing the primer coats is the single biggest cause of both pinholes and sanding scratches.
For a full walkthrough, see our guide to repainting motorcycle fairings.
Treat the Primer Stage as Your Foundation
If there is one lesson worth carrying out of the booth, it is that pinholes and sanding scratches in a sprayed motorcycle fairing are rarely the topcoat’s fault. They are the fingerprints of a primer stage that was rushed. Flash off too briefly, sand before the primer has truly cured, or skip a grit in the sequence, and every shortcut stays buried in the surface, waiting to telegraph through the color and clear.
A pinhole is trapped air or solvent finding its way out. A sanding scratch is a groove you created because the film underneath was still soft. Both are preventable when you respect the chemistry: give each coat its full flash-off window, let the primer cure completely before you touch it, and step through your grits instead of jumping ahead.
Three Takeaways to Remember
- Never rush flash-off. Let each primer coat flash fully before the next one goes down; trapped solvent becomes a pinhole.
- Respect cure time. Sand only when the primer is genuinely hard, not just dry to the touch, or you will carve scratches instead of flattening them.
- Stay disciplined with grits. Work through the sanding sequence in order and inspect under good light before committing to color.
The primer is the foundation of the entire finish. Get it flat, sealed, and fully cured, and the color coat has nothing left to expose.
And when a repair calls for a replacement or an extra panel, Summit Fairings makes sourcing easy, with over 3,000 styles across almost all motorcycle models at 10-40% less than other sites. Their six-hour answer promise gets you quick guidance on motorcycle fairing repair, so you can stay focused on doing the prep right.